Monday 3 November 2014

Mixed Media canvas - Bird Cage

I've finished another canvas this week and am truly loving doing these! 

This time I went for a patterned paper background mixed with paint, stenciling, tissue paper, dry wall tape and gold embossing!


The greyboard birdcage, birds and key are all from That Craft Place and I decorated these using a variety of methods.

 The flowers were die cut, inked and glazed with mod podge before assembling and adding mixed bead and gem centres.

Thankyou as always for visiting my blog. 

If interested, I have a stall at the East Morton Christmas Makers Fair at the end of November and would love to see a few friendly faces there! 

 
Sam
xxx

I would please like to enter this canvas
into the following challenges:


Monster Mash!

It's time for the halfway reminder for the challenge over at the


As always the theme is Anything but a card and you still have until the end of November to get your entries in!

My DT inspiration this time is a Halloween / Monster inspired large canvas measuring 16" x 20".


The background was made using acrylic paints dropped, run and splodged randomly! I continued to layer up paint, Imagination Crafts mica powder spray, Viva Decor texture paste and stamped Distress inks until I was happy with it!

I sketched the monsters onto the background and then painted them in with a couple of coats of gesso before applying texture paste through some stencils. I added colour to the monsters using Distress inks before spraying the whole canvas with a light coat of cheap hairspray to seal! 

The eyes were added by building up layers of gesso with the occasional layer of mod podge. Then I painted the red pupils before sealing again with mod podge. I added the black outlines to the monster's body/head eyes and mouth before carrying on.

The next stage was to add Inkessentials Crackle Accents to the eyes which I left to set overnight. The next morning I rubbed red paint into the cracks giving the wonderful bloodshot look! 


Finally I added black ink to frame the whole canvas. 

Thankyou as always for visiting my blog

Sam

Monday 6 October 2014

Love changes everything.

Time for a brand new
Craft My Life All Crafts Challenge!
              
As always the theme for this challenge is ANYTHING GOES (but no cards) so pop over and let your creative juices flow!
 
This is my very first outing as a Design Team member for this challenge blog so I am very excited to be associated with a blog that encourages such varied crafty disciplines! So much excited that I have started a month earlier than due!  Yay!
 

Speaking of firsts, this is my very first canvas!  And yes, I know I've said it before but... I think I have a brand new addiction!  I just love getting messy with paints and lots of mixed media stuff.
I went on a crafty retreat at the end of last month and one of the activities asked for us to bring a pre-gesso'd canvas. Sooooo, after gessoing a canvas I got a tad bit TOO inspired and carried away.  Oooops!
           
Anyway, so now I need to get a plan B for the crafty retreat but it was so much fun transforming this boring generic beach hut canvas that had not even made its way onto my wall. The canvas measures 12" square.
 
I prepared the canvas with a few coats of Collall Colorall Gesso before I started to play!  First came a coat of acrylic paint in purples and pinks before running watery yellow acrylic paint from the top edge.  Using the same yellow paint I then stencilled the honeycomb design.
 
Next I started laying down some Viva Décor Texture Paste, stencilled through the same honeycomb stencil as well as a brickwork stencil.  I also added strips of Dry Wall Tape at this point.
 
The final few steps before adding the embellishments involved heat embossing over the textured areas.  I used a mixture of clear and gold on the honeycomb area. I also rubbed a little purple StazOn ink over this as I felt it came out a little brighter and more gold than I wanted.  I embossed gold over the brickwork area and sprinkled a little gold and antiquey silver over the dry wall tape.  Before heat embossing the dry tape I sprayed a little mica powder mist in a turquoise on these areas, just enough to give a hint of the turquoise colour when the light hits.
 
Finally I gesso'd the mdf "LOVE" (which came free with a magazine... good or what!!).  I then gave a second coat with Gesso, this time with a little turquoise Mica Powder mixed in which gives it a lovely shimmer!  I stencilled the honeycomb design using a Distress Ink pad in China Blue.  Then, because the distress ink is not designed to adhere to surfaces like this, I also gave the whole thing LOVE shape a quick spray with Crafters Companion Spray and Sparkle in Pearl Diamond.  Gold heat embossing around some of the edges ties this in with the canvas itself.
 
I die cut two of each of the butterfly and hearts, once from scrap corrugated card and once from a smoother scrap cardstock.  I Mod Podge'd the two layers together using my own home made Mod Podge (Do please check out my Altered Mod Podge Jar whilst visiting!)

After gluing together the layers for the butterfly and hearts I Gesso'd them and painted with acrylic paint.  I added dry wall tape to the large heart before heat embossing with a sprinkle of gold and plenty of clear embossing powder.  I then added a second coat of clear embossing powder.

The "changes everything" is simply stamped onto cardstock that I had painted with the mica powder/gesso mix left over from the "LOVE" plaque.  I heat embossed the gold edging before mounting all the embellishments onto the canvas using good old Pinflair Glue Gel. 

The whole canvas got treated to a light spraying with Crafters Companion Spray and Shine to finish.

Anyway, I do hope you pop over and join in the challenge! 
Each challenge runs for 2 months, so plenty of time to enter.  I look forward to seeing your creations.
   
P.S - If anyone can guess which Musical this canvas is inspired by you get a good old fashioned Brownie Point??!
   
Sam
x
           
Please can I enter this project into the following challenges:

Saturday 4 October 2014

Matchbox Chest Clock

Welcome back and thankyou for visiting my blog today!  I'd love to share with you a matchbox project I finished this week. 

 
I made this using large size matchboxes which I coloured with a Promarker before covering the front with a script paper. The handles are little fabric covered brads. I used papers from my stash, glazed with Mod Podge for a hardwearing finish. I tore the script and postage stamp papers for a rustic feel. The die cut flowers and all other embellishments are also glazed with the Mod Podge.
 
The clock face is a free printable CD clock face which I resized to fit my project and the clock hands.  I die cut many many flowers and layered then to make a 3D flower.  The leaves were cute free hand and vein detail drawn in using a Promarker. 
 
The clock hands and mechanism I pinched out of a raffle prize clock I had laying around!
 
Thankyou for vising my blog and I do hope you come back soon!

Sam
X

Please could I enter this project into the following challenges:

Ikea Moppe Project

Back in September I picked up 3 of these awesome mdf Ikea "Moppe" 4 drawer mini chests to decorate up for desk storage in my studio.  I had a wonderful weekend with crafty friends in Harrogate and took one of them with me to do for my Sunday "freestyle" project. 

 
Whilst I'm on the subject, I'd definitely recommend a crafty getaway! It is good for the soul! This want anything huge, in fact there were 5 of us in total, but great fun was had by all and we went away vowing to repeat this again next year!

Anyway, back to the Moppe's!  I pre-gessoed with a gesso/red acrylic mix which gave me a lovely pink base coat. I then gave it a thorough sanding before it was ready for the next stage.

I decided to découpage this set of drawers using 3 or 4 coordinating papers from my stash. I tore the papers roughly and inked the edges with Distress Ink.   

All the papers were attached with Mod Podge Matte and finished with a coat of the Mod Podge to seal and protect.
 
I added a humming bird die cut to each of the end panels although I'm not sure if I like them now... Anyway, seeing as this set of drawers is sandwiched between 2 others, you can see the end anyway!... 
 
For the drawer fronts, rather than decoupage the papers, I used one large sheet which looked great I think! After the glue was completely dry I used a craft knife to cut out the finger holes. 

I could have turned the drawers back to front and attached knobs to open with but I didn't want to as I don't want to much bulk on the front encroaching into my valuable work space! I AM however going to add little metal label holders to the drawer fronts, one I've made up my mind which ones to get!
 
If interested, here is how the Moppe starts it's life, all preassembled and ready to get stuck into. 

 
Thanks for stopping by and reading my blog.

Sam
X

Please enter this project into the following challenges:

Saturday 20 September 2014

Upcycled Jeans - Handbag

So I've had an idea in my head for some time but this week I finally brought it to fruition!
 
The whole bag used under 1 pair of jeans; I was left with one whole leg which I'm sure I will find a use for! The jeans I used for this were a ladies size 16 although size doesn't really matter other than to make the finished bag size bigger or smaller.  

Other than the pair of jeans I used around a 1\2 metre of cotton fabric in this stunning retro skull pattern.

The bag was straight forward to make. I cut off the legs at the relevant place leaving enough in the main section to give me the depth of bag that I wanted. Don't throw those legs away though! We use them a bit later.  The crotch was cut open and the front/back and bottom sewn up.  I then put boxed corners into the bottom of the bag.

Next strips for the cross-body strap were cut from one of the legs. I cut three 1 3/4" wide strips for the strap and whilst there also cut three 1 1\2" strips for the decorative belt. Approximately 1" at the end of the strips were overlapped and topstitched together with a zigzag stitch. 

Slightly narrower strips were cut from the skull fabric and topstitched onto the denim strips that were cut at the last stage.  This left me with 2 long strips, one wider one for the strap and a narrower one for the decorative belt.  I finished these steps off by fraying the long edges to add to the hippy look of the bag.

I sewed the straps into the bag, pinning and trying on first in order to get the strap the length I wanted.  I strengthened these stitches by double sewing as well as sewing in a cross to reinforce. 

Finally was the lining which I cut to fit the bag before sewing the sides up and boxing the corners to match the outside bag.  The lining was then painstakingly hand stitched into the bag ensuring to stretch the stretchy and elastic denim out to fit the lining.

So this was surprisingly easy to make, with the hardest  (for "hardest" read instead "most tedious / most likely to turn my finger end into a painful mess")  job being the many many teeny tiny overhand stitches to sew the lining into the bag. I did not want to machine stitch the lining in and spoil the outside appearance of the bag; so finger stabbing stitches through the thick denim was my alternative! 

Well, I'm very glad that I endured the monotony because the hand stitched finish is so much cleaner and attractive looking!

 
So that finishes this blog post!  I think I am going to add a small piece of Velcro into the from pockets just to keep them from gaping open whilst in use and may also add an applique of one of the skulls from the fabric to the front although I've not completely made up my mind on that point. 

Anyway, thankyou so much for stopping my and reading my blog.  Every view means a lot to me, and every comment means even more.

Sam x

Wednesday 17 September 2014

CRIPPLE - What's In A Word?

          
"You shouldn't call yourself a cripple"
     
Right, so this has been irking me for a few days after it was reported back to me that some family members seemingly took offense to the title of this blog.
      
Well, I must say that I take offense to them taking offense..... ugh whatever!
     
I am not alone in the disabled community to reclaim ownership of this word and flip it on its head.

Undoubtedly "Cripple" is not a nice word, but that is kind of the point! 
   
To put it in the simplest way possible, think of it like a trend which is emulating the now mostly accepted use of the word "queer" to describe a gay person (I am gay myself).  Similar, maybe more so, is the term "nigger" to label a person who is black.  This, like "cripple" still has some way to go until it becomes acceptable for non-disabled or non-black people to use the word in every day life.
         
When used as a slur the word cripple is clearly being used to insinuate that the persons disability is something to be ashamed of and/or ridiculed.  I have had this shouted at me, amongst other unimaginative choices of words, in the street on more than one occasion and yes, it bloody well hurts!  It also hurts to have people telling me that I should not use this word myself as though my disability is something that should never be talked about.  
        
Now that doesn't mean that I should not be free to use the word myself.  Only once the word stops having prejudicial connotations, or at least gets much nearer to that point, will it then be okay to be used in everyday talk.  I am a person who strongly supports minorities or oppressed persons in reclaiming so called offensive words.
 
WE CAN turn those words on their head so as to remove any power those which aim to oppress us may have in using them in an offensive way. 
     
After writing this blog entry I chose to do a bit of Googling on this subject and you would be surprised just how many disabled bloggers are out there using the word Cripple or Crip in their blog titles or blurb.  I did also come across  THIS DISABLED BLOGGER EXPLAINING THEIR USE OF THE WORD.   Well worth a read to those who want to read a little more about this subject.
      
I'll finish with a quote from the blog linked in the previous paragraph:
    
"It is up to each individual crip to decide their comfort level with the word,
and it is the job of their friends and family to respect that"
    
Sam x
     
P.S - The disability I have is called Charcot-Marie-Tooth Disease (or CMT for short!).  It has nothing to do with teeth, but if you are interested in finding out more about CMT then pop over to www.cmt.org.uk for September is International CMT Awareness Month!... You are also welcome to ask me anything at all about CMT and how it affects me, I'm not shy!
       

Tuesday 16 September 2014

Peg Loom Weaving with a friend

Yesterday I had a lovely day out a Farfield Mill in Sedbergh with a crafty friend.  I met Joanna through my favourite Facebook group, CRAFT, CHAT, SHARE & CARE which is run by another crafty friend, Judith Taylor-Wright.
 
Joanna and I are not too far away from one another so decided to get together for a crafty session!  Joanna brought along enough sheep to clothe a flock of sheep and taught me Peg Loom weaving.
 
Oh my, how addictive!  I can see so much potential for  these strips and mats of woven wool! 
 
Anyway, here is what I came away with after a fun filled day!


And here is one of my mutts, thoroughly interrogating the new arrival!
 
 
xxSAMxx
  

Sunday 14 September 2014

Dance Like Nobody's Watching

CMT sucks, that's as pure and simple as I can put it! Charcot-Marie-Tooth is a very disabling condition and seeing as it is currently CMT Awareness Month I want to do my bit and direct my fellow bloggers to www.cmt.org.uk, the UK's official charity for those with CMT, or those who just want to find out a little more about the disease.
 
Anyway, Yes, I AM disabled but I still like to have a bit of a boogie now and then... in my very own style of course... The upper body boogie or chair dance haha!!
 
 
I made this the other day using an image I coloured a week or so ago. My very first art journal page! ... Also my first try with stencils and texture paste.
 
I think I'm a complete convert! I just love the free and easy way of laying down layers.

The image is coloured with Promarkers and is "Spanish Dancer" by Treasured Times Stamps.  The stencils are both by Dutch Doobadoo.
 
Anyway, thank you so much for stopping by and for leaving comments.
 
Sam
x
 
I would please like to enter this journal page into the following challenges:
 

Sunday 7 September 2014

Oh yeah!... I won again!

Wow! Another Challenge win under my belt! I chosen as the winner of August's "Anything Goes" challenge over at Crafty Calendar Challenges!

http://craftycalendarchallenge.blogspot.co.uk/

I won with my favourite make recently too... my 52 Reasons Album that I made for my partner when we celebrated our 10 year anniversary last month.


You can find my 52 Reasons Album blog post HERE.

Thank you to the Crafty Calendar Challenge Blog for picking me as your winner, and thank you to Hobbybook for sponsoring!!

This week I'm working on another very large batch of Cat Cushions in between making a handbag using an upcycled pair of jeans. I'm also making myself a pair of trousers!  The first item of clothing I've made so it will remain to be seen whether they resemble trousers at the end of the project!

Friday 5 September 2014

Farewell dear little Sheldon

Some may know that I very sadly lost a beloved pet to a sudden illness on Tuesday night and this has just devastated me and completely broken my spirit.

 
I am struggling to regain any sense of normality and have found myself stuck in a cycle of very temporary normal moments, which the memory of my loss steamrollers through leaving me bereft once again.

I spent time with Sheldon today (he has joined our other rainbow bridge piggies in his own "pig pot" in the garden). I just started crying once more and couldn't stop

Many may think that Sheldon was "just a guinea pig" but to those I simply say "Frell You!"; Sheldon was the most laid back pig, always up for a cuddle session or to just sit with his head up my sleeve or in my jumper just chilling!

So please folks, if you are expecting anything from me at the moment, please give me time. (Fundraisers, Charity commitments, Make It Sew Orders....)

And yes, I do realise that it is 5.30am, and no I've not had any sleep.... sleep is seriously evading me to once again.

Regarding Winnie the guinea pig, the vet and I are exploring possible hormone treatment for her mammary tumors; which have worsened significantly since initial discovery. She has also gone and got herself a hay stick injury to her eye! Luckily I spotted this very quickly, cleaned the eye out and started treatment with eye drops. I am seeing an improvement already.


I do hope the vet can suggest a treatment plan for the tumors that gives her as much time with us as possible.

I just couldn't bear to lose another piggy.  Both the girls are noticeably quieter without Sheldon which is sad to see. Luckily they have each other and have a good bond.


Sunday 31 August 2014

ATC Swap - 4 Seasons

So another ATC Swap has arri bed, this time over at the wonderful and so inspiring That Craft Place Natter & Chatter group on Facebook!

The theme this time was 4 Seasons, with instructions to make 4 ATCs, one for each of the seasons of the year!

I love this group as a lit of mixed media stuff goes on, something I am increasing my knowledge of challenge by challenge!

So I set myself 2 additional rules for this swap; Rule 1 was to use a mixed media / handmade background instead of preprinted papers etc. Rule 2 came in after my ideas started forming and that was to include skeleton leaves into to the design of each ATC and I managed it!!
 
 
Spring:
 
This ATC I struggled with the most out of all these four, and I actually binned 2 attempts and completely rethought my design!!

The background is acrylic paint and gold glitter. Then the paper layered over the top is inked with distress ink.

The bird is made from cream skeleton leaves. I triple embossed some leaves with clear embossing powder after spraying heavily with Crafters Companion Iridescent Spray and Sparkle. I then smeared a layer of PVA and sprinkled more glitter and small beads. I left this to dry before doing a final layer of clear embossing to seal.

Then I cut out of the leaves the gales for the body tail and wings and stickled around the edges. Left to dry then glued together and added a large gem for the eye!

Summer:
 
I just love the butterfly on this! This is made from silver skeleton leaves which I sprayed with Crafters Companion Pearl Diamonds Spray and Sparkle and then edged with stickles.

The background was plain white cardstock, embossed and the inked with distress inks.

Autumn:
 
I struggled to decide whether the Autumn or Winter ATC is my favourite, but I think that Winter just wins as I simply love the teal colour scheme!

The background for this was made using Sheena Douglas' faux leather technique (kraft card, embossing folder, glycerine, distress inks etc).  I glued the skeleton leaves to the background. The red card strip is edged with a tonic punch. The tags are cut using a tag punch that I don't know the make of!

Winter:
 
My absolute favourite for sure, a probably my favourite season too!! The crisp air is so refreshing to breath in.  It is also the time of year where we focus more than ever on bringing the family all together in one place.

I just love the colours of this and I love working with acrylic paint. I painted a couple of thin layers of home mixed teal blue acrylic paint onto thick cardstock. Whilst still wet I stuck the snowflakes on overlapping the edge with some.

I would like to enter these projects into the following challenges please:

ATC Swap - Oriental

So the July/August ATC Swap over at my favourite Facebook Craft Group had an Oriental theme so I put my new Promarker Ultra-fine nibs to test and coloured in 6 very small versions of the My Besties Geisha digis Stamp!

5 have been sent off destined for this themed swap and the extra ATC is up for grabs at the end of this post if anybody would like to do a swap!

So here are the 5 submitted for the swap over at the CRAFT,CHAT, SHARE & CARE group:

 
I used a Joanna Sheen die for the fans, and the Japanese themed backing papers are from a small kimono block, not sure of the brand!
 
Until next time!....

I would like to enter this project into the following challenges please:

Challenge Winner - Treasured Times Stamps

So, I'm getting into this challenge business and it's quite addictive!

This week (or was it the end of last week?! I can't remember!), I chosen as the winner of July's "Anything Goes" challenge over at Treasured Times Stamps!


I was so thrilled to have been picked for this challenge as my entry was the 52 Reasons mini album that I blogged about earlier this month!


I also received more good news this week from blog land which I shall be announcing shortly! This is a new venture that I am very excited about indeed!!

Anyway, a big thankyou again to Treasured Times Stamps for picking me as your winner, for gifting 3 of your gorgeous digis stamps and for inspiring me to continue entering challenges. Thank you also to Bugaboo Stamps who sponsored the challenge and gifted 7 of your digi Stamps also! What a whopping great prize bundle!!

Tuesday 26 August 2014

Bob!

Hi guys, well today I'll be back to the land of crafting after enjoying a 2 week break with my partner! She had a holiday from work so we spent some much needed quality time together and had a wonderful relaxing time.

I did however manage to squeeze in time to work on a personal crafting project and use up some fleece from another sewing project that I made some time ago. 

Bob the bear is entirely my own design and pattern and whilst I know that he ended up a little longer than intended I love him just the way he is!

 
Before I go, I just want to quickly remind folks about the giveaway that is going on over on my Make It Sew Facebook Page right now!

Click HERE and follow the steps to enter!
 
Please can I enter this project into the following challenges:


Sunday 10 August 2014

Finally I can show you! (52 Reasons Mini Album)

Okay, if you can read this post then that means it's FINALLY my partner and I's 10th anniversary of being together!  This means I've been able to give her the Mini album a made for her, so can show it to you guys!  It has been finished for a few weeks now and I've been impatiently counting down the days!

This post is VERY picture heavy, but I hope you find it well worth the read and as much fun as this project was for me to make!

This is the first mini album I've made, and there are a small number of lessons learnt for the next one, should I be so brave! I'll list these at the end of this post.

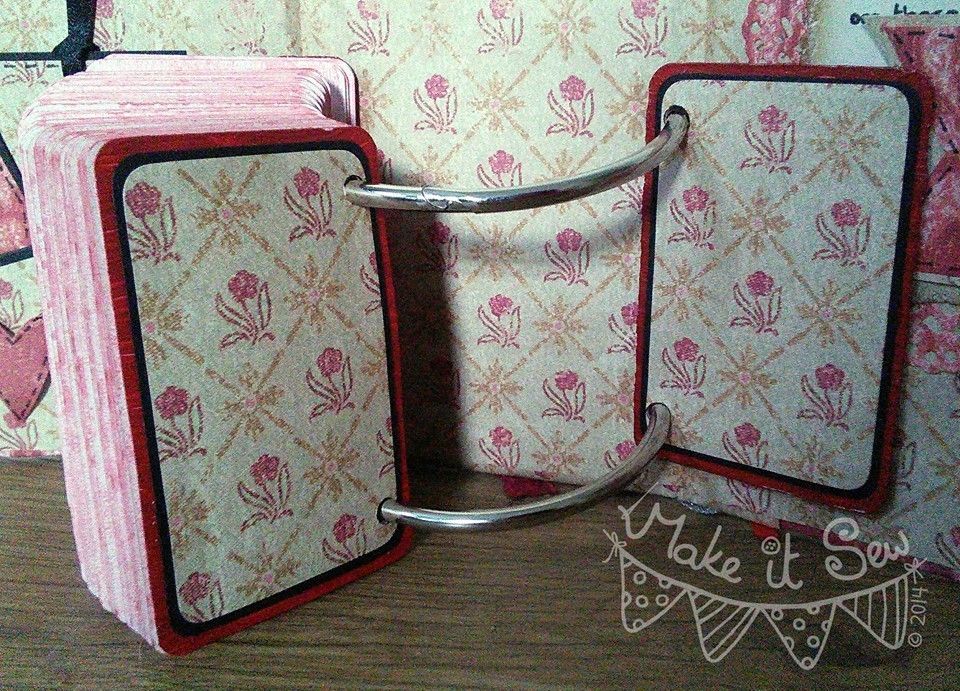
The album is constructed from a sandwich of brown corrugated box card and cereal box card.  This has given it wonderful structure and was easy (and free!) to source.  I worked out the dimensions by noting the diameter of the book rings that I used to bind the album together as well as the playing cards that form the pages.

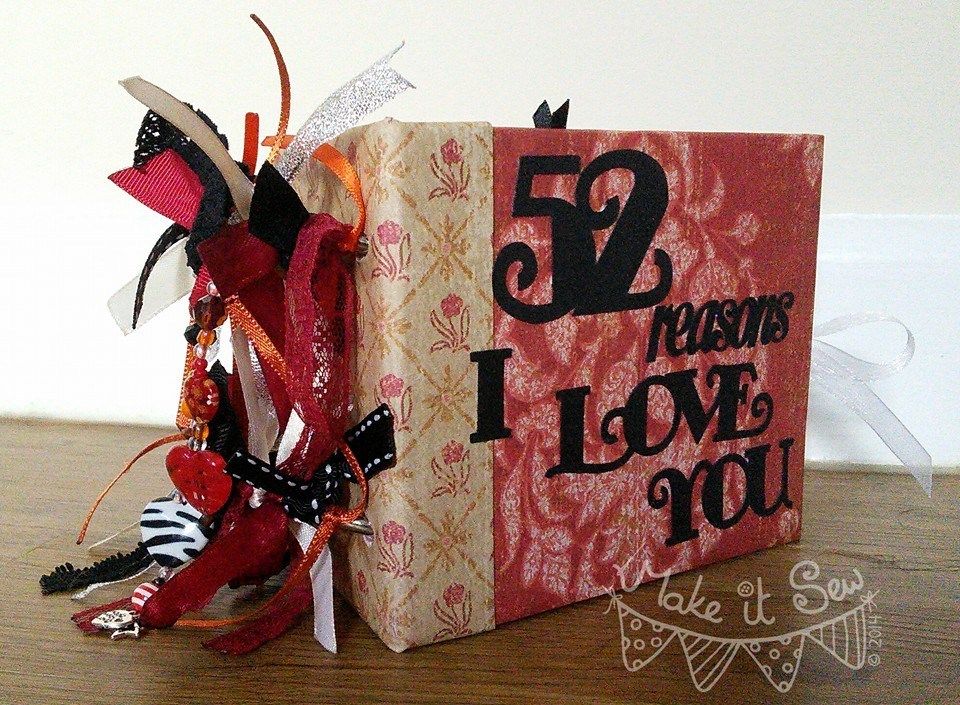
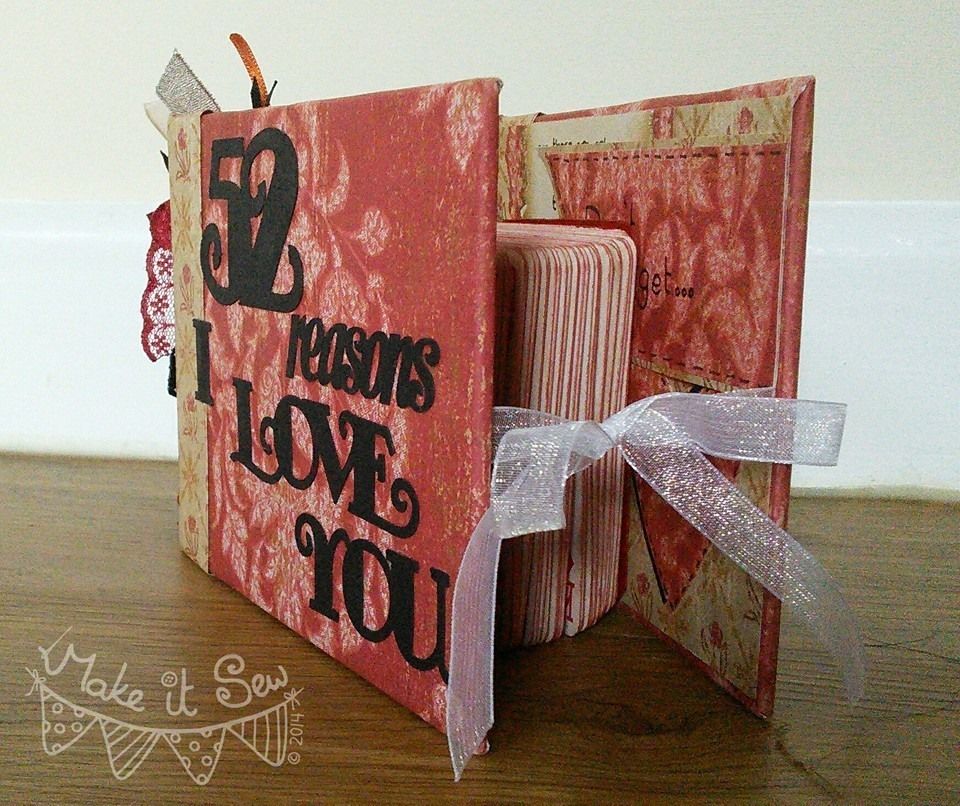
The Papers used to cover the album are 12" square papers from my stash. The wording on the front cover was cut on a Silhouette Cameo (not mine, boo hoo!), out of black cardstock, and stuck on with Anita's PVA glue.

 
I sandwiched two pieces of white organza ribbon in between the paper covering the outside of the album and the lining paper, thus creating a ribbon tie closure.

 
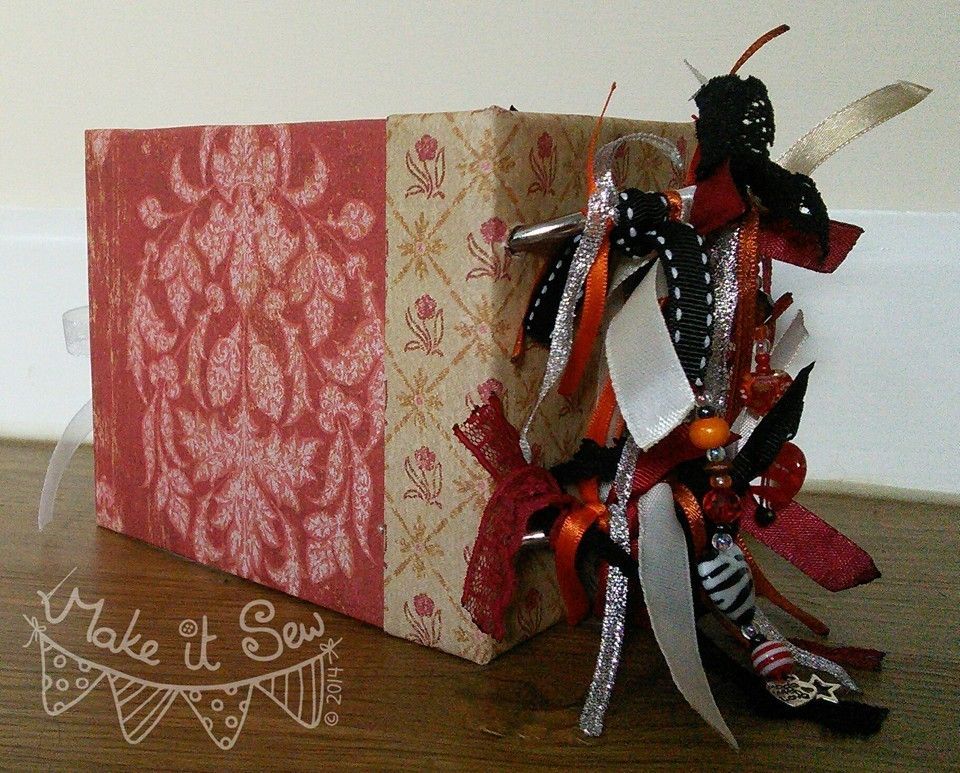
I went ribbon crazy, decorating and disguising the 3" book rings on the outside of the album, using lots of widths and types of ribbons and lace in reds, creams, oranges and blacks, with the odd silver one thrown in! 

I melted each end of all the ribbon pieces using a lighter, to prevent fraying.

 
I created two bead strings, threading different beads on to a very strong embroidery thread and securing though a couple of the ribbons on the top book ring.

 
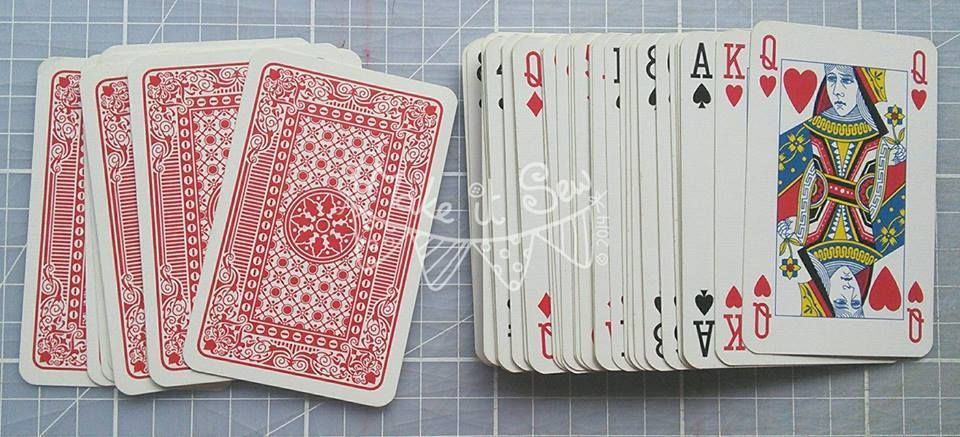
So, on to the inside of the album. As already mentioned, a deck of playing cards made up the pages, and this is the deck I used, before any alterations were made!  This is one deck out of a two deck set from WH Smiths, that Claire and I bought at an airport on our very first (and only!) holiday abroad together, many years ago!

 
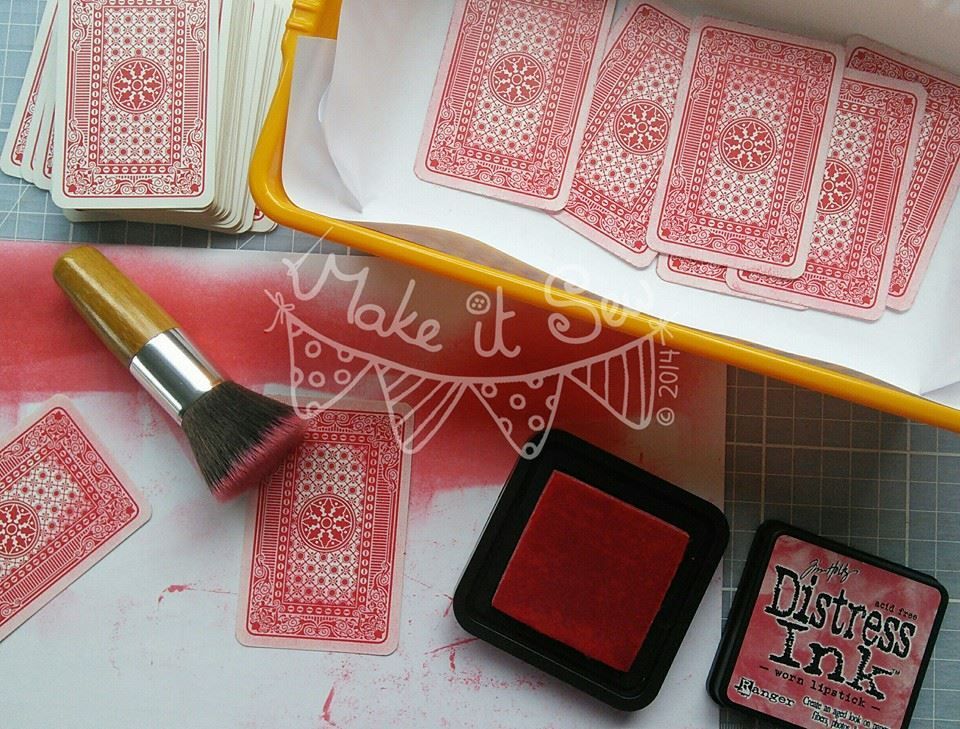
Firstly I distressed the back sides of every card with Distress Ink in "Worn Lipstick".

 
I wrote all my "52 Reasons" on to individual rectangles of copier paper, half in black and half in red.  I distressed the edges of these rectangles with "Gathered Twigs" Distress Ink and stamped the little hearts using the same ink pad.

Then I layered each reason onto the same colour card stock and after choosing my final order, stuck these to the cards, matching the ink colour to the colour of the card's suit.  (and no, I am NOT showing you all my mushy reasons ;-) )

 
The numbers 1 to 52 were then glued to the back of each card.  These numbers were also cut by a Cameo.

 
I fancied up the first "page" and the last 2 "pages" in the album to give a bit more detail, and to disguise the reverse of those pages.  I used acrylic paint in white as a primer and whilst still wet stuck pieces of bakers twice to create a textured surface. 

 
Once dry I applied a few coats of red, coarsely painted over, adding white highlights to the raised areas created by the bakers twine.  I finished the front "page" off with a die cut heart stuck on with Pinflair glue gel holding a string of black sequins in place.  The sequin string is finished off with tiny "made with love" charms".

 
The second to last and front side of the back pages were painted with the red acrylic paint, and then had paper and black card layered onto them.  Onto these I have added photos of Claire and I (which I'm keeping private!).

 
The last page was painted with the red acrylic and finished off with the bakers twine, the match the first page.

 
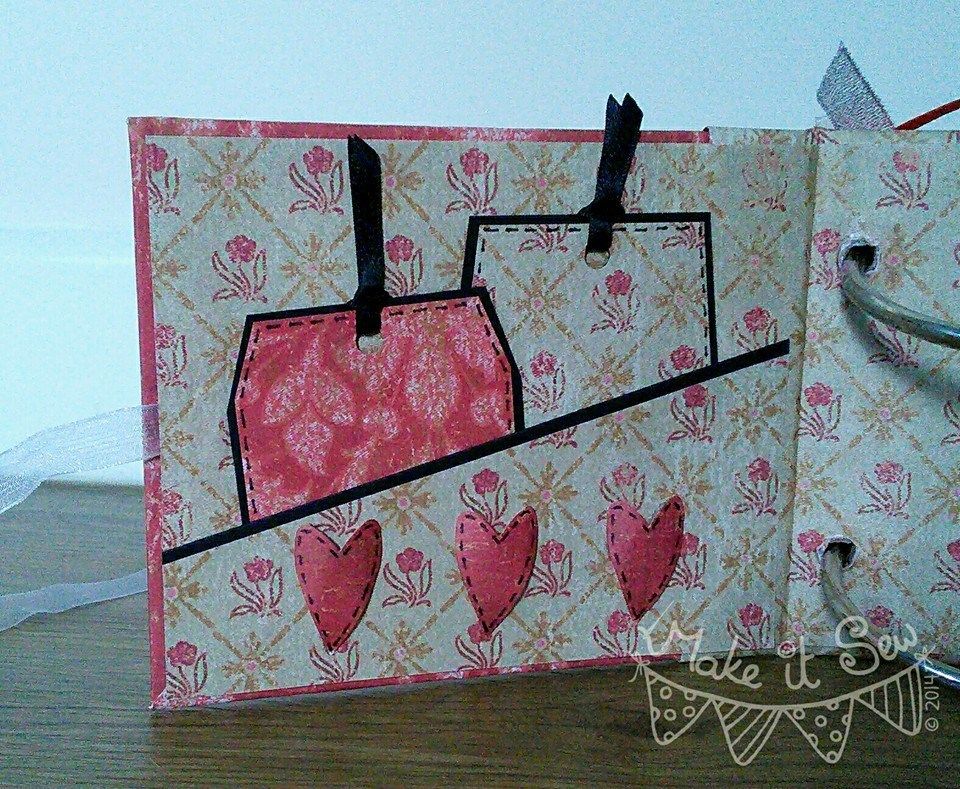
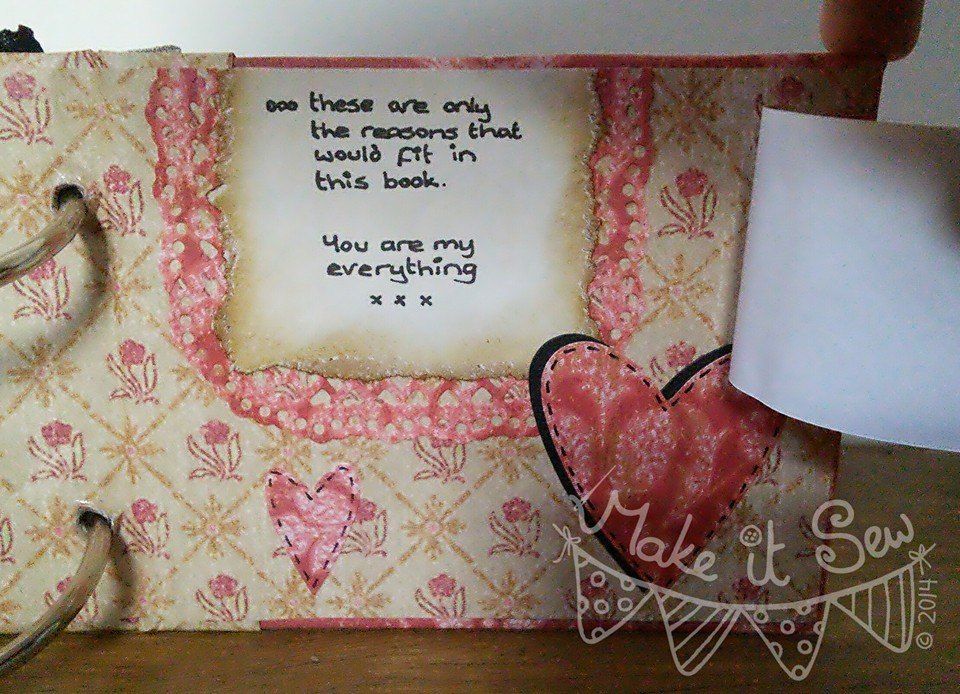
And finally, the inside covers of the album itself are lined with matching papers, and I added a few more personal touches.  The inside front cover has a pocket with two tags one which I added more photos of Claire and I.  The little hearts are attached with Pinflair glue gel to add a bit of dimension.

 
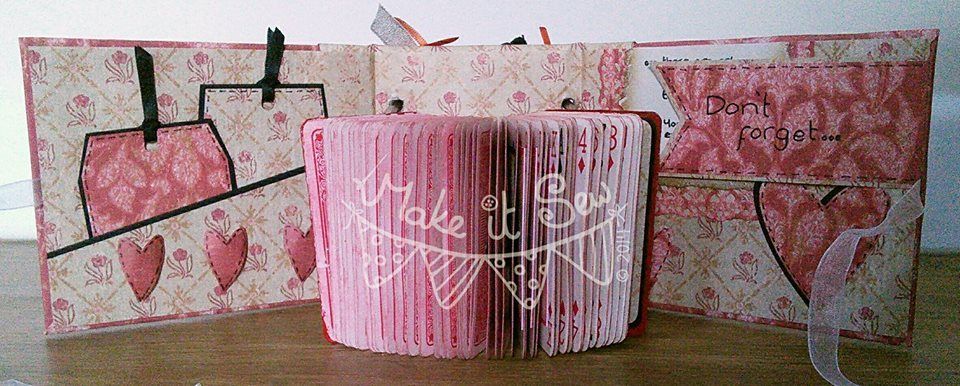
The inside back cover has a "final thought" from me, hidden under a folding back "Don't forget..." banner.  The hearts are die cut, as is the intricate background to the final thought. I've added some faux stitching details in black fine liner to the inside of both the front and back covers.


And, that is it!  I do hope you have enjoyed this blog post, I'll leave you with one final photo of the inside of the album.

 
LESSONS LEARNT:

1... Be sure to leave enough of a gap between the cover and spine pieces otherwise the paper can split very easily (hence the separate paper section over the spine area, which actually made it look much better, but wasn't intended!).
2... Invest in a Crop-O-Dile!  I had to drill, yes DRILL the holes in the spine of the cover for the book rings to go through.
3... The more ribbons tied to the outside parts of the book rings the better!  These stop the book rings from shifting round, making for a nice sturdy fit.
 
xxSAMxx 
 
I would please like to enter this project into the following challenges:

Friday 8 August 2014

Giveaway time over at Make It Sew!

It's GIVEAWAY TIME over at the Make It Sew Facebook Page!
 
So pop over to www.facebook.com/Krafts4CMT to take part!
 
Up for grabs is the "Olga" Owl Cushion pictured.
 
 
The Giveaway ends 30 August 2014 so don't miss out!

 Good luck!

Friday 1 August 2014

Box Crayzee

Another pop-up card!  I said in my last post that they are addictive!

Anyway, this card was made for my Nephews 7th birthday last weekend and I am assured that he was sufficiently overjoyed at receiving it! (sadly I missed out on seeing him on his birthday for the first time since he was born, if I remember correctly!).
 
For once, I kind of remember where the papers are from.  The come from Cricut paper pad called "Tags, bags, boxes and more".  I do not have a Cricut machine, but just loved this paper pad so had to grab it!

The stars are hand drawn/cut and the letters are Sizzix Bigz dies.  The cardstock is from American Crafts.


The image is a free one, available to members of the Jelly Park Post Pals Club.  The creator of the Jelly Park stamps kindly gives away a series of stamps to those who use them to send cards/projects to poorly kids as part of the Post Pals scheme.  This is certainly worth a look and very rewarding. 

 
I coloured this image using the following Promarkers:

HAT: Burgundy, Poppy, Red, Cool Aqua.
SKIN: Ivory, Dusky Pink, Coral, Blush.
HAIR: Cocoa.
JUMPER: Ginger, Mandarin.
TROUSERS: China Blue, Prussian.
SHOES: Cool Grey 3 to 5.
SOCK MONKEY: Ivory, Grass, Yellow, Tulip Yellow.
 
The blue details on the hat and the yellow stripes on the sock monkey are blinged up with stickles.
 
I would please like to enter this card in the following challenges:

Pigs might fly

I can't be the other crafter out there completely obsessed by the Pop-Up Box?!

This was made this week for an order, the brief being "pigs"!
 
 
The digi-stamp I used for this is "floating pig" by Hambo Stamps.
The balloon(s) came as part of the image, but I separated this out and printed several in different sizes to separately "attach" the piggy using bakers twine. 
 
I mounted the balloons and hand cut clouds on acetate strips. 
 
 
The balloons and pig are coloured using the following Promarkers:
 
PIG: Dusky Pink, Pale Pink.
BALLOONS: Blender, Cerise, Cyan, Grass, Bright Green, Tulip Yellow, Buttercup.
 
The sentiment and name is stamped in "Seedless Preserves" Tim Holtz Distress Ink.  The papers are from my stash (as always I haven't a clue where they came from!) and the pink cardstock is by American Crafts.
 
Please can I enter this card in the following challenges:


Extreme hoarding... cat edition!

Sorry for my absence folks, no excuse!

Well, today I finished the last "Kitty" Cat cushion for a large order!  12 in total, all bought by my friend Denise, to be donated to the The Scratching Post Cat Rescue where they will be sold to raise much needed funds.

So, without further ado, here are 11 of them! (number 12 is a secret as it is made using the same fabric as I've used for a present that is tucked into the box for Denise! (I'll let you see this, and the 12th cat cushion, once my friend has received them!).


Fingers crossed they all find new homes and make lots of money for the rescue!

p.s. - these can be made to order if wanted! Just drop me a comment below, or pop over to my Facebook page HERE.

I would please like to enter this project into the following challenges: