
Welcome to the blog of Sam Lewis AKA The Crippled Crafter
Sunday 19 October 2014
Monday 6 October 2014
Love changes everything.
Time for a brand new
As always the theme for this challenge is ANYTHING GOES (but no cards) so pop over and let your creative juices flow!
This is my very first outing as a Design Team member for this challenge blog so I am very excited to be associated with a blog that encourages such varied crafty disciplines! So much excited that I have started a month earlier than due! Yay!

Speaking of firsts, this is my very first canvas! And yes, I know I've said it before but... I think I have a brand new addiction! I just love getting messy with paints and lots of mixed media stuff.
I went on a crafty retreat at the end of last month and one of the activities asked for us to bring a pre-gesso'd canvas. Sooooo, after gessoing a canvas I got a tad bit TOO inspired and carried away. Oooops!
Anyway, so now I need to get a plan B for the crafty retreat but it was so much fun transforming this boring generic beach hut canvas that had not even made its way onto my wall. The canvas measures 12" square.
I prepared the canvas with a few coats of Collall Colorall Gesso before I started to play! First came a coat of acrylic paint in purples and pinks before running watery yellow acrylic paint from the top edge. Using the same yellow paint I then stencilled the honeycomb design.
Next I started laying down some Viva Décor Texture Paste, stencilled through the same honeycomb stencil as well as a brickwork stencil. I also added strips of Dry Wall Tape at this point.
The final few steps before adding the embellishments involved heat embossing over the textured areas. I used a mixture of clear and gold on the honeycomb area. I also rubbed a little purple StazOn ink over this as I felt it came out a little brighter and more gold than I wanted. I embossed gold over the brickwork area and sprinkled a little gold and antiquey silver over the dry wall tape. Before heat embossing the dry tape I sprayed a little mica powder mist in a turquoise on these areas, just enough to give a hint of the turquoise colour when the light hits.
Finally I gesso'd the mdf "LOVE" (which came free with a magazine... good or what!!). I then gave a second coat with Gesso, this time with a little turquoise Mica Powder mixed in which gives it a lovely shimmer! I stencilled the honeycomb design using a Distress Ink pad in China Blue. Then, because the distress ink is not designed to adhere to surfaces like this, I also gave the whole thing LOVE shape a quick spray with Crafters Companion Spray and Sparkle in Pearl Diamond. Gold heat embossing around some of the edges ties this in with the canvas itself.
I die cut two of each of the butterfly and hearts, once from scrap corrugated card and once from a smoother scrap cardstock. I Mod Podge'd the two layers together using my own home made Mod Podge (Do please check out my Altered Mod Podge Jar whilst visiting!)
After gluing together the layers for the butterfly and hearts I Gesso'd them and painted with acrylic paint. I added dry wall tape to the large heart before heat embossing with a sprinkle of gold and plenty of clear embossing powder. I then added a second coat of clear embossing powder.
The "changes everything" is simply stamped onto cardstock that I had painted with the mica powder/gesso mix left over from the "LOVE" plaque. I heat embossed the gold edging before mounting all the embellishments onto the canvas using good old Pinflair Glue Gel.
The whole canvas got treated to a light spraying with Crafters Companion Spray and Shine to finish.
Anyway, I do hope you pop over and join in the challenge!
Each challenge runs for 2 months, so plenty of time to enter. I look forward to seeing your creations.
P.S - If anyone can guess which Musical this canvas is inspired by you get a good old fashioned Brownie Point??!
Sam
x
Please can I enter this project into the following challenges:
Saturday 4 October 2014
Matchbox Chest Clock
Welcome back and thankyou for visiting my blog today! I'd love to share with you a matchbox project I finished this week.
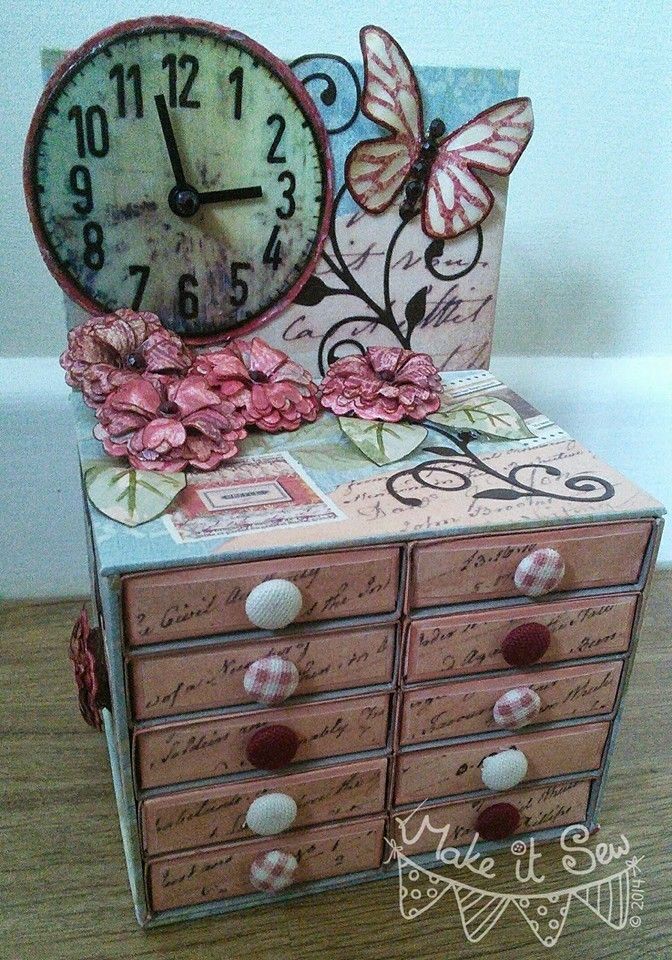
I made this using large size matchboxes which I coloured with a Promarker before covering the front with a script paper. The handles are little fabric covered brads. I used papers from my stash, glazed with Mod Podge for a hardwearing finish. I tore the script and postage stamp papers for a rustic feel. The die cut flowers and all other embellishments are also glazed with the Mod Podge.
The clock face is a free printable CD clock face which I resized to fit my project and the clock hands. I die cut many many flowers and layered then to make a 3D flower. The leaves were cute free hand and vein detail drawn in using a Promarker.
The clock hands and mechanism I pinched out of a raffle prize clock I had laying around!
Thankyou for vising my blog and I do hope you come back soon!
Sam
X
Please could I enter this project into the following challenges:
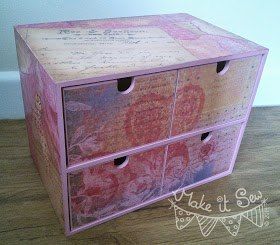
Ikea Moppe Project
Back in September I picked up 3 of these awesome mdf Ikea "Moppe" 4 drawer mini chests to decorate up for desk storage in my studio. I had a wonderful weekend with crafty friends in Harrogate and took one of them with me to do for my Sunday "freestyle" project.
Whilst I'm on the subject, I'd definitely recommend a crafty getaway! It is good for the soul! This want anything huge, in fact there were 5 of us in total, but great fun was had by all and we went away vowing to repeat this again next year!
Anyway, back to the Moppe's! I pre-gessoed with a gesso/red acrylic mix which gave me a lovely pink base coat. I then gave it a thorough sanding before it was ready for the next stage.
I decided to découpage this set of drawers using 3 or 4 coordinating papers from my stash. I tore the papers roughly and inked the edges with Distress Ink.
All the papers were attached with Mod Podge Matte and finished with a coat of the Mod Podge to seal and protect.
I added a humming bird die cut to each of the end panels although I'm not sure if I like them now... Anyway, seeing as this set of drawers is sandwiched between 2 others, you can see the end anyway!...
For the drawer fronts, rather than decoupage the papers, I used one large sheet which looked great I think! After the glue was completely dry I used a craft knife to cut out the finger holes.
I could have turned the drawers back to front and attached knobs to open with but I didn't want to as I don't want to much bulk on the front encroaching into my valuable work space! I AM however going to add little metal label holders to the drawer fronts, one I've made up my mind which ones to get!
If interested, here is how the Moppe starts it's life, all preassembled and ready to get stuck into.

Thanks for stopping by and reading my blog.
Sam
X
Please enter this project into the following challenges:
Subscribe to:
Posts (Atom)