Now that these super cute and practical MDF coaster sets from That Craft Place have been received by their intended recipient, I can show them to you!
I simply decoupaged all the Coasters, and decorated the holders using a variety of techniques. The MDF is 4mm thick and cut amazingly cleanly! Also, raw MDF smells rather amazing, but that might just be me being weird.
I simply decoupaged all the Coasters, and decorated the holders using a variety of techniques. The MDF is 4mm thick and cut amazingly cleanly! Also, raw MDF smells rather amazing, but that might just be me being weird.
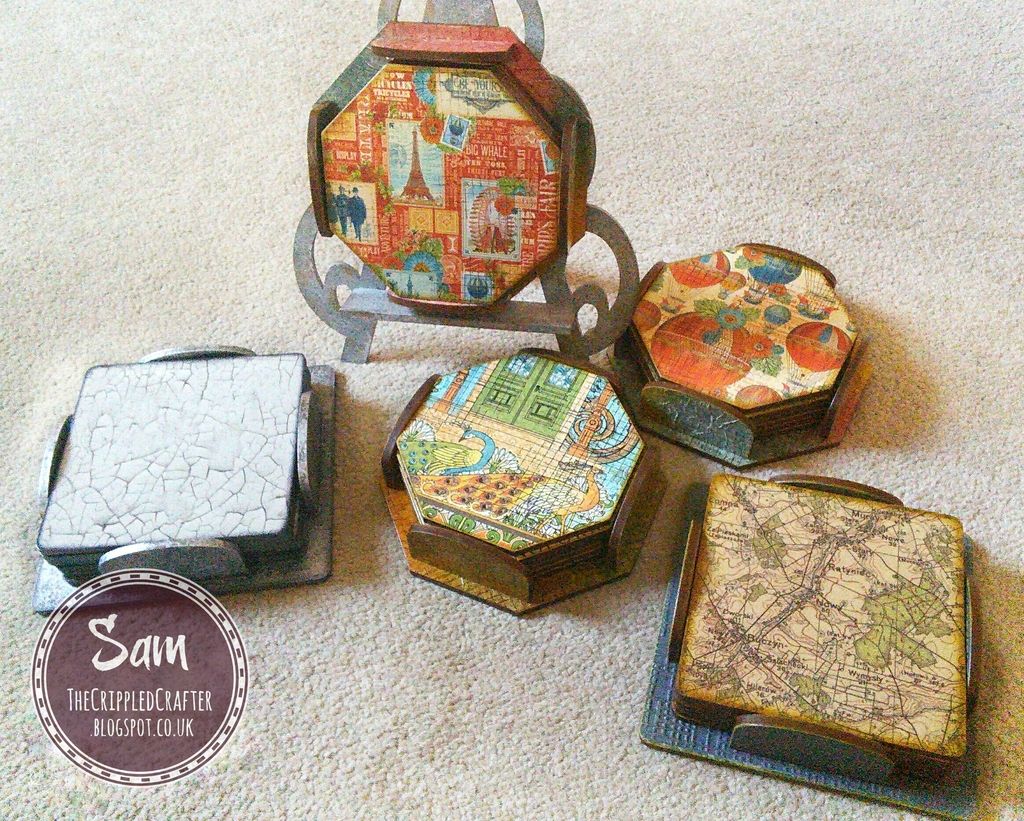 |
| MDF Coaster Sets by That Craft Place, decorated by The Crippled Crafter |
- - - - - - - - - - - - - - -
I used the following materials:
THAT CRAFT PLACE MDF / GREYBOARD
Set of 6 Octagonal Coasters, with holder
Set of 6 Square Coasters, with holder
MEDIUMS USED
Distress Inks (various colours)
Archival Ink (Tree Branch)
DecoArt Dazzling Metallics (Silver)
Pinflair Buff-It (Slate)
Mod Podge Matte
OTHER PRODUCTS USED
"Linen" Embossing Folder by Creative Expressions
All products above available from That Craft Place.
ANYTHING ELSE
White tissue paper
Graph stamp by Tim Holtz
Blue cardstock by American Crafts
- - - - - - - - - - - - - - -
Summary Process
COASTERS
Glue chosen paper to the top
(squeezing out excess glue or air bubbles)
Ink round edges (I used Archival Ink in Tree Branch)
Gave one coat of the Mod Podge Matte (or other medium of choice)
Stamped the grid pattern in Jet Black Archival Ink
2 more coats of Mod Podge Matte
- - -
HOLDER (OCTAGONAL SETS)
Inked all the pieces well with Distress Inks that complement the papers
Glued crinkled white tissue paper over the top
Gave one coat of the Mod Podge Matte
Stamped the grid pattern in Jet Black Archival Ink
2 more coats of Mod Podge Matte
Glue the pieces together!
- - -
HOLDER (SQUARE CRACKLED SET)
Painted with 2 coats of Pinflair Buff-It in Slate
Sponged on DecoArt Dazzling Metallics in Silver
Glue the pieces together!
- - -
HOLDER (SQUARE MAP SET)
Embossed a piece of cardstock and glued to the pieces
Inked the raised parts with Archival Ink in Tree Branch
Sealed with 3 coats of Mod Podge Matte
Glue pieces together!
- - -
If I had to give any tips they would be to strictly avoid getting paint, glue or paper etc on the tabs or in the tab holes. This makes it easy peasy then when gluing the pieces together.
- - - - - - - - - - - - - - - -
Here are some more photos
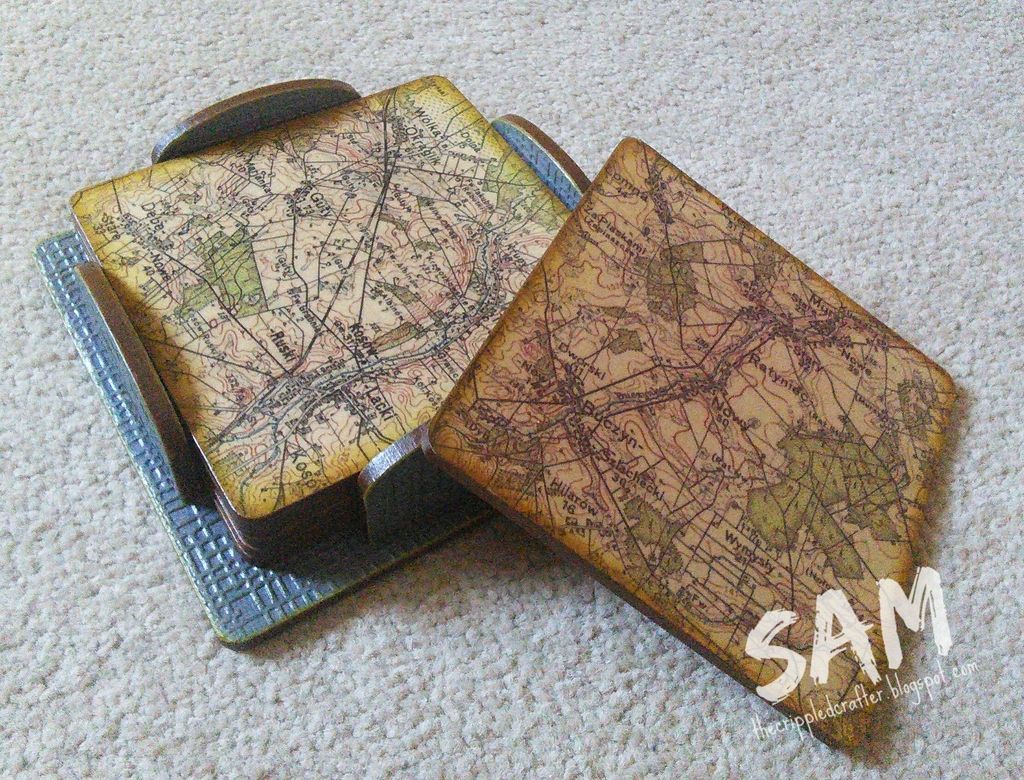 |
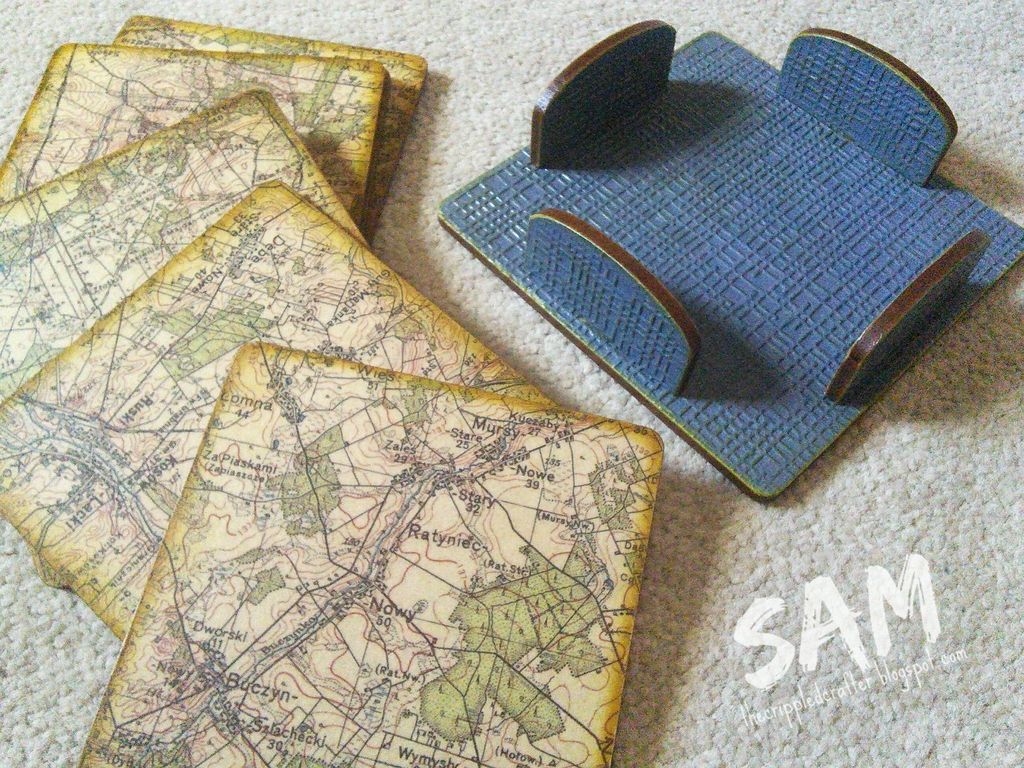
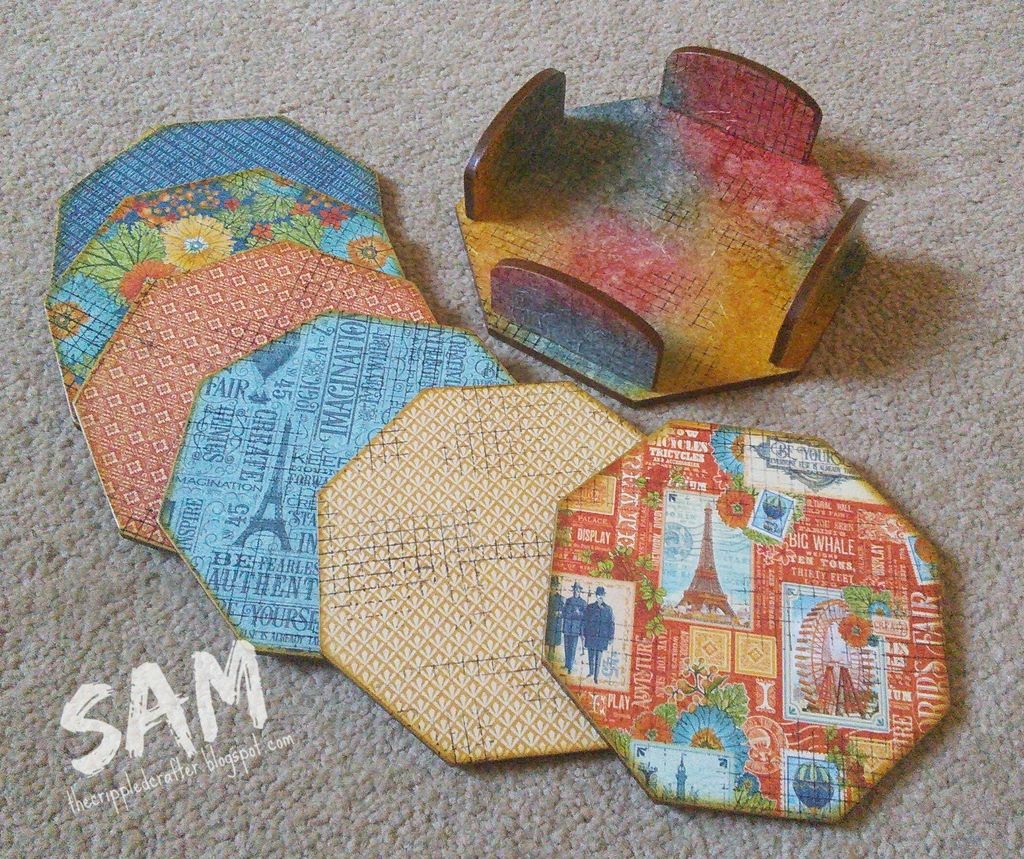
| Square Coasters by That Craft Place - "Vintage Map" paper by Craft Consortium |
- - -
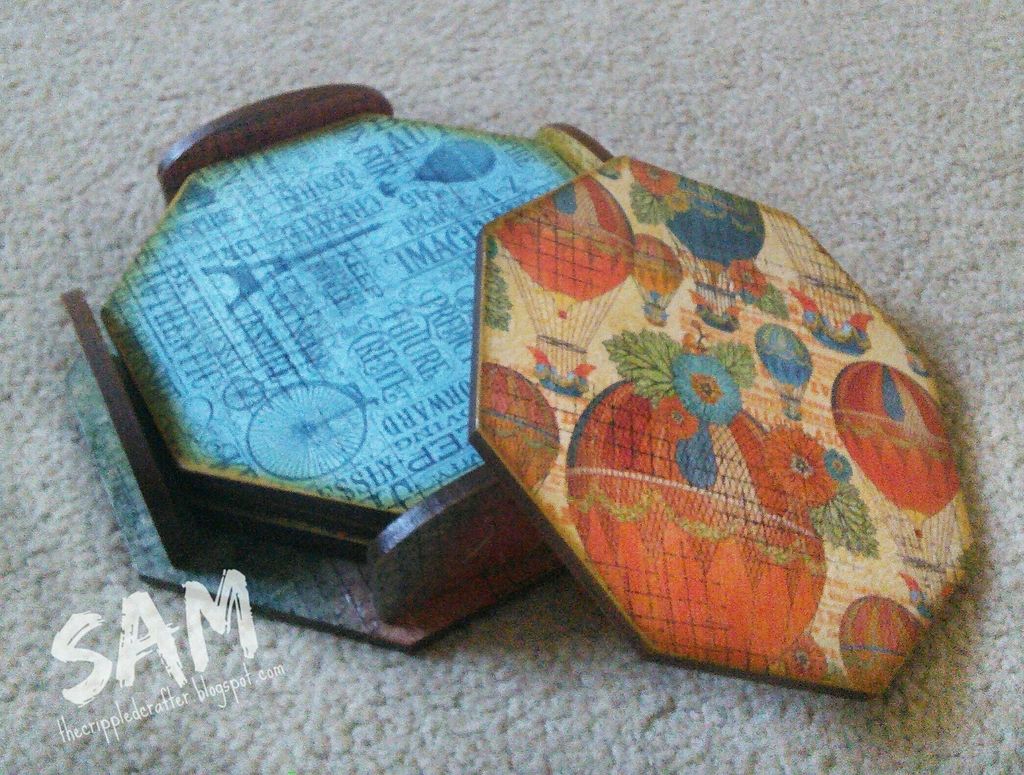 |
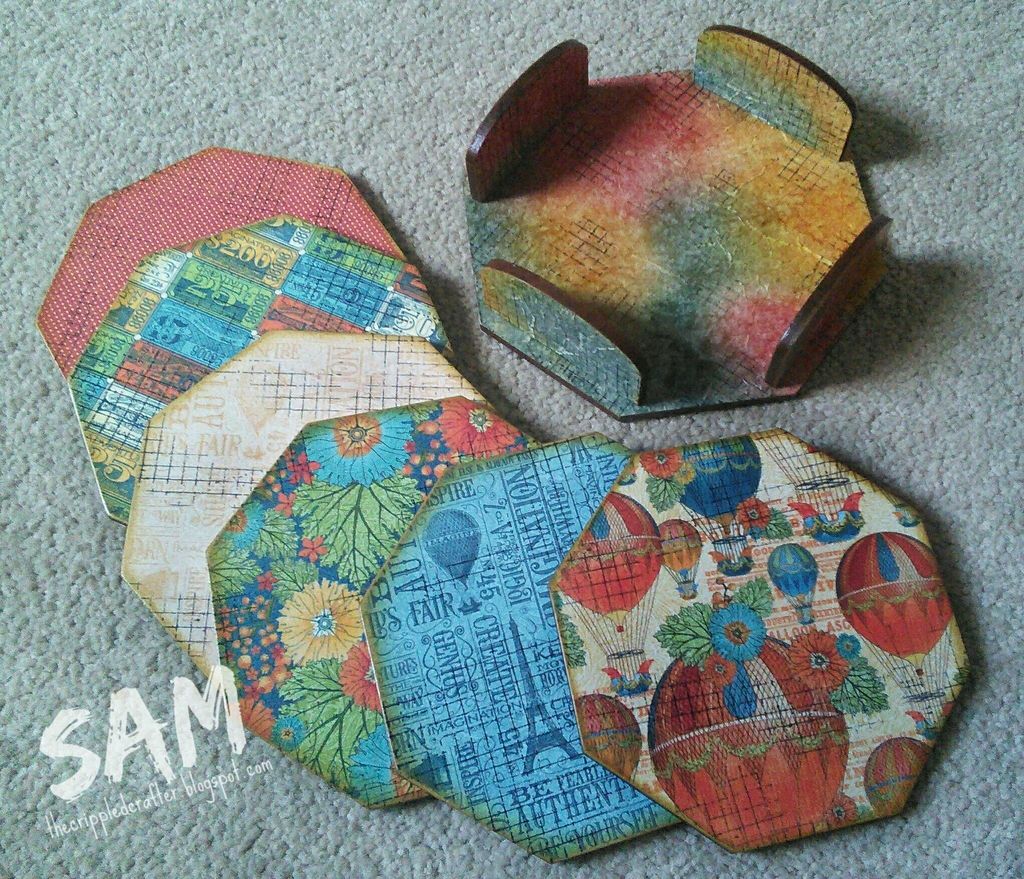
| Octagonal Coasters by That Craft Place - "World's Fair" papers by Graphic 45 |
- - -
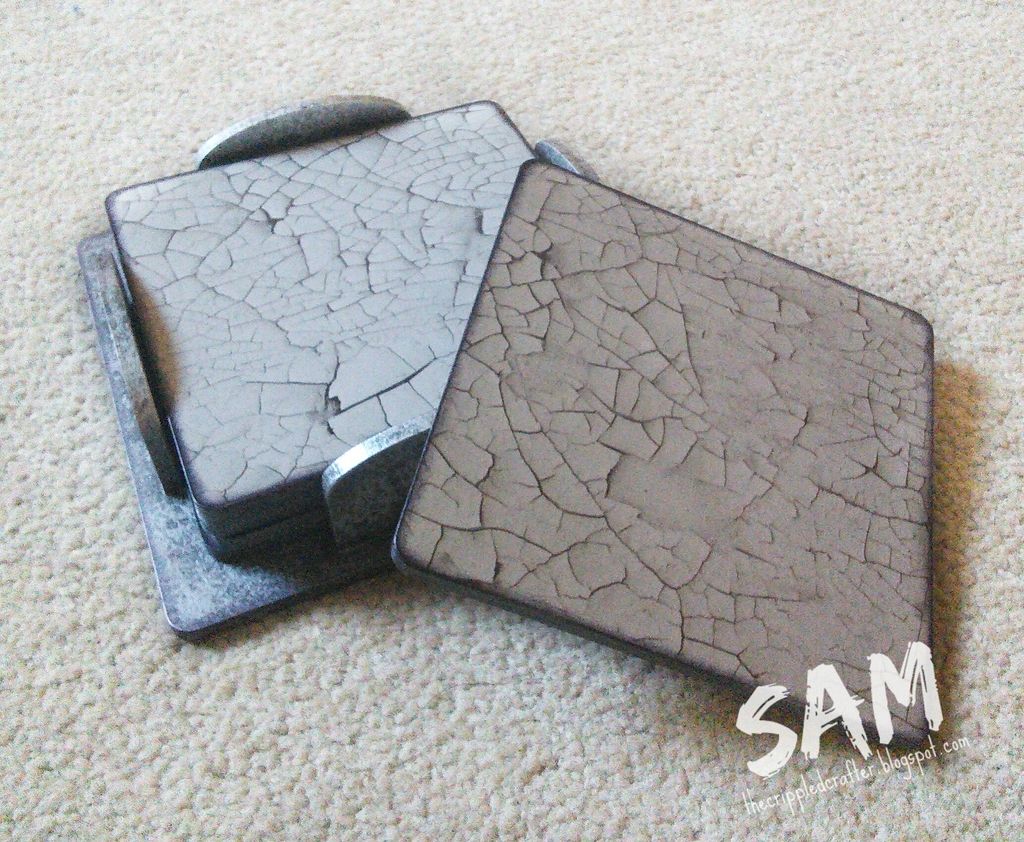 |
| Square Coasters by That Craft Place - "White Crack Texture" paper by Craft Consortium |

- - -
 |
| Octagonal Coasters by That Craft Place - "World's Fair" papers by Graphic 45 |
- - -
And finally, you can see more photos of the set below HERE where I originally blogged about it.
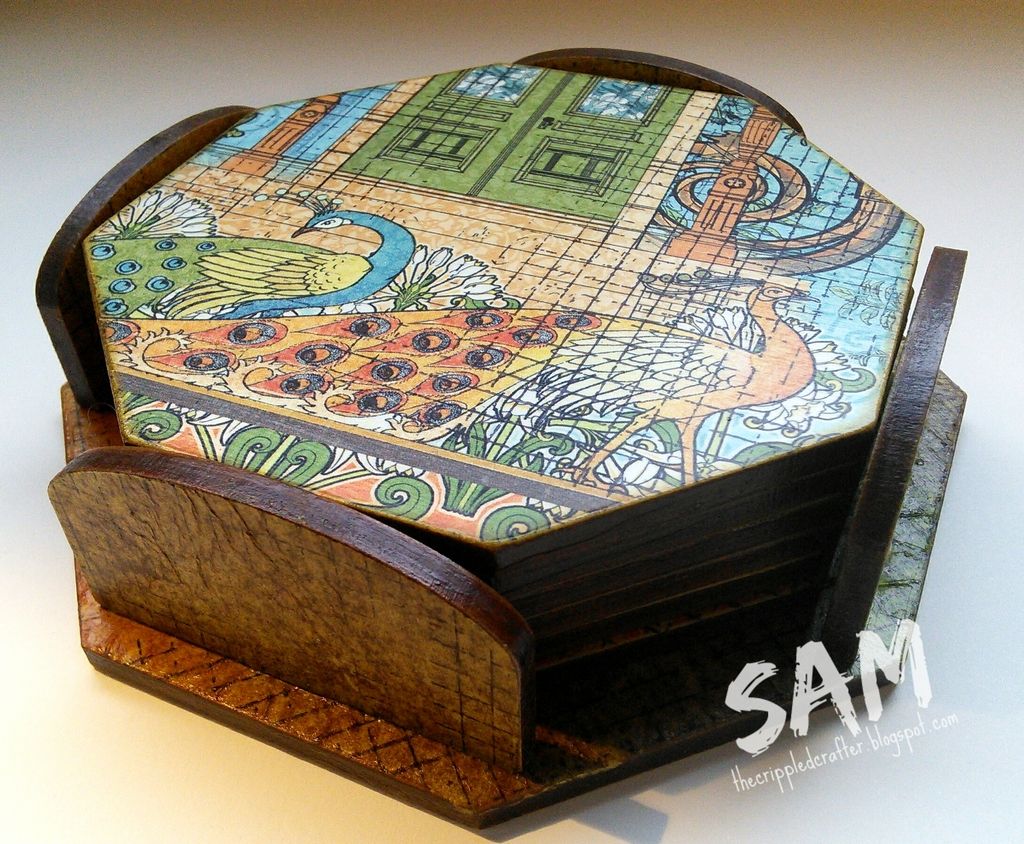 |
| Octagonal Coasters by That Craft Place - "Artisan Style" papers by Graphic 45 |
LINKS YOU NEED - THAT CRAFT PLACE
That Craft Place - Website
That Craft Place - Facebook Shop
That Craft Place - Facebook Natter & Chatter Group
That Craft Place - Etsy Digi Stamp Store
That Craft Place - Website
That Craft Place - Facebook Shop
That Craft Place - Facebook Natter & Chatter Group
That Craft Place - Etsy Digi Stamp Store
- - - - - - - - - - - - - - -
Thank you as always for popping by, I hope you enjoyed looking at this creation as well as reading the thought process behind it.
Enjoy whatever you have planned for the new year!
Enjoy whatever you have planned for the new year!
xxSAMxx
Please can I enter this project into the following challenge(s):