Sunday 31 January 2016

New Challenge, New Digistamps & Blog Hop! - That Craft Place


Time for a new challenge over at the
 
That Craft Place challenge blog

This fortnight (as always) the theme is
ANYTHING GOES
    
The prize is 5 digi stamps from the That Craft Place Etsy store!
       
That Craft Place MDF Frames with TCP Digis and Graphic 45 papers - by The Crippled Crafter
   
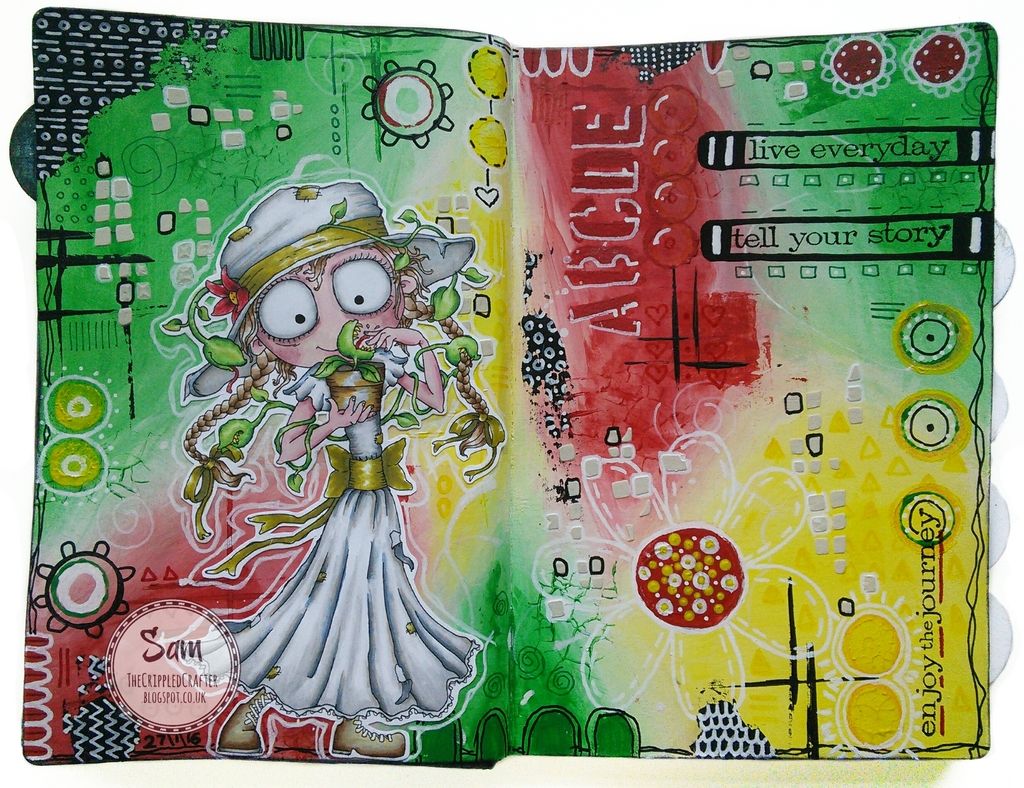
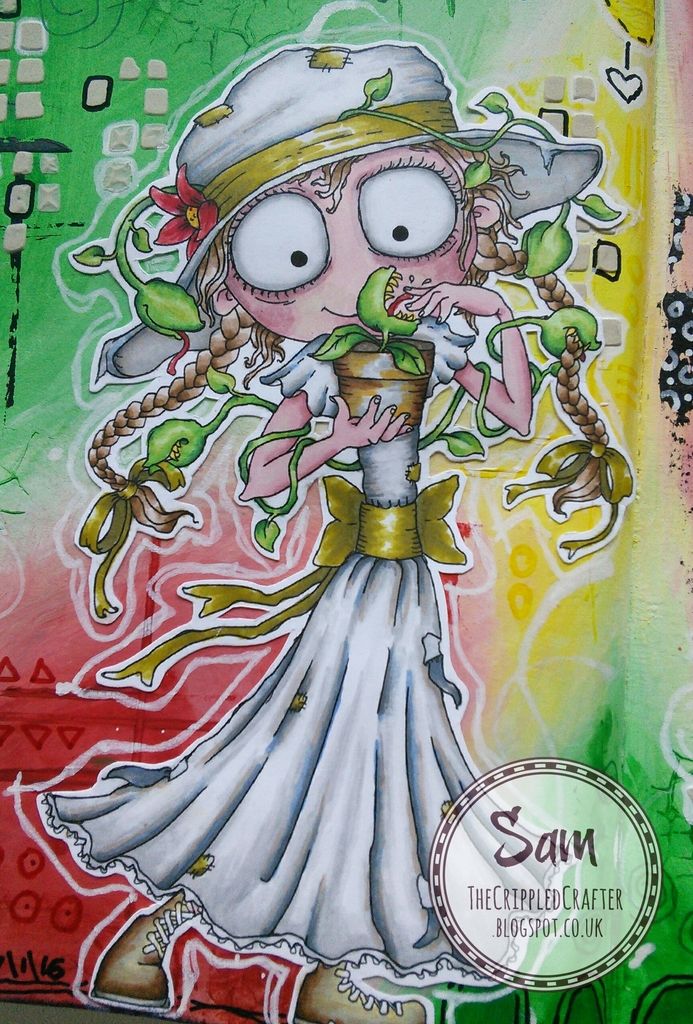
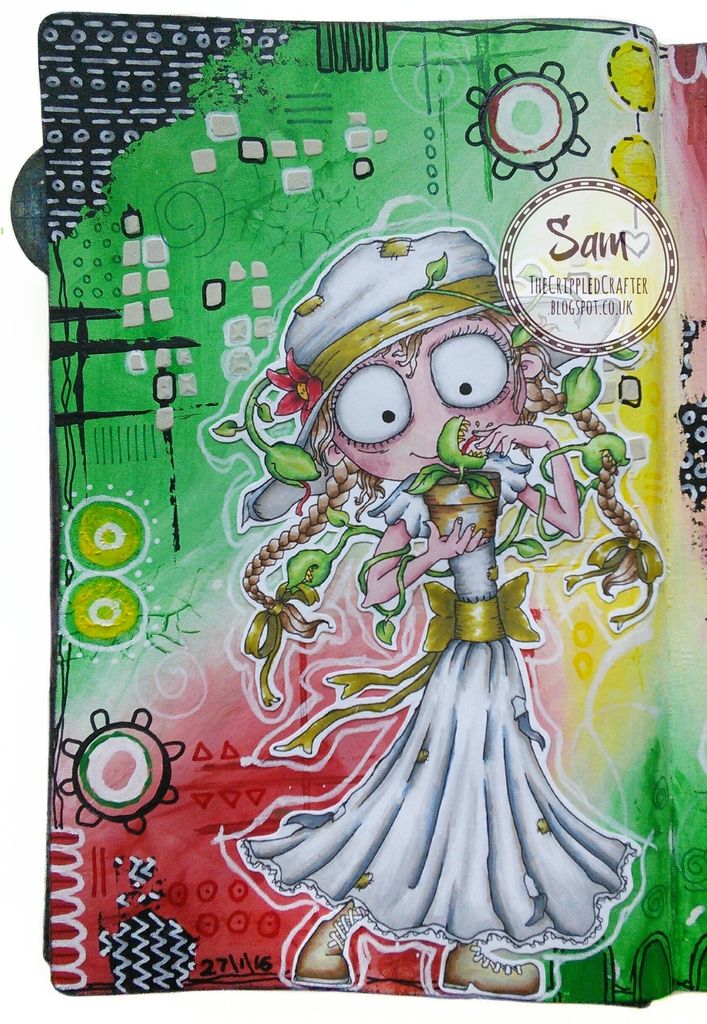
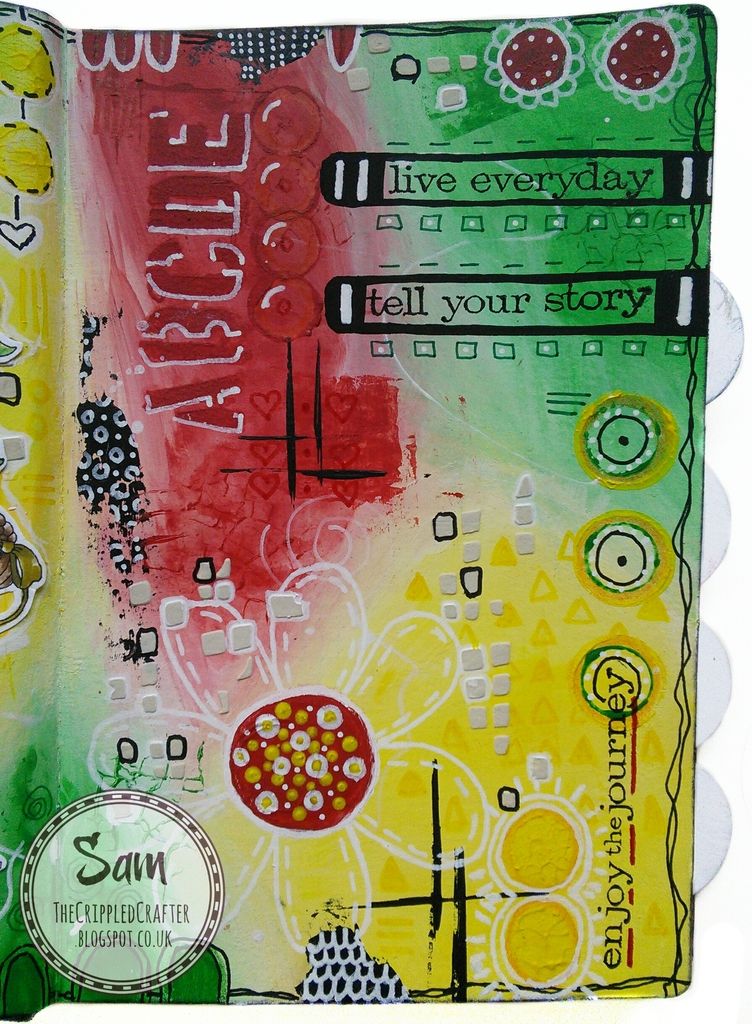
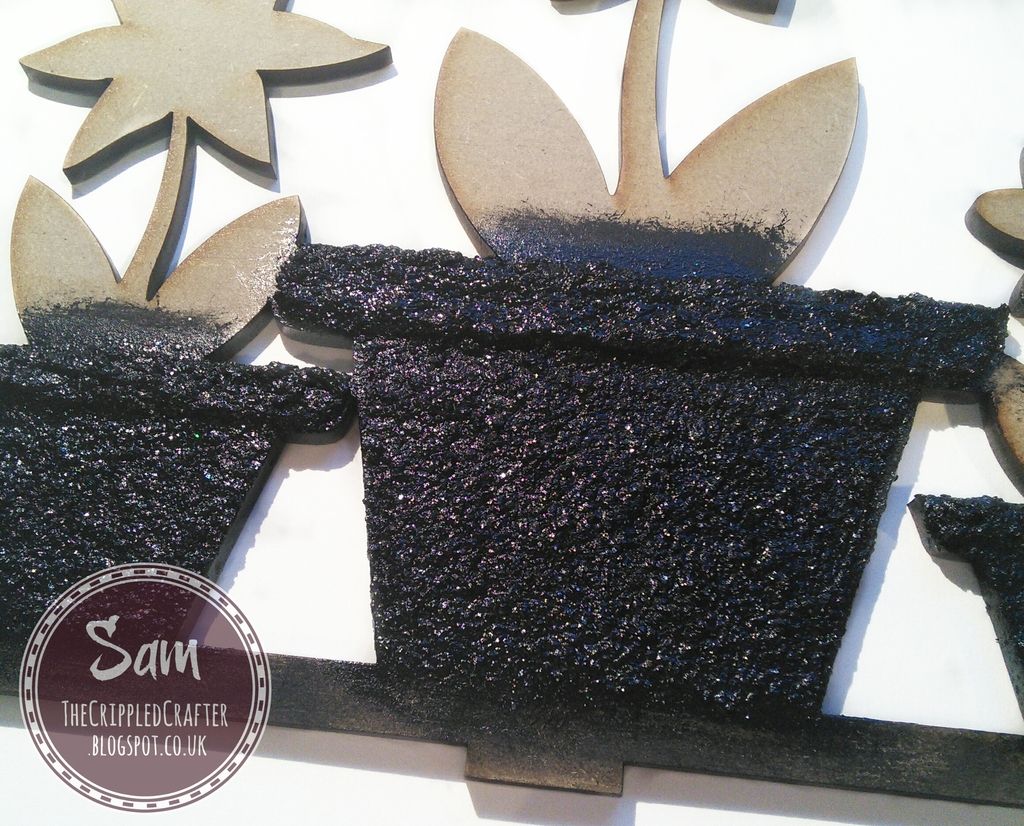
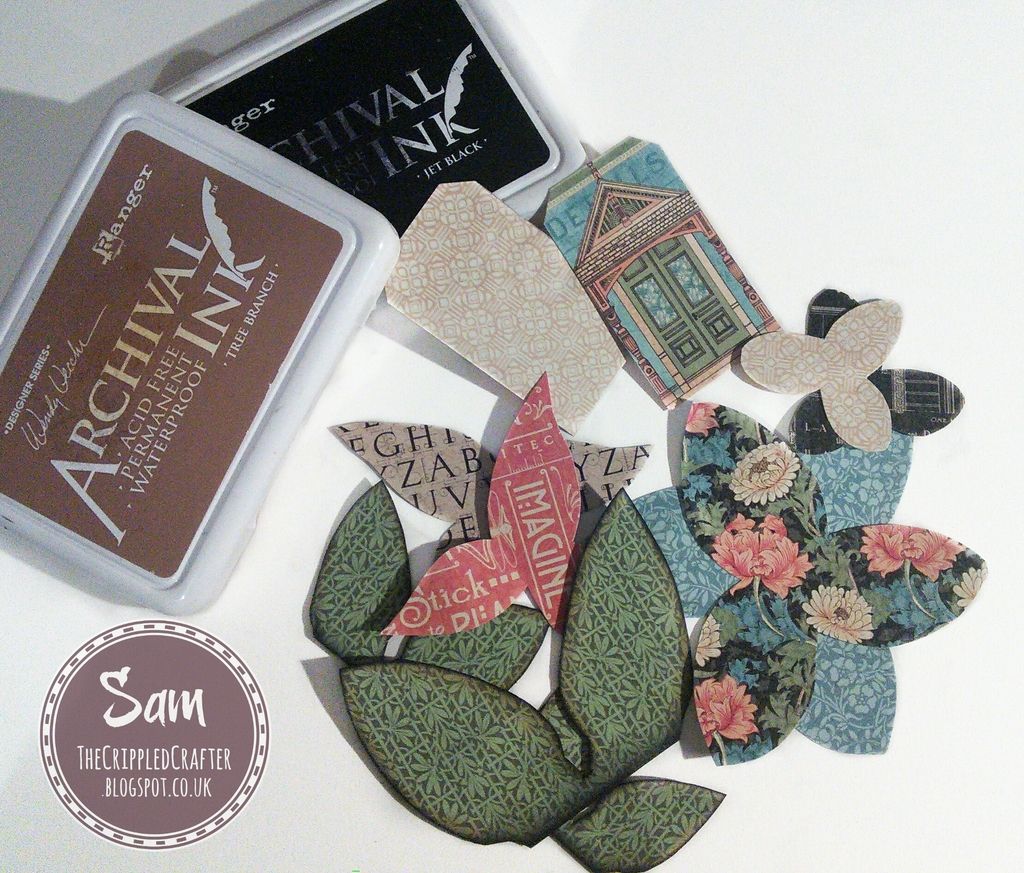
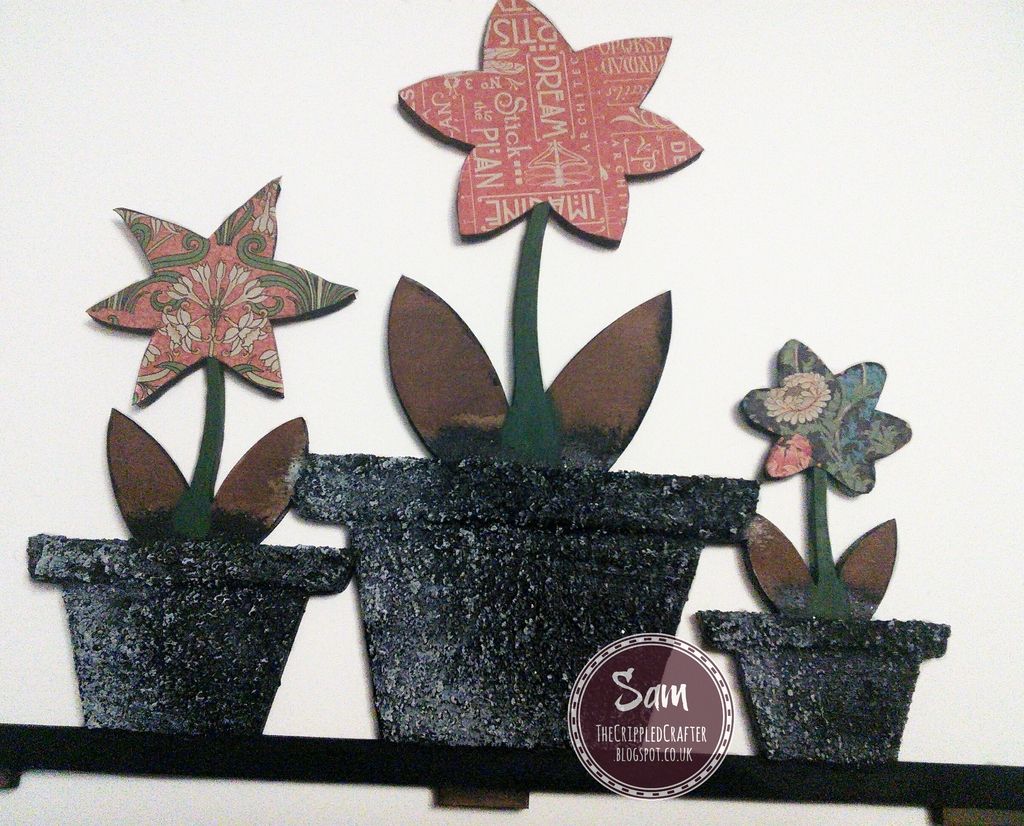
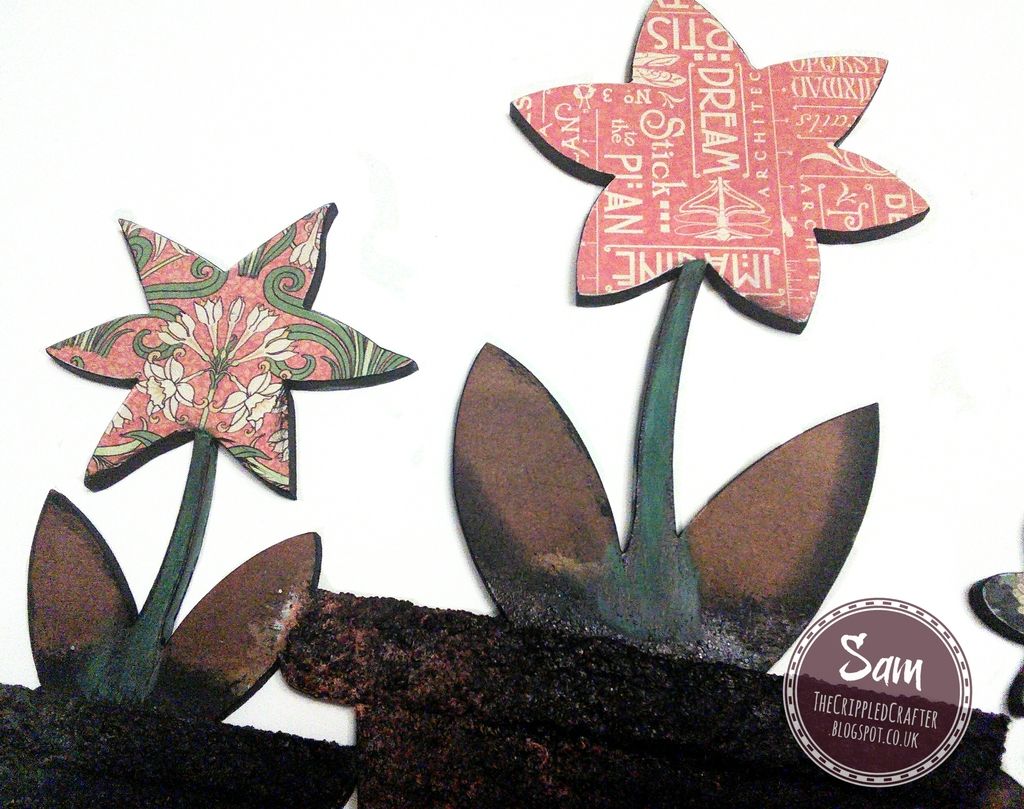
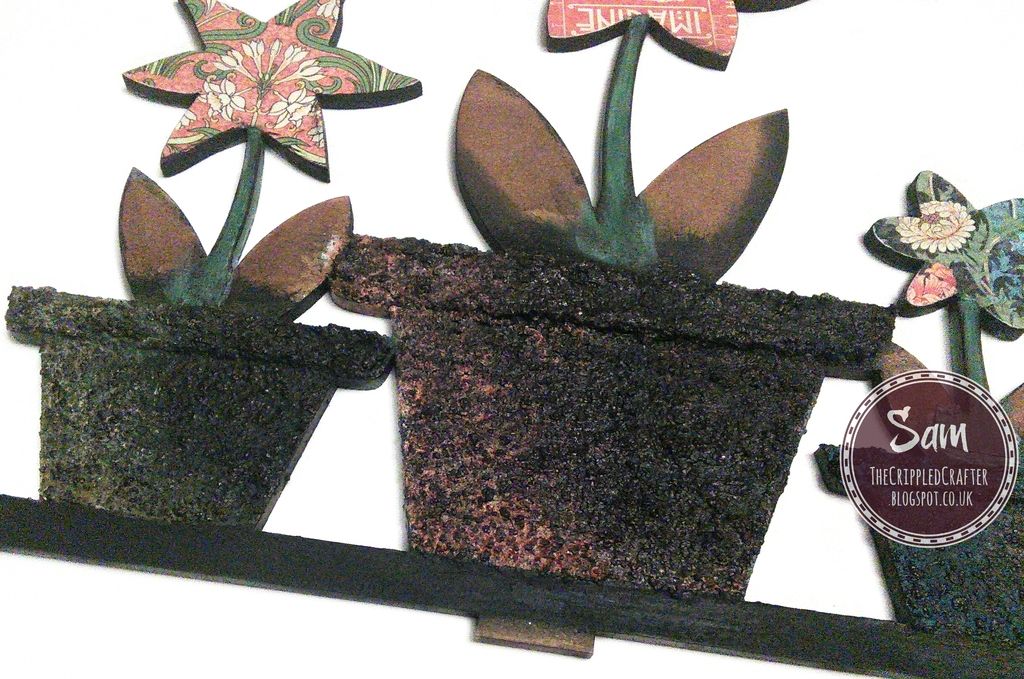
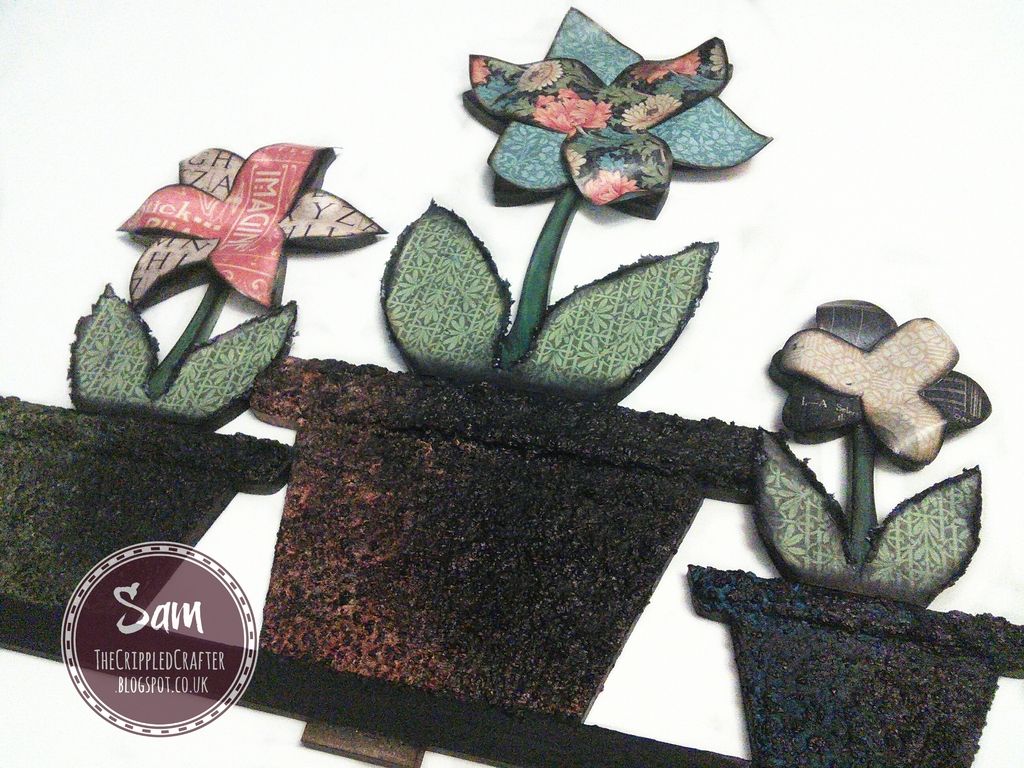
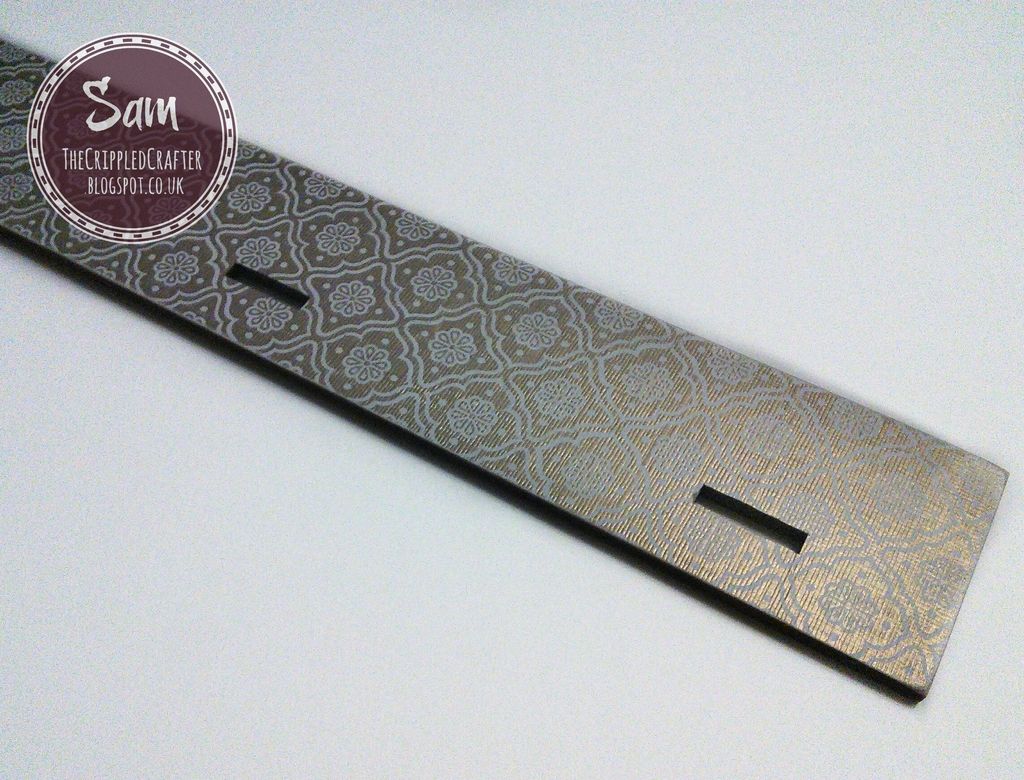
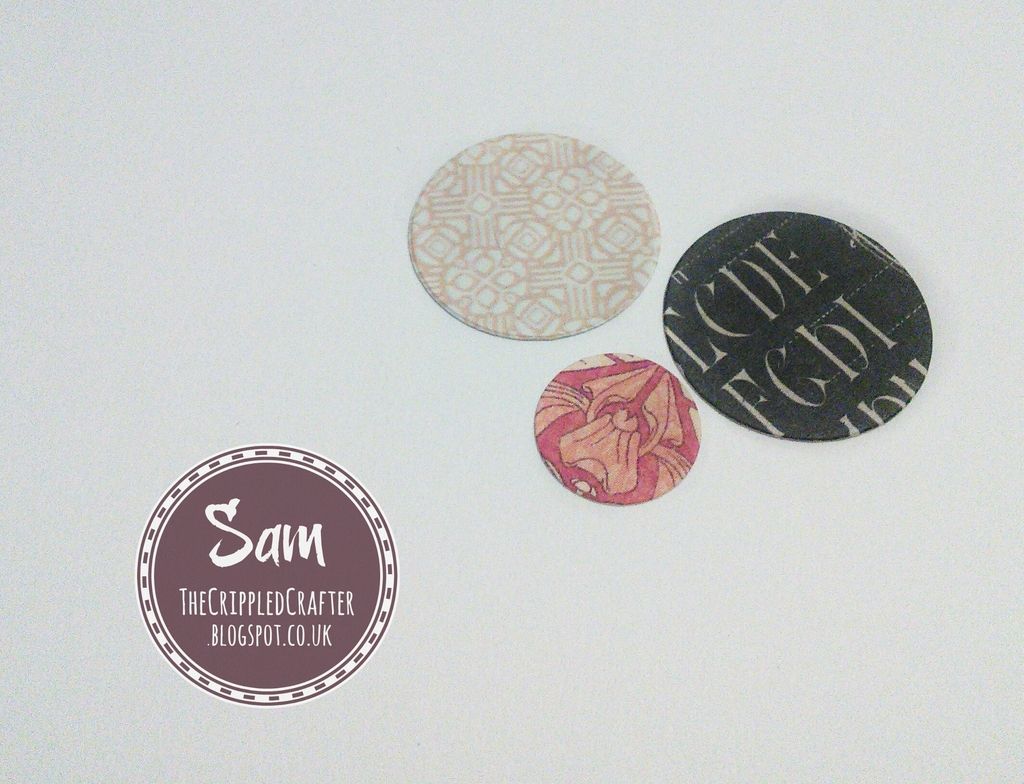
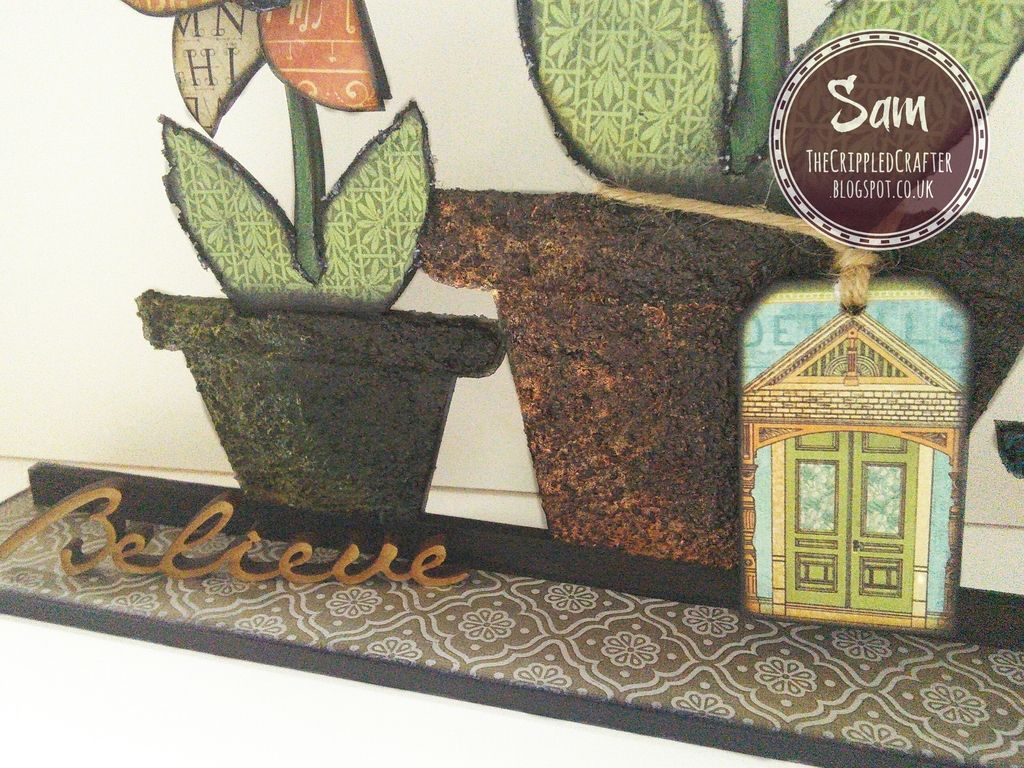
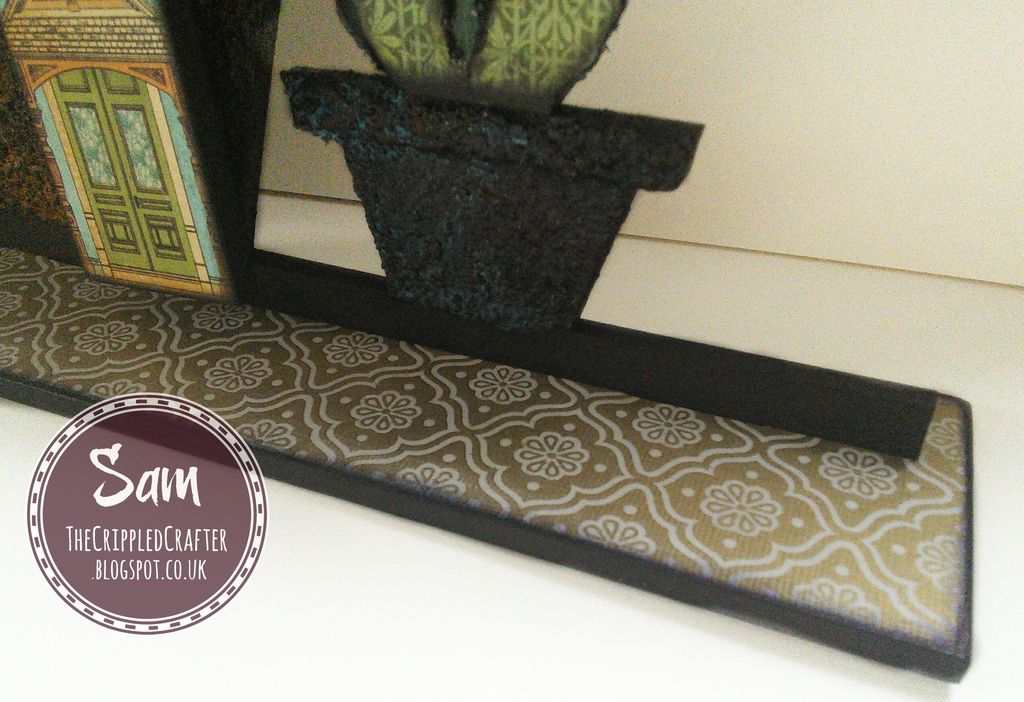
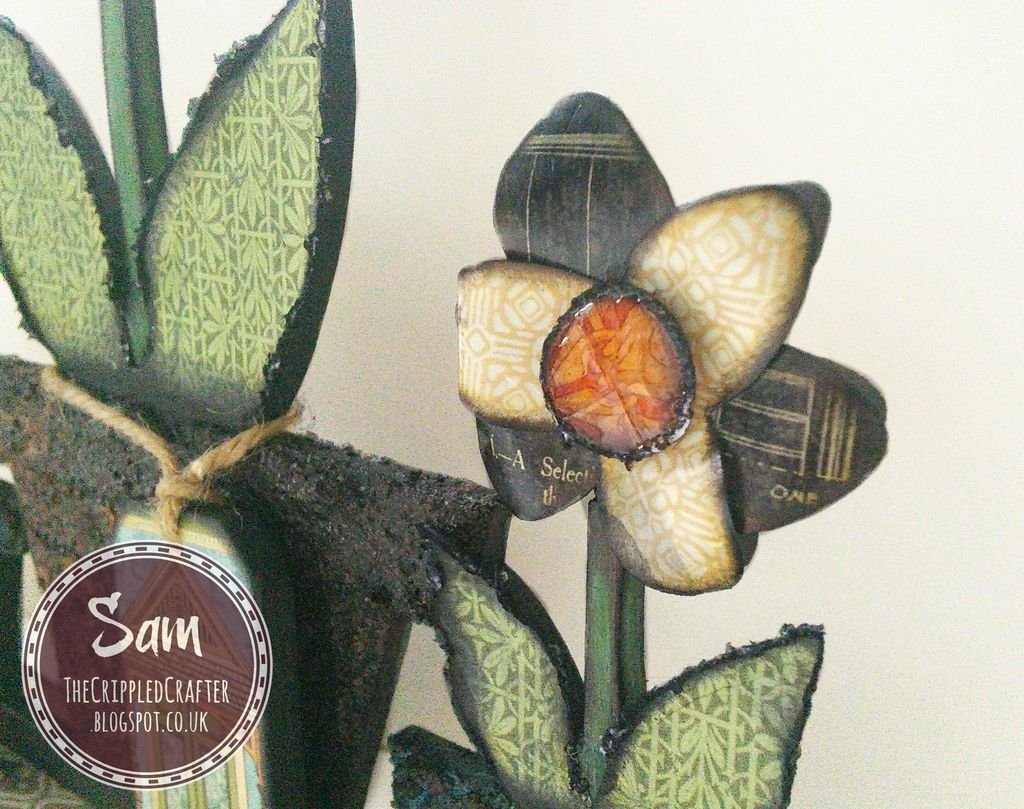
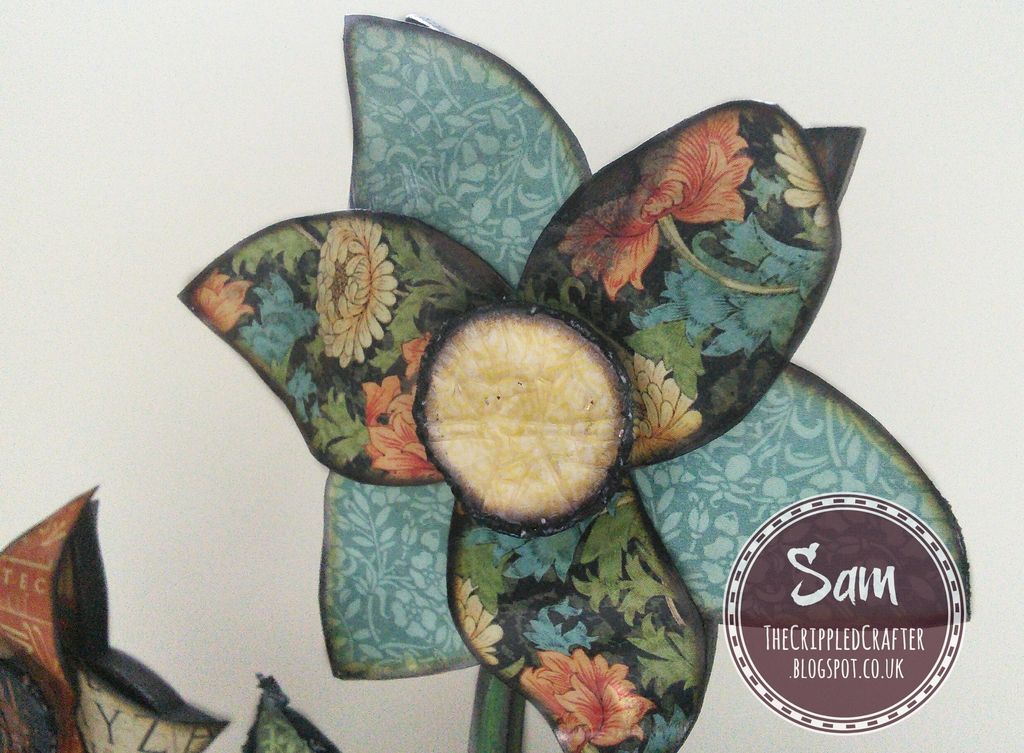
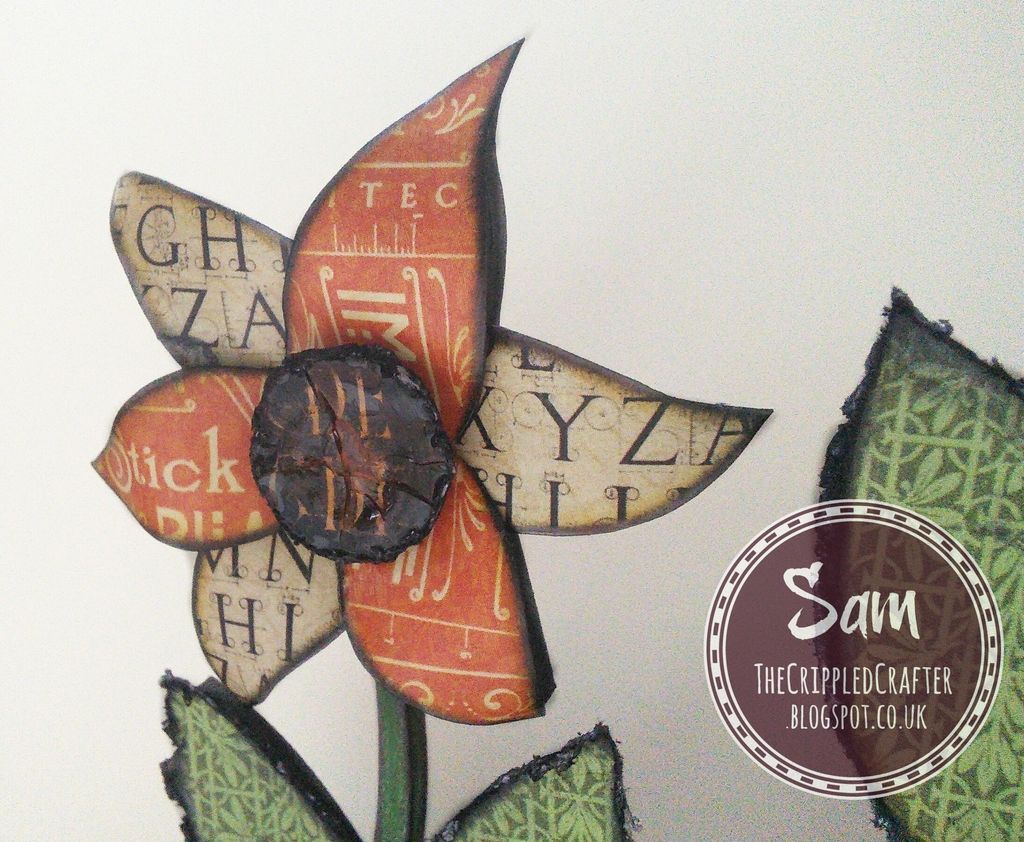
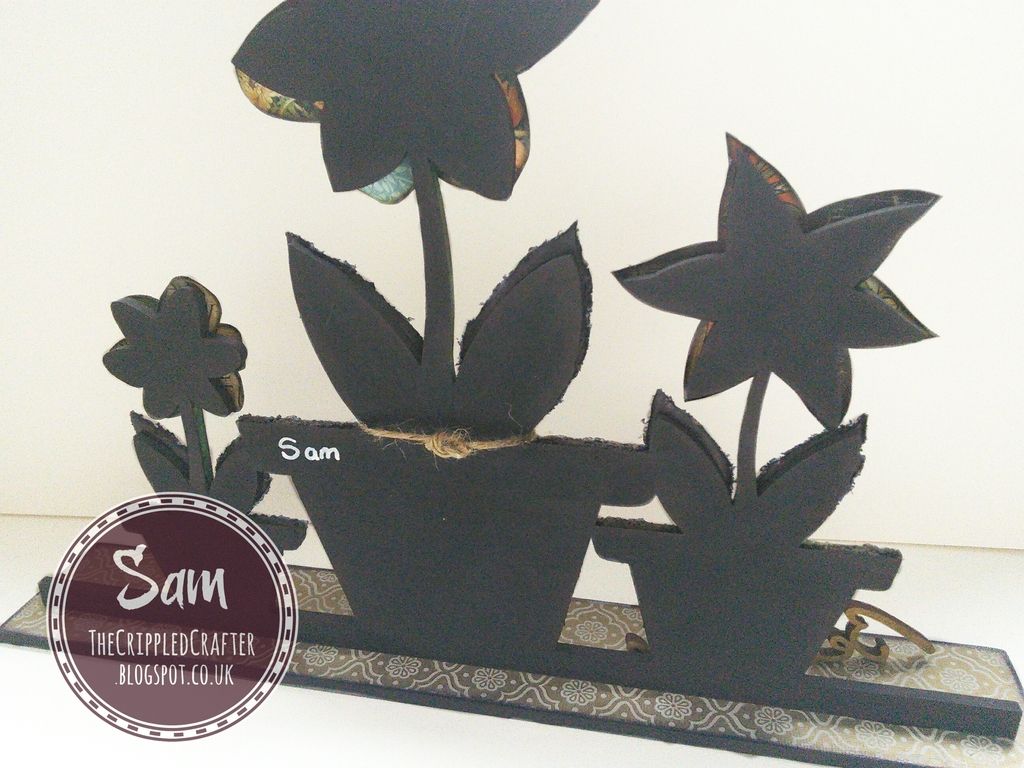
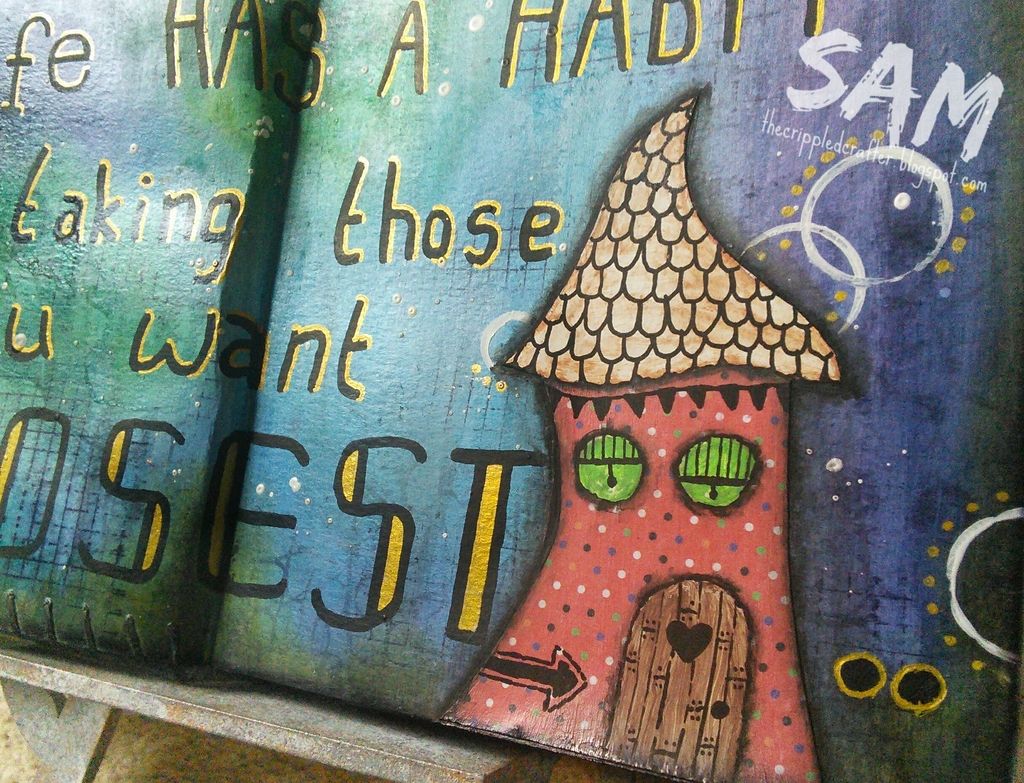
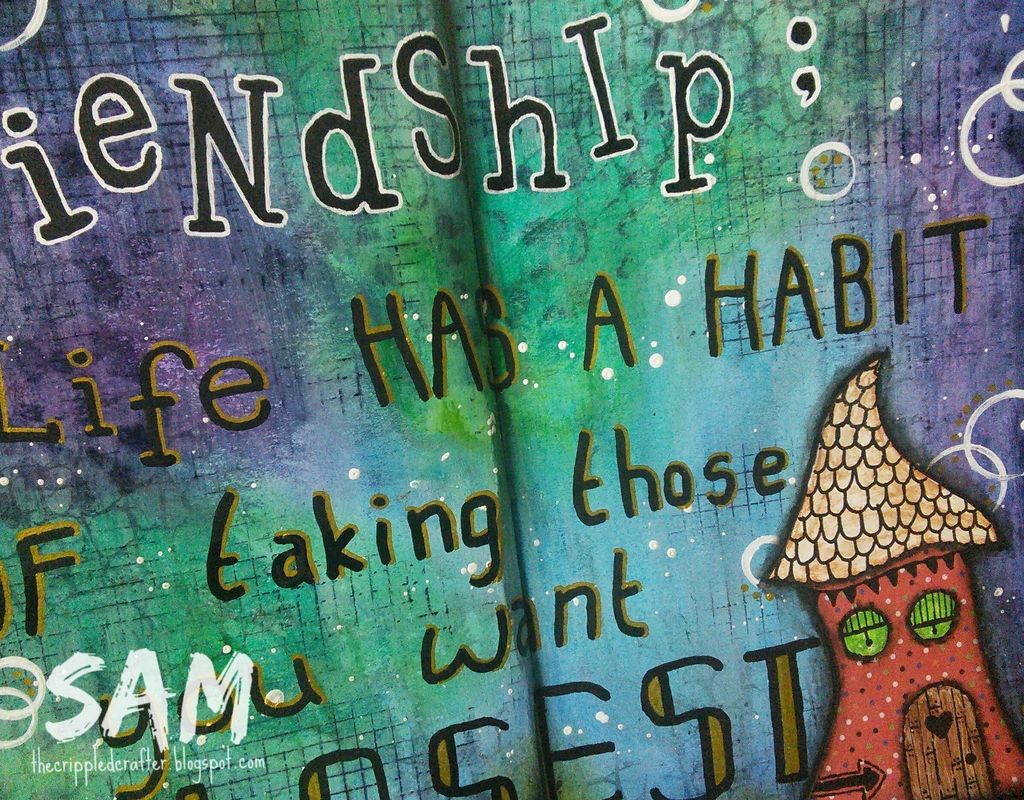
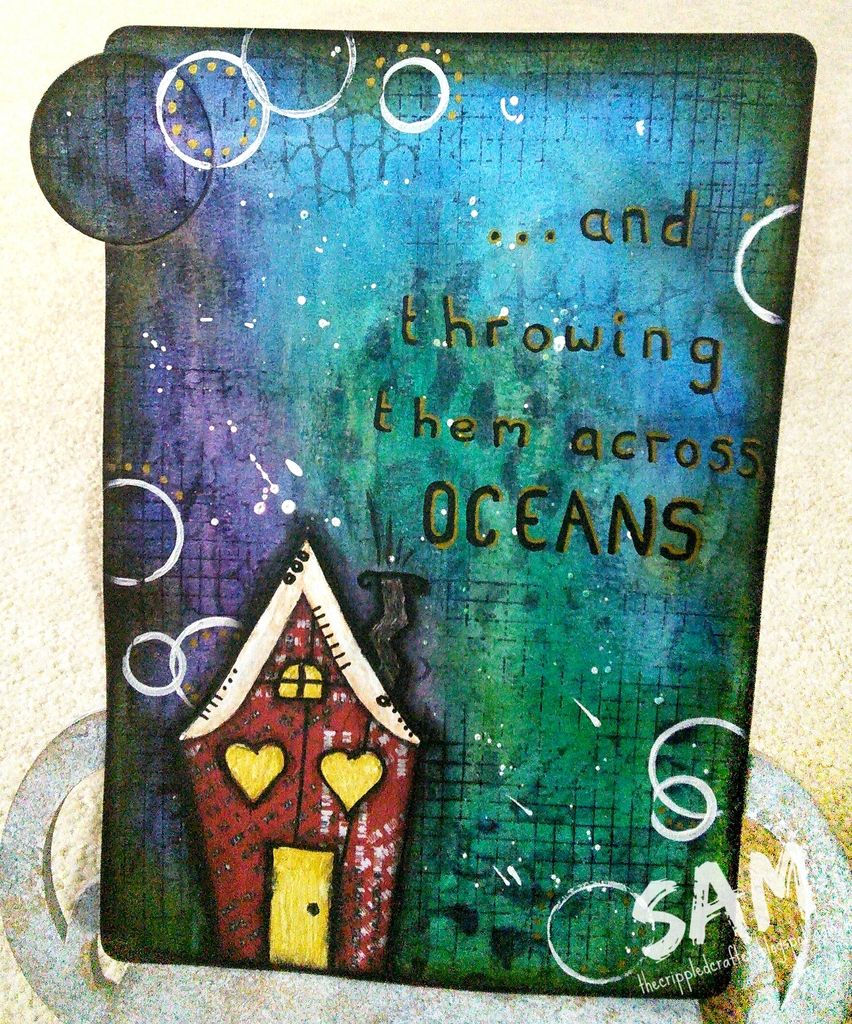
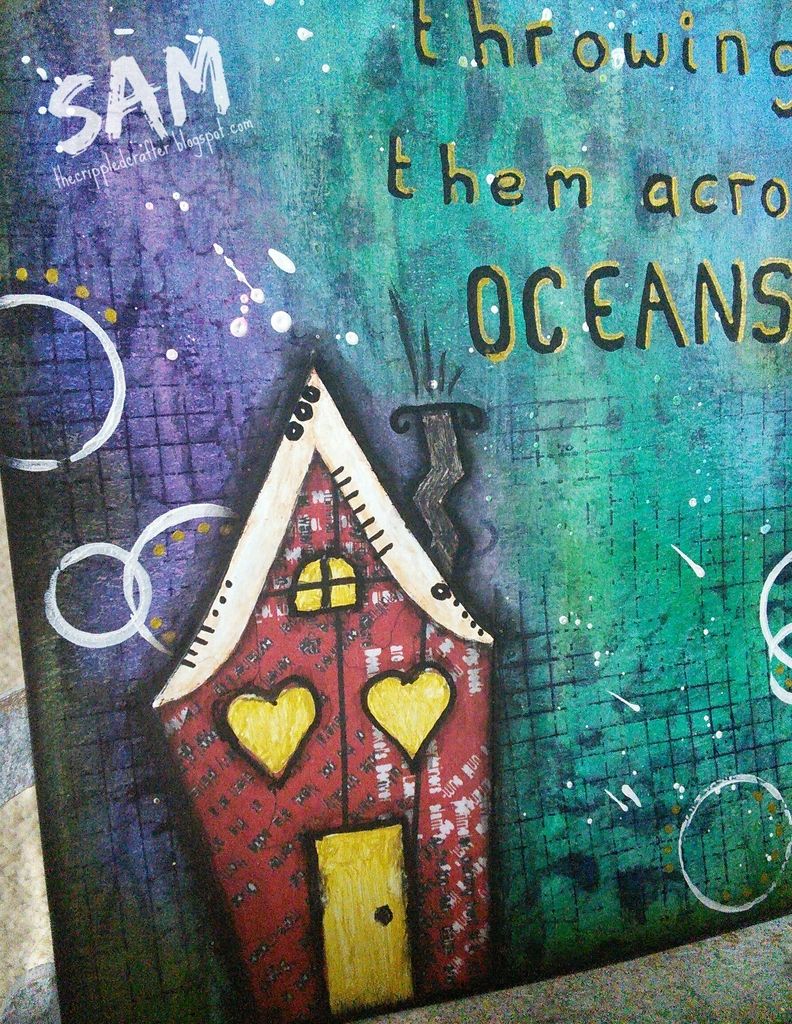
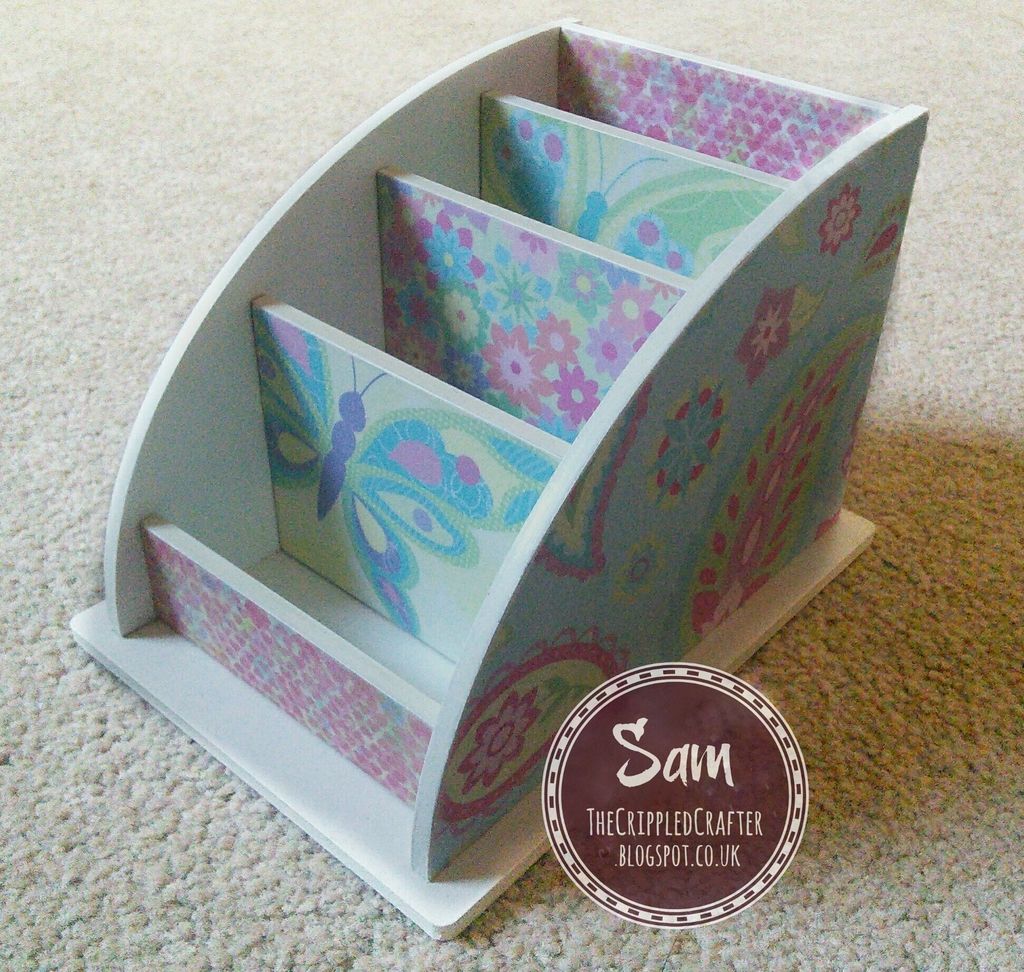
I used Graphic45 papers and MDF Frames by That Craft Place.

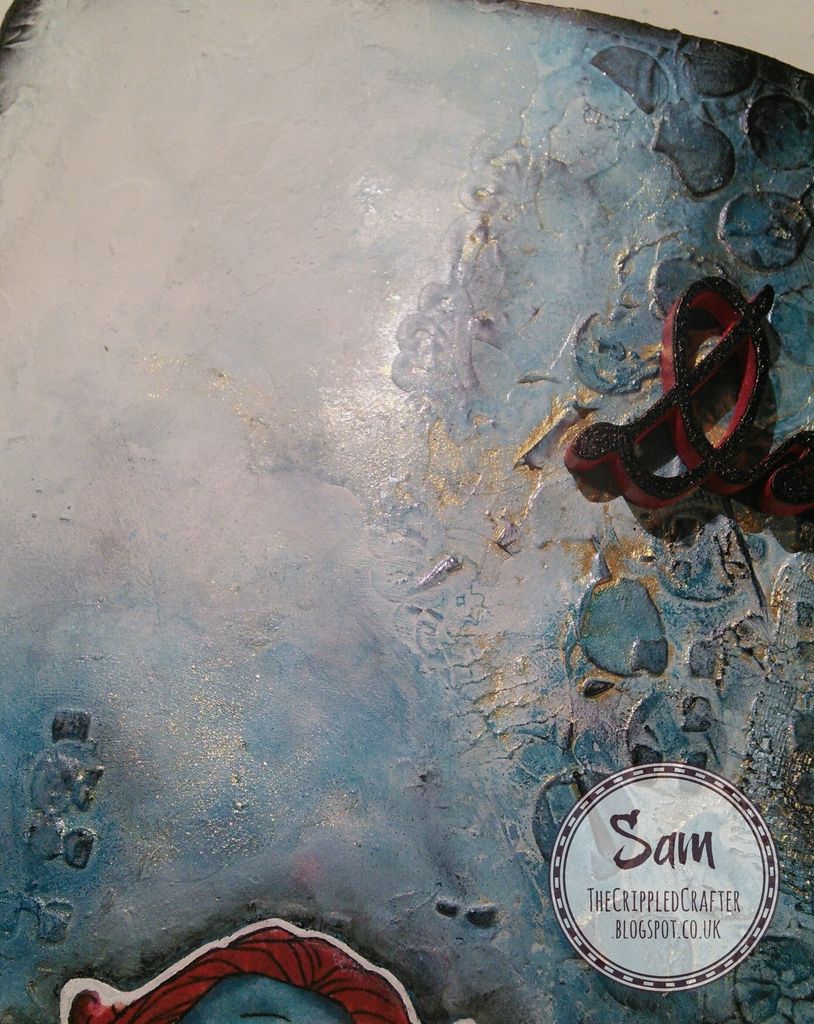
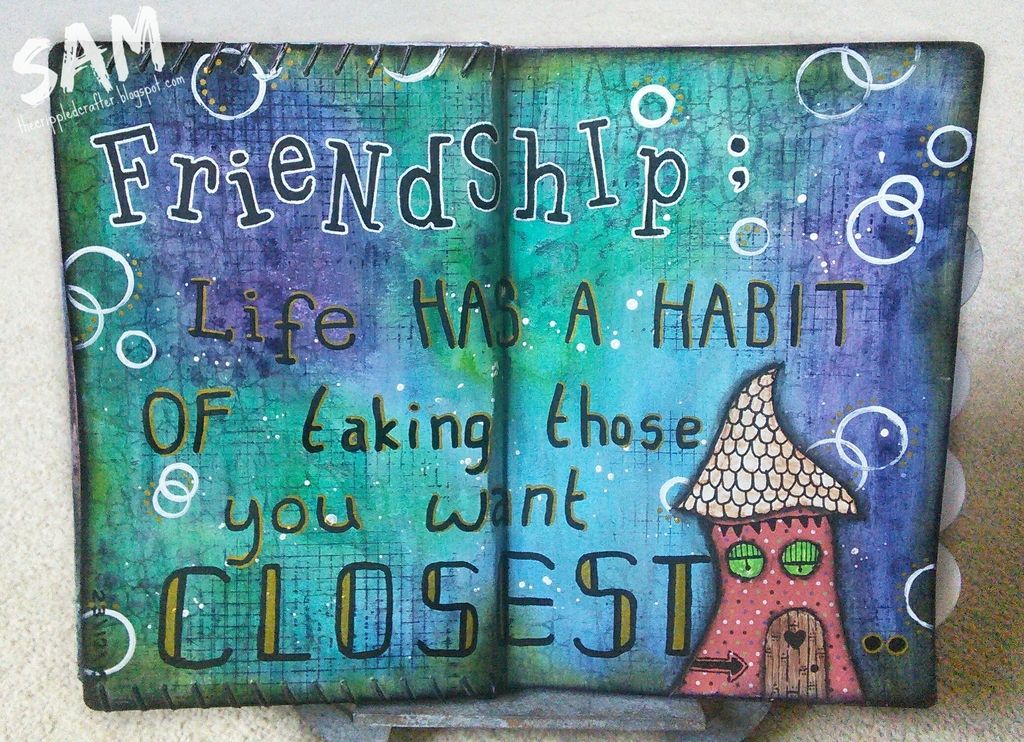
The images are "New Dungarees" and "Bubble Magic" from the new release by That Craft Place.
 
  - - - - - - - - - - - - - - -
 
We are also having a blog hop with our new release of digital stamps!

The winner of the blog hop will win the full collection from the new release
  
Make sure you hop on over to each of the DT's blogs and leave all of our team a lovely comment to be in with a chance of winning the whole collection.
   
Lisa
   
     
Amanda
    
     
Sandie
    
Lucy (you should have come from here)
  
Sam (you are here!)
         
Nicola (go here next)
  
Angela


- - - - - - - - - - - - - - -
       
POP BACK THIS THURSDAY FOR ...
TUTORIAL THURSDAY!   
 
There will be more photos, a full supplies list and a short tutorial on how to make this fabulous project using products available from That Craft Place!
   
- - - - - - - - - - - - - - -
      
   That Craft Place MDF Frames with TCP Digis and Graphic 45 papers - by The Crippled Crafter
 
That Craft Place MDF Frames with TCP Digis and Graphic 45 papers - by The Crippled Crafter
      
       
- - - - - - - - - - - - - - -
           
And before you leave, we have a 25% Discount for using in the Etsy store until 14th February!

THATCRAFTPLACEGP25
     
- - - - - - - - - - - - - - -
 
LINKS YOU NEED - THAT CRAFT PLACE
   
That Craft Place - Website
That Craft Place - Facebook Shop
That Craft Place - Facebook Natter & Chatter Group
That Craft Place - Etsy Digi Stamp Store
    
     
xxSAMxx
   
Please can I enter this project into the following challenge(s):


Saturday 30 January 2016

Venus Von Trapp - Art Journal Page

I've been practising my colouring again, and this quirky image by Bloobel Stamps really got me inspired.

Once coloured I used this in an art journal page inspired by the techniques of Kate Crane who was a guest teacher on the fabulous Wanderlust Course a couple of weeks ago!
   
This page was done in my handmade journal, on Daler-Rowney Mixed Media Paper.
 
       
- - - - - - - - - - - - - - -
    
I used the following materials:
  
DIGITAL STAMP
"Venus Von Trapp" by Bloobel Stamps
(Coloured using Promarkers)
 
MEDIUMS USED
White Gesso
Dylusions Acrylic Paint
Other Acrylic Paint
Modeling Paste
Spectrum Noir Pencils
DoCrafts Artiste Permanent Duel-Tip Pens
DecoArt Media Mister (White)
Posca Paint Markers (Black & White)
Archival Ink (Jet Black)
Mod Podge (to adhere the coloured image)
     
OTHER PRODUCTS USED
That Craft Place Stencils
Tim Holtz Stamps
 
All products above available from That Craft Place.
   
- - - - - - - - - - - - - - -
  
Here are some more photos


- - - - - - - - - - - - - - -
 
Thank you as always for popping by.
    
xxSAMxx
   
Please can I enter this project into the following challenge(s):
     

Thursday 21 January 2016

Tutorial Thursday - Freestanding Flowerpots (FULL TUTORIAL COPIED FROM THE TCP BLOG)

It's Sam here and I have a Tutorial on how to make my project from this fortnight's challenge.

FREESTANDING FLOWERPOTS
    
   
- - - - - - - - - - - - - - -
          
Supplies
  
THAT CRAFT PLACE MDF / GREYBOARD
MDF Freestanding Flowerpots
MDF Mini Tag
MDF Words - "Believe"

MEDIUMS USED
DecoArt Crafters Acrylic - Black
Black Gesso
White Gesso
Old, Unwanted Coarse Glitter
(or you could use coarse sand, or a ready mixed Texture Sand Paste)
Acrylic Paint (various brands)
Archival Ink (Tree Branch & Jet Black)
Mod Podge Gloss
Mod Podge Matte
Ranger Crackle Accents
Collall Silicone Glue Gel

OTHER PRODUCTS USED
8x8 Graphic 45 Paper Pad - "Artisan Style"

All products above available from That Craft Place.

ANYTHING ELSE
Brown Garden Twine
A vintage piece of gold patterned paper from my stash
   
- - - - - - - - - - - - - - -
    
Tutorial

This is the fabulous MDF freestanding flowerpots before I got my hands on it!  It is of course available from That Craft Place!

I didn't pre-gesso this project because much of it was going to be covered in patterned paper.


STARTING WITH THE FLOWERPOTS: 
1...  Mix together black gesso and cheap coarse glitter until it is the required consistency 
(see supplies list above for alternatives to glitter).  
TIP: I wanted it to be very "gritty" so added quite a lot of glitter to the gesso!

2...  Apply the mixture to the pots using a stiff brush, adding an extra thick layer to the top edge to form the lip of the pot.
3... Allow to dry thoroughly.


NEXT ONTO THE PAPERS FOR THE LEAVES AND FLOWERS
4... Lay the MDF piece face down on the reverse of your patterned paper and draw round the leaves .
5... Repeat several times with each chosen paper for the flowers.
Tip: I drew round alternate flower petals, choosing 2 papers for each flower for more interest.
 6... Cut paper for the mini tag and glue to each side of the tag.  Sand the paper off the edges to tidy.
7... Cut out all the leaves and flowers, cutting the pieces around 2 to 3mm bigger than the lines.
8... Using a distressing tool, or open edge of scissors, distress around the edges of the leaves (except the bottom edge).
9... Glaze the petal pieces with Mod Podge Matte.
10... Ink the edges of all the pieces with Archival Ink, first with "Tree Branch" then with "Jet Black".


NOW FLIP THE PIECE FACE DOWN
11... Paint the reverse and all the edges of the the piece as well as the bottom strip on the front.  I used black crafters acrylic.
Tip: Avoid the tabs when adding paint, paper or any other medium to MDF pieces.  This allows the pieces to still slot together nicely, otherwise extra bulk can make things a tight fit!


BACK TO THE FRONT, WITH THE FLOWERS FOR NOW:
12... Paint the flower stems and dry before adding black Archival Ink to the edges.
13... Choose more papers and glue to the flowers! We will trim to size and tidy it up at a later stage.
(I just forgot to photograph them before trimming!).

NOW BACK TO THE FLOWERPOTS:
14... Using a dry brush and a tiny amount of white gesso, dry brush over the pots highlighting one side more than the other.


AND BACK UP TO THE FLOWERS!...
15... Trim roughly around the petals.
16... Using sandpaper or a sanding block, sand round the edges of the petals holding the sandpaper at a 45* angle so that the excess paper is smoothed away.
  
NOW TO ADD SOME COLOUR TO THE FLOWERPOTS
17... Dilute some acrylic paint to a wash consistency and brush over the flowerpots.
Tip: I chose 3 different colours as closely matched to colours in the papers as possible.
18... Using a sponge applicator, redefine some of the raised areas with black Archival Ink.


NOW TO ADD THE PAPERS TO THE MDF!
19... Glue the leaves to the piece, making sure it is stuck down all the way to the edges.
20... Using a bone folder, shape the petal pieces.
21... Add glue to the back centre only of the petal pieces and attach to the MDF.


NOW FOR THE BASE
22... Paint the reverse and sides of the base with the black acrylic paint. Allow to dry.
23... Add paper to the top of the base piece.
24... Allow to dry before glazing over the top of the paper with Mod Podge.
25... Using a sharp knife, cut away the paper from the tab slots.
  
      
NEARLY THERE!....
26... Using dies, cut circles to fit the centre of the flowers.
Tip: If you don't have any suitable dies, simply draw around bottle tops or similar, and cut out!


AND NOW FOR THE FINISHING TOUCHES
27... Again using a distressing tool or scissors, distress the edges of the circles.
28... Ink the edges with black Archival Ink.
29... Apply a thick layer of Crackle Accents to each circle.
30... Once completely dry, attach to the centre of each flower with silicone glue gel.
Tip: Add a generous blob of glue gel to give dimension.

31... Ink around the base piece with black Archival Ink.

32... Apply glue to the flowerpot piece, between the tabs, and firmly press together into the holes in the base piece.
33... Hold in place until a bond has formed. Allow to dry firm before continuing.

34... Attach the mini tag around the centre flower with twine, tying in a knot at the back.

35... Add the "Believe" sentiment.

ENJOY!


- - - - - - - - - - - - - - -
          
Links you need to know 
    
That Craft Place Website
     
- - - - - - - - - - - - - - -

Don't forget our latest challenge is HERE

xxSAMxx

Tutorial Thursday #1 - Freestanding Flowerpots

Hello!  I'm here with Tutorial Thursday.
         
I would like to share with you how to make this project.
    
  FREESTANDING FLOWERPOTS

        
I would love you to head over to the That Craft Place blog HERE to see the tutorial.


Please do let me know what you think!
     
xxSAMxx


Sunday 17 January 2016

Freestanding Flowerpots - That Craft Place Challenge

It is time for a new challenge over at the
    
That Craft Place challenge blog

This fortnight (as always) the theme is

ANYTHING GOES


The prize is 5 digistamps from the That Craft Place Etsy store!
   
- - - - - - - - - - - - - - -
  
POP BACK THIS THURSDAY FOR A BRAND NEW FEATURE ON MY BLOG ...

TUTORIAL THURSDAY!

I'll be sharing with you a full photo tutorial on how to make this fabulous project.

- - - - - - - - - - - - - - -
I used the following materials:
  
THAT CRAFT PLACE MDF / GREYBOARD
MDF Freestanding Flowerpots
MDF Mini Tag
MDF Words - "Believe"

MEDIUMS USED
DecoArt Crafters Acrylic - Black
Black Gesso
White Gesso
Old, Unwanted Coarse Glitter
(or you could use coarse sand, or a ready mixed Texture Sand Paste)
Acrylic Paint (various brands)
Archival Ink (Tree Branch & Jet Black)
Mod Podge Gloss
Mod Podge Matte
Ranger Crackle Accents

OTHER PRODUCTS USED
8x8 Graphic 45 - "Artisan Style"

All products above available from That Craft Place.

ANYTHING ELSE
Brown Garden Twine
A vintage piece of gold patterned paper from my stash
     
- - - - - - - - - - - - - - -
  
Here are some more photos:


- - - - - - - - - - - - - - -
- - - - - - - - - - - - - - -
 
Thank you as always for popping by, myself and the other That Craft Place DT very much look forward to seeing your creations!
     
xxSAMxx
   
Please can I enter this project into the following challenge(s):
   

Dream - Art Journal Page

Hey folks! Another journal page to share with you today, this time using the digi stamp Tammy Buccaneer by Saturated Canary.

I coloured her up waaaay back in June 2014 as a practice image for a birthday card (the final version on the card found HERE).

     
Dream - an art journal page by The Crippled Crafter
 
I made full use of That Craft Place's fab MDF and Greyboard on this page, showing how versatile they really are!  I also had fun with several of That Craft Place's Stencils.
  
- - - - - - - - - - - - - - -
   
I used the following materials:
  
THAT CRAFT PLACE MDF / GREYBOARD
Greyboard Hinge
MDF "Dream"

MEDIUMS USED
White Gesso
DoCrafts Spritzing Inks
(Ocean Blue, Hematite, Gold & Cardinal Red)
Pebeo Modeling Paste
Archival Ink (Jet Black)
Stickles (Yellow)

OTHER PRODUCTS USED
Stencils by That Craft Place
Lace trims

IMAGE
Printed onto That Craft Place Super Smooth card and coloured with Promarkers.

All products above available from That Craft Place.

- - - - - - - - - - - - - - -
  
Here are some more photos

Dream - an art journal page by The Crippled Crafter

Dream - an art journal page by The Crippled Crafter
   
      
- - - - - - - - - - - - - - -

Thank you as always for popping by.
    
xxSAMxx


Please can I enter this project into the following challenge(s):
     

Wednesday 13 January 2016

2016 - The year for Self-Development

In this post I share with you my journal page inspired by Kate Crane's Wanderlust class by Everything Art that I was bought for Christmas! 

I've also incorporated the Week 1 Journal Prompt from Journal52 - "Word Of The Year"
 
2016 is the year for embracing my quirks! Not just self-acceptance but also self-development.
     
Kate Crane inspired Art Journal Page by The Crippled Crafter, Cosmic Shimmer, Wanderlust
Kate Crane inspired Art Journal Page
     
- - - - - - - - - - - - - - -
   
I used the following materials:
 
MEDIUMS USED
White Gesso
Acrylic Paint
Cosmic Shimmer Paint
Pebeo Modeling Paste
Spectrum Noir Pencils
Derwent Academy Colour Pencils
Posca Paint Markers
DecoArt Media Misters
Archival Ink

OTHER PRODUCTS USED
Dylusions A4 Art Journal
Tim Holtz Graph stamp
Dovecraft Mini Alphabet stamps
Stencils by That Craft Place

ANYTHING ELSE
Bottle/Pen Lids
Old Credit Card
Palette Knife
Paint Brushes
Sponge Dauber
     
- - - - - - - - - - - - - - -
  
Here are some more photos

Kate Crane inspired Art Journal Page by The Crippled Crafter, Cosmic Shimmer, Wanderlust
This shot shows the lush Cosmic Shimmer paints at their best!

Kate Crane inspired Art Journal Page by The Crippled Crafter, Cosmic Shimmer, Wanderlust
This might just be my new favourite colour combo!

Kate Crane inspired Art Journal Page by The Crippled Crafter, Cosmic Shimmer, Wanderlust
Mini Alphabet stamps by Dovecraft
     
Both the tiny squares and the stencil style letters are from stencils by That Craft Place!
          
Kate Crane inspired Art Journal Page by The Crippled Crafter, Cosmic Shimmer, Wanderlust
 
     - - - - - - - - - - - - - - -
    
Thank you as always for popping by, and just a shout out to my favourite craft shop, That Craft Place! You can but online from them and they really do have everything!!!!
    
xxSAMxx
   
Please can I enter this project into the following challenge(s):
     

Sunday 3 January 2016

Art Journal self-therapy! - That Craft Place

Good morning!  It is time for a new challenge over at the
That Craft Place challenge blog

This fortnight (and for all challenges from now on) the theme is

ANYTHING GOES

The prize is 5 digistamps from the That Craft Place Etsy store!
 
"Friendship" - An Art Journal Page by TheCrippledCrafter
      
I started this page on the 21st after finding out my amazingly awesome friend Erin (I say my best friend!), was leaving the UK to return to Canada.  By the time this post is published, my besty will have been back home with her parents for over a week and hopefully settled!

Her favourite colours are blue, purple and green so I tried to incorporate these in my page.

- - - - - - - - - - - - - - -

I used the following materials:
 
White Gesso
Acrylic paint
Pastel Sticks
Derwent Academy Watercolour Pencils
Inktense Pencil (Black)
Patterned paper
Archival Ink (Tree Branch, Watering Can, Jet Black)
Tim Holtz Graph & Croc stamps
Molotow Paint Marker (Black)
Posca Paint Marker (Black & White)


All products above available from That Craft Place.
   
- - - - - - - - - - - - - - -

Process Notes:

I created this journal page in my handmade art journal.  The left page is a sewn pocket into which the extra panel slides.

I morosely created the background with purply blue, green and turquoise acrylic paint but was not entirely happy with the results so I rubbed it back just a little with baby wipes before going back over with pastels. I loved that effect!  I used a cheap hairspray as a fixative.

It is the first time I've played with pastels. I bought them in preparation for the Wanderlust course by Everything Art.  I'm so excited for the course to get started!

I cut the whimsical houses from patterned paper that I dug out of my overflowing scrap box! I am viewing to use more scraps during 2016!!
 
- - - - - - - - - - - - - - -
  
Here are some more photos:


- - - - - - - - - - - - - - -
- - - - - - - - - - - - - - -

Thank you as always for popping by, myself and the other That Craft Place DT very much look forward to seeing your creations!
     
xxSAMxx
   
Please can I enter this project into the following challenge(s):
   

Friday 1 January 2016

MDF Desk Tidy

Firstly, HAPPY NEW YEAR! I confess that whilst I was awake late as is the norm for me, midnight came and went without me noticing! I do live the highlife don't I?!

Just a quick post today to share with you this remote control holder. It is so versatile, in fact I've made this one for my young niece to keep all her pens and bits in on her desk!

MDF Remote Control Holder by That Craft Place, decorated by TheCrippledCrafter
MDF Remote Control Holder by That Craft Place, decorated by TheCrippledCrafter 
    
I used the following materials:
  
THAT CRAFT PLACE MDF / GREYBOARD
MDF Remote Control Holder

MEDIUMS USED
White Gesso
Mod Podge Matte

OTHER PRODUCTS USED
Patterned Papers

All products above available from That Craft Place.
 
All the best for 2016! Wanderlust starts today and I'm so excited!

xxSAMxx