I hope you are enjoying the Crafter's Companion Blog Hop! Today is the last day to join in the Hop for the mental health charity MIND .
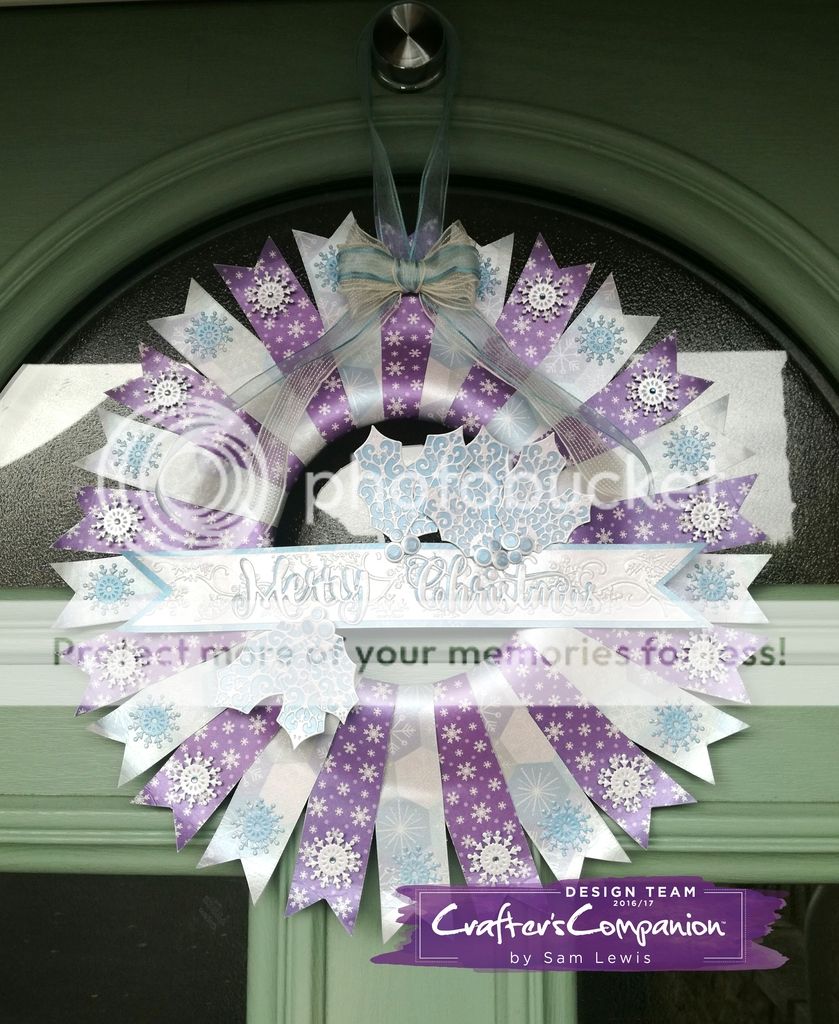
Join me as I share with you how I made the Christmas Wreath that was featured in the Blog Hop.
Gemini Die Cutting Machine
A3 Centura Pearl Cardstock - "Softly Falling"
A3 Centura Pearl Cardstock - "Snow White Hint of Silver"
Sara's Contemporary Christmas - Seasonal Sentiment Die
Sara's Contemporary Christmas - Decorative Holly Die
Crafter's Inspiration Magazine - Issue 12 - Snowflake Die & Border Embossing Folder
Collall Tacky Glue
All products above available from
CRAFTER'S COMPANION
OTHER MATERIALS
Paper Plate
Wired Ribbon
Gems
- - - - - - - - - - - - - - - - - -
STEP #1:
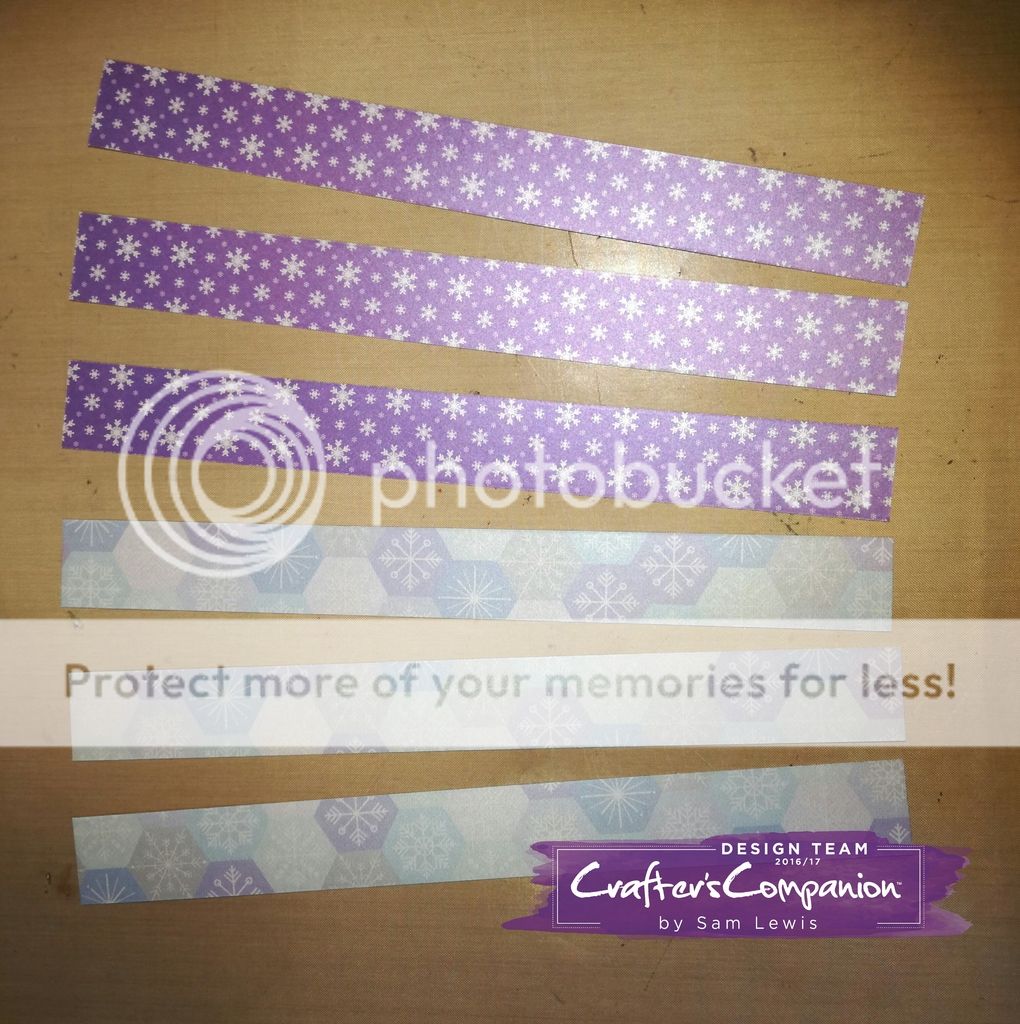
Using 2 sheets of Softly Falling Card, cut both sheets into 1¼" wide strips
(accross the short edge of the sheet so that each strip measures 1¼" X 11¾")
STEP #2:
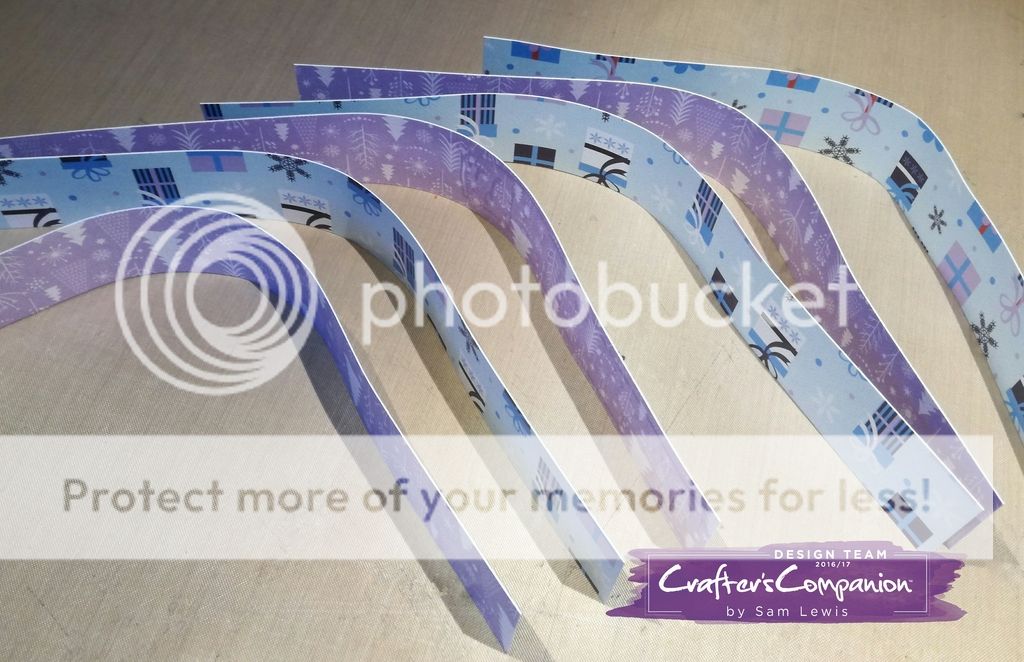
Using a bone folder, gently soften the centre of each strip
(to make bending them in half a curve rather that harsh fold)
STEP #3:
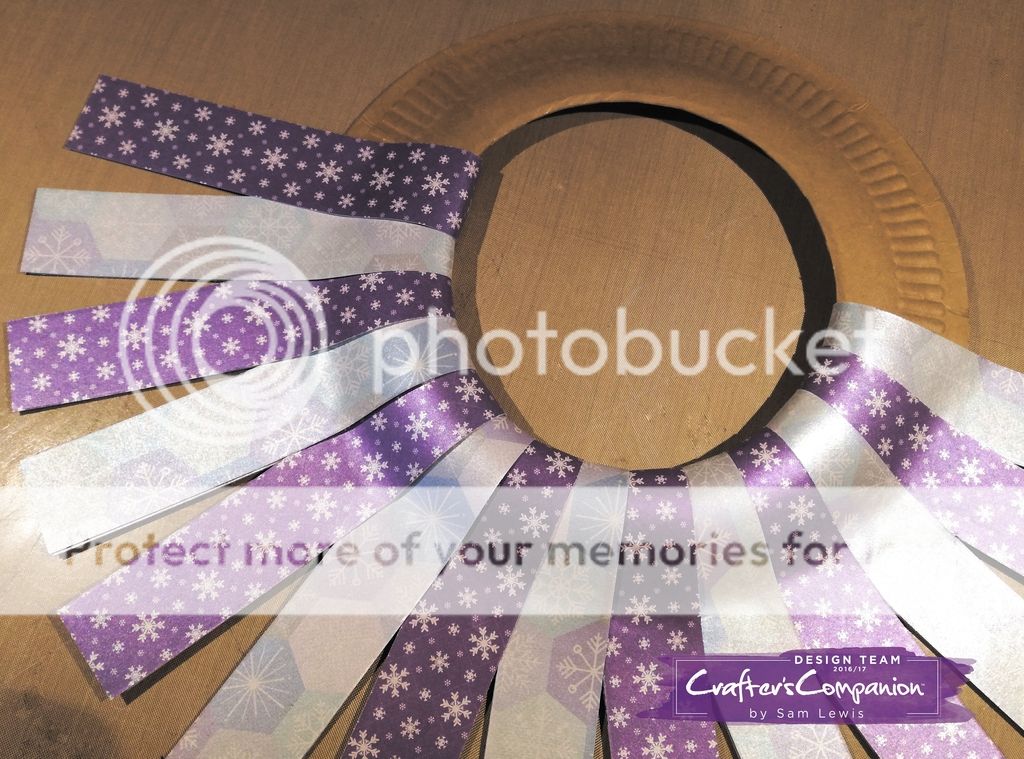
Cut the centre out of the paper plate
STEP #4:
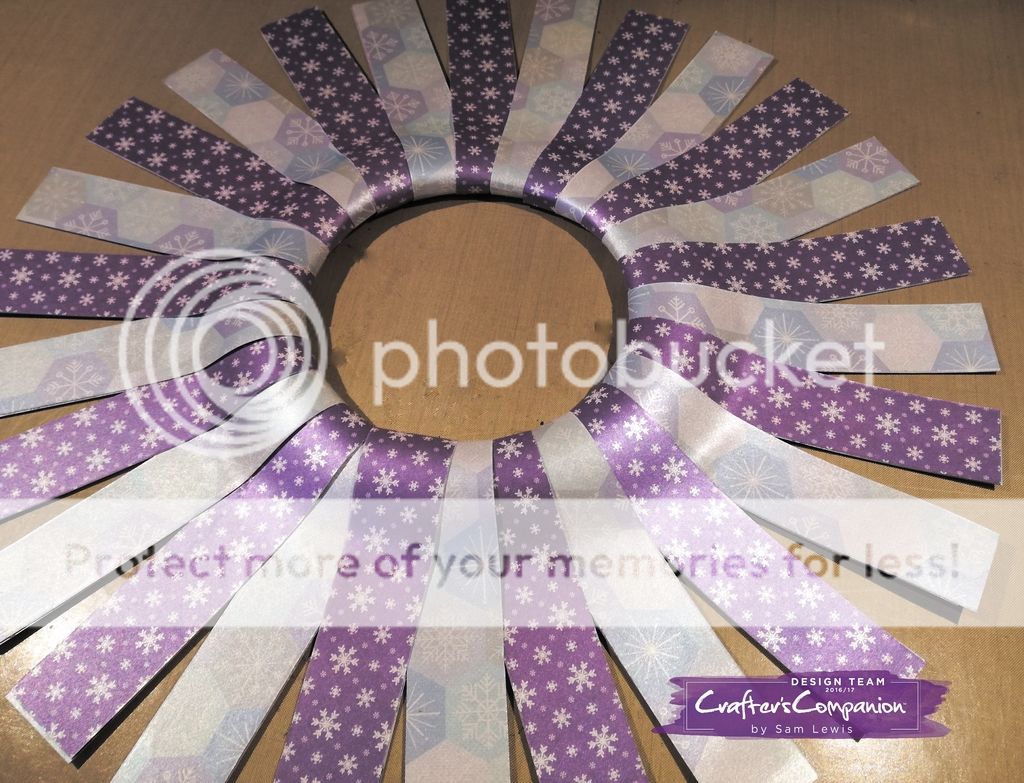
Bend each strip through the hole in the plate and glue with Collall Tacky Glue
(Overlap each strip over the previous one)
Bend each strip through the hole in the plate and glue with Collall Tacky Glue
(Overlap each strip over the previous one)
STEP #5:
Continue until all the plate is covered
(don't worry about tucking the last strip under the first one as we'll cover this join later)
STEP #6:
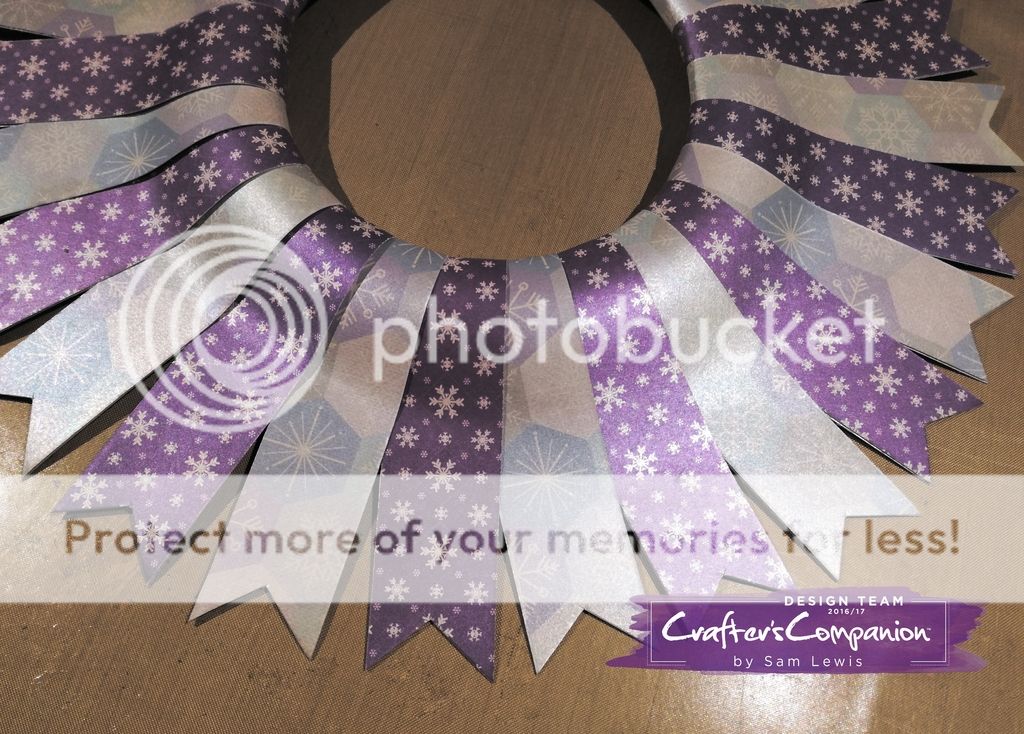
Cut a triangle wedge out of each strip to make a banner shape
(the length at which you keep each strip is up to you, mine measures approximately 4½" from centre to tip making for an overall wreath size of 13½")
STEP #7:
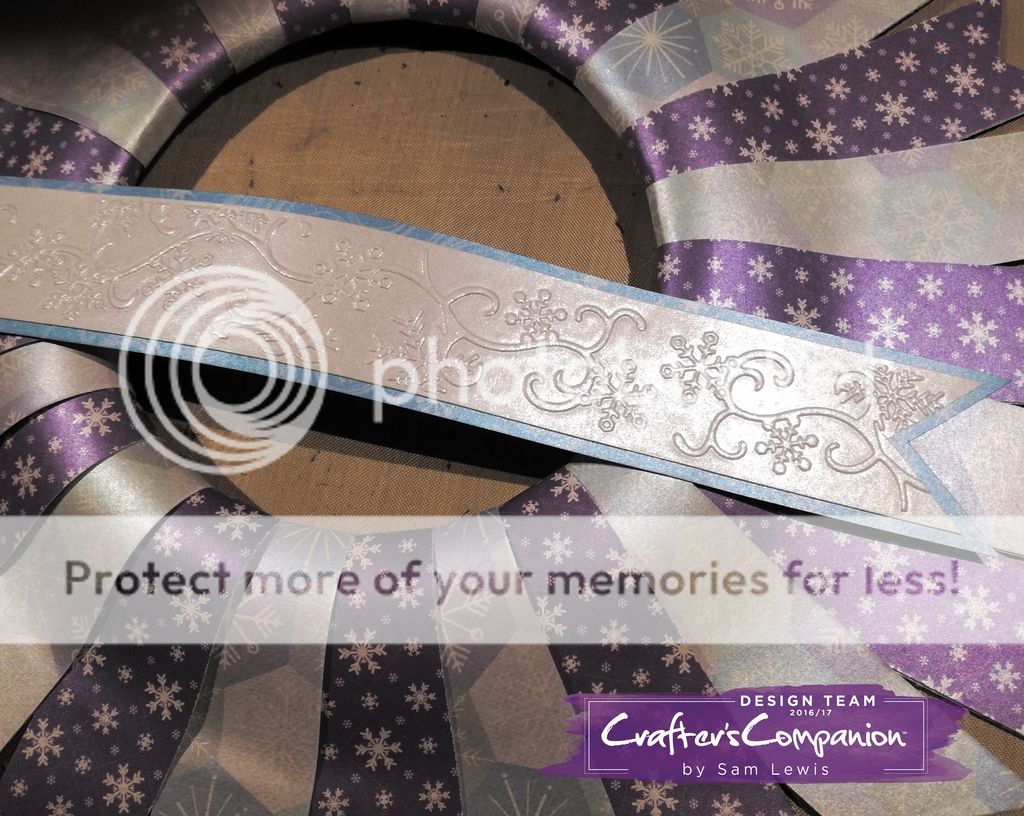
Using the border embossing folder from Crafter's Inspiration 12, emboss a 2" strip of Centura Pearl Cardstock (Snow White Hint of Silver)
(once you've embossed the cardstock once, flip the card in the embossing folder to emboss the other end of the strip)
STEP #8:
Trim to 1¼" wide and trim a triangle from each end leaving a banner shape
(overall banner length of 10½")
Trim to 1¼" wide and trim a triangle from each end leaving a banner shape
(overall banner length of 10½")
STEP #9:
Mount the embossing banner onto blue Softly Falling cardstock and trim to leave a ⅛" border
STEP #10:
Gently shape the banner and attach to the wreath with hot glue
(position one end of the banner to cover the last banner that we positioned in Step #5)
Mount the embossing banner onto blue Softly Falling cardstock and trim to leave a ⅛" border
STEP #10:
Gently shape the banner and attach to the wreath with hot glue
(position one end of the banner to cover the last banner that we positioned in Step #5)
STEP #11:
DIE CUT THE FOLLOWING ELEMENTS:
Blue Softly Falling Cardstock:
13 X small snowflakes from Crafter's Inspiration 12
1 X Merry Christmas from "Seasonal Sentiment"
8 medium & 4 small holly berries from "Decorative Holly"
13 X small snowflakes from Crafter's Inspiration 12
1 X Merry Christmas from "Seasonal Sentiment"
3 X sets of holly leaves from "Decorative Holly" (9 leaves in total)
8 large & 4 medium holly berries from "Decorative Holly"
STEP #12:
USE THOSE DIE CUTS! :
Holly Leaves:
Apply tacky glue to the back of the holly leaves and apply to a piece of blue cardstock.
Once dry, fussy cut out the leaves.
Put to one side for now.
USE THOSE DIE CUTS! :
Snowflakes:
Attach a foam dot to the back of each white snowflake.
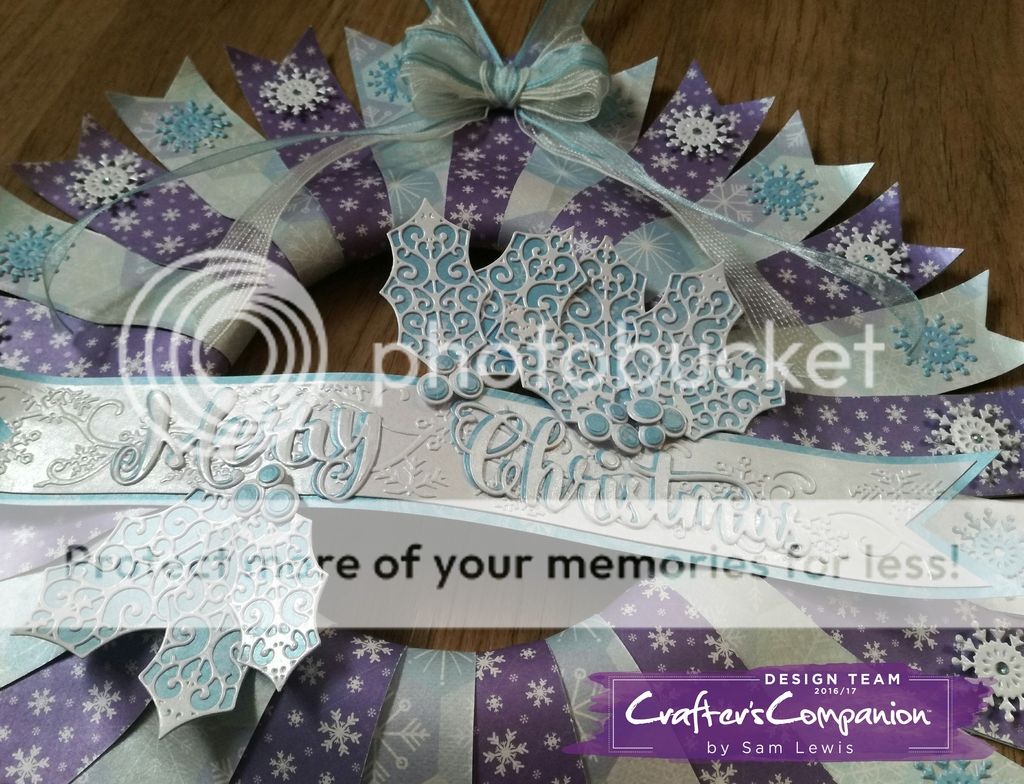
Using tacky glue or the foam dots, attach all the snowflakes around the edge of the wreath, alternating white and blue.
(decide to which banner you are going to attach the bow/hanging loop and don't put a snowflake there)
Attach a foam dot to the back of each white snowflake.
Using tacky glue or the foam dots, attach all the snowflakes around the edge of the wreath, alternating white and blue.
(decide to which banner you are going to attach the bow/hanging loop and don't put a snowflake there)
Merry Christmas sentiment:
Apply tacky glue to the back of the white sentiment and apply to the blue piece, offsetting slightly.
Apply more tacky glue to the back of the blue piece and attach to the large banner on the wreath.
Apply tacky glue to the back of the white sentiment and apply to the blue piece, offsetting slightly.
Apply more tacky glue to the back of the blue piece and attach to the large banner on the wreath.
Apply tacky glue to the back of the holly leaves and apply to a piece of blue cardstock.
Once dry, fussy cut out the leaves.
Put to one side for now.
Holly Berries:
Apply tacky glue to the back of the blue berries and attach to the larger white berries.
Use hot glue to construct the holly bundles, three bundles with 2 leaves and 3 berries per bundle, plus one bundle with 3 leaves and 3 berries.
Using more hot glue, attach the holly bundles to the wreath in a random way.
STEP #13:
Grab the wired ribbon and make a triple bow. Leave the tails long.
Use the bow maker on the Ultimte Pro if you have one; it makes bow making much easier!
(wired ribbon will help the hanging loop and bow tails to hang better, but normal ribbon could certainly be used in it's place)
Grab the wired ribbon and make a triple bow. Leave the tails long.
Use the bow maker on the Ultimte Pro if you have one; it makes bow making much easier!
(wired ribbon will help the hanging loop and bow tails to hang better, but normal ribbon could certainly be used in it's place)
STEP #14:
Cut more wired ribbon for the hanging loop.
Use hot glue to attach the bow to the wreath, catching the hanging loop between the wreath and the bow.
Cut more wired ribbon for the hanging loop.
Use hot glue to attach the bow to the wreath, catching the hanging loop between the wreath and the bow.
- - - - - - - - - - - - - - -
If you make a wreath using my tutorial, why not tag me on social media to show me what you've made?! Find my social media links in the side bar and use the hashtag #thecrippledcrafter
If you make a wreath using my tutorial, why not tag me on social media to show me what you've made?! Find my social media links in the side bar and use the hashtag #thecrippledcrafter
Thank you as always for popping by.
xxSAMxx

No comments:
Post a Comment
I really appreciate the time taken to read my posts and leave a message. It means a lot to me.
Thank you,
xxSAMxx