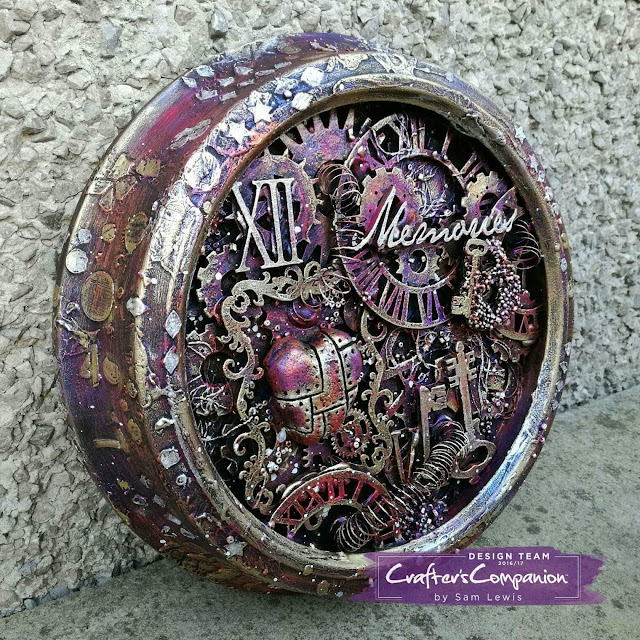
Today I'd like to share a project made featuring the delicious Pebeo products that Crafter's Companion stock!
Some time ago our living room clock stopped working so I stashed it away to use for a project at some point. I used the clock for this project in conjunction with laser cut shapes and found objects all based around the theme of time and memories.
- - - - - - - - - - - - - - -
Some time ago our living room clock stopped working so I stashed it away to use for a project at some point. I used the clock for this project in conjunction with laser cut shapes and found objects all based around the theme of time and memories.
- - - - - - - - - - - - - - -
I used the following materials:
Pebeo Studio Acrylics - Dyna Paint SET 2 - 353 Orange Yellow, 354 Red Blue & 356 Violet Blue
Pebeo Studio Acrylics - Black Gesso
Pebeo Gilding Wax - Silver
All products above available from CRAFTER'S COMPANION .
OTHER MATERIALS
Recycled clock
MDF & Greyboard shapes
Beads
Craft wire
Texture paste
Air drying clay
All products above available from CRAFTER'S COMPANION .
OTHER MATERIALS
Recycled clock
MDF & Greyboard shapes
Beads
Craft wire
Texture paste
Air drying clay
- - - - - - - - - - - - - - -
HERE'S HOW TO MAKE A PIECE LIKE THIS!
STEP #1:
After removing the clock mechanism, apply 2 coats of white gesso.
STEP #2:
Add stenciling to the outside of the clock frame.
STEP #3:
Apply a coat of black gesso before continuing.
STEP #4:
Lay all the lasercut pieces and found objects into the frame and decide on the final layout.
STEP #5:
Once happy with the layout, remove all the pieces and glue into place using hot glue.
(I find it helpful to take a quick photo at this point, to help remember what went where!)
STEP #6:
Cover everything with 2 or 3 coats of black gesso.
(be sure to get into all the nooks and crannys, a hog hair brush works best for this)
Cover everything with 2 or 3 coats of black gesso.
(be sure to get into all the nooks and crannys, a hog hair brush works best for this)
STEP #7:
Using a DRY hogs hair fan brush, dry brush the 3 colours of acrylic paint onto your piece.
(take your time and build up gradual colour in layers) (don't be startled by the brightness of these paints, layering them over a black base tones them down whilst allowing their irridescent colour to shine!)
STEP #8:
Grab your gold and silver gilding waxes and using your fingers highlight and define areas of the piece until happy with the final result.
- - - - - - - - - - - - - - -
Thank you as always for popping by! If you make anything using these techniques be sure to share with me on social media using my hashtag #thecrippledcrafter ! My social media links are in the sidebar.
xxSAMxx
xxSAMxx


Wow! This is an amazing piece of art Sam, so many details and intricate elements, I love it!
ReplyDeleteLorraine