Saturday, 10 December 2016

MEMORIES - Assemblage piece - TUTORIAL

Today I'd like to share a project made featuring the delicious Pebeo products that Crafter's Companion stock!
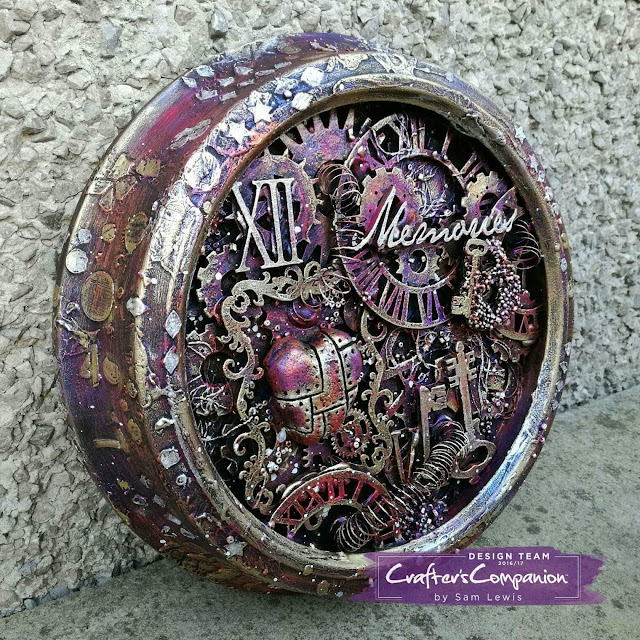
       
MEMORIES - A mixed media assemblage piece by Sam Lewis AKA The Crippled Crafter featuring Crafter's Companion and Pebeo
  
Some time ago our living room clock stopped working so I stashed it away to use for a project at some point.  I used the clock for this project in conjunction with laser cut shapes and found objects all based around the theme of time and memories.
       
- - - - - - - - - - - - - - -
             
I used the following materials:
Pebeo Gilding Wax - Silver
          
All products above available from CRAFTER'S COMPANION .
        
OTHER MATERIALS

Recycled clock
MDF & Greyboard shapes
Beads
Craft wire
Texture paste
Air drying clay
    
- - - - - - - - - - - - - - -
              
HERE'S HOW TO MAKE A PIECE LIKE THIS!
       
 
STEP #1:
After removing the clock mechanism, apply 2 coats of white gesso.
         
STEP #2:
Add stenciling to the outside of the clock frame.
               
STEP #3:

Apply a coat of black gesso before continuing.
                         
   
STEP #4:
Lay all the lasercut pieces and found objects into the frame and decide on the final layout.
        
STEP #5:
Once happy with the layout, remove all the pieces and glue into place using hot glue.
(I find it helpful to take a quick photo at this point, to help remember what went where!)
           
                     
STEP #6:
Cover everything with 2 or 3 coats of black gesso.
(be sure to get into all the nooks and crannys, a hog hair brush works best for this)
                 
               
STEP #7:
Using a DRY hogs hair fan brush, dry brush the 3 colours of acrylic paint onto your piece.
(take your time and build up gradual colour in layers) (don't be startled by the brightness of these paints, layering them over a black base tones them down whilst allowing their irridescent colour to shine!)
           
STEP #8:
Grab your gold and silver gilding waxes and using your fingers highlight and define areas of the piece until happy with the final result. 
             
- - - - - - - - - - - - - - -
                   
                         
Thank you as always for popping by!  If you make anything using these techniques be sure to share with me on social media using my hashtag #thecrippledcrafter ! My social media links are in the sidebar.
       
xxSAMxx

Friday, 9 December 2016

Christmas Banner Wreath - TUTORIAL THURSDAY

I hope you are enjoying the Crafter's Companion Blog Hop! Today is the last day to join in the Hop for the mental health charity MIND .

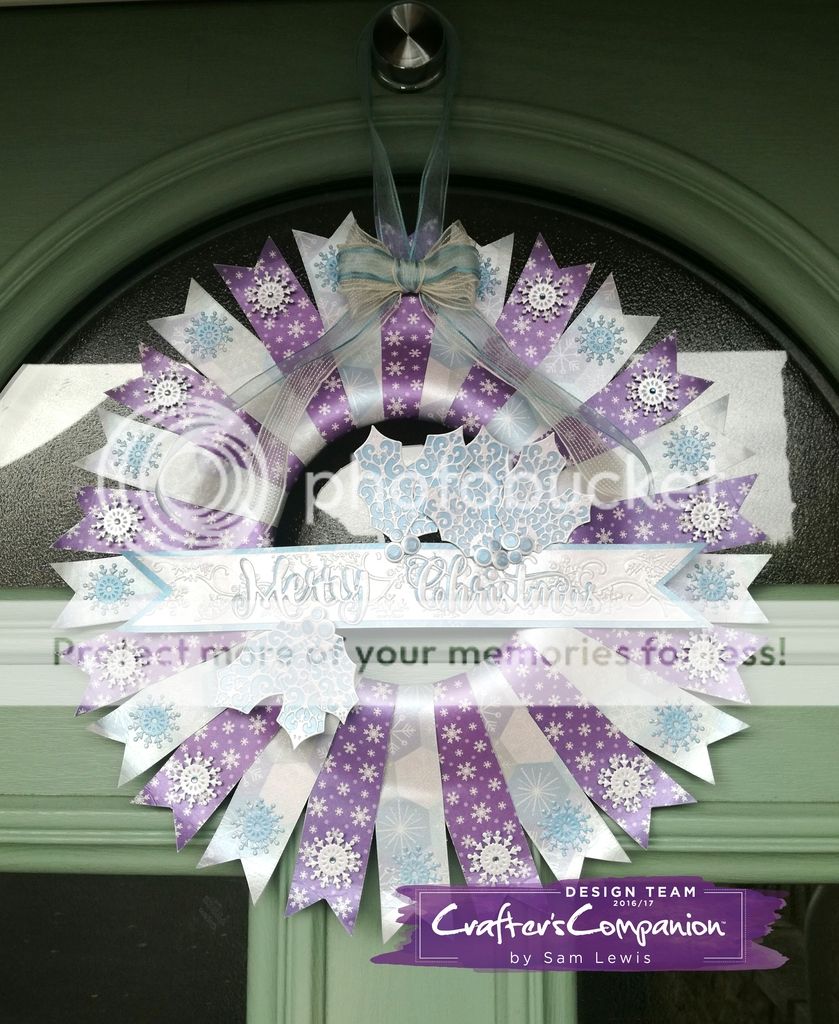
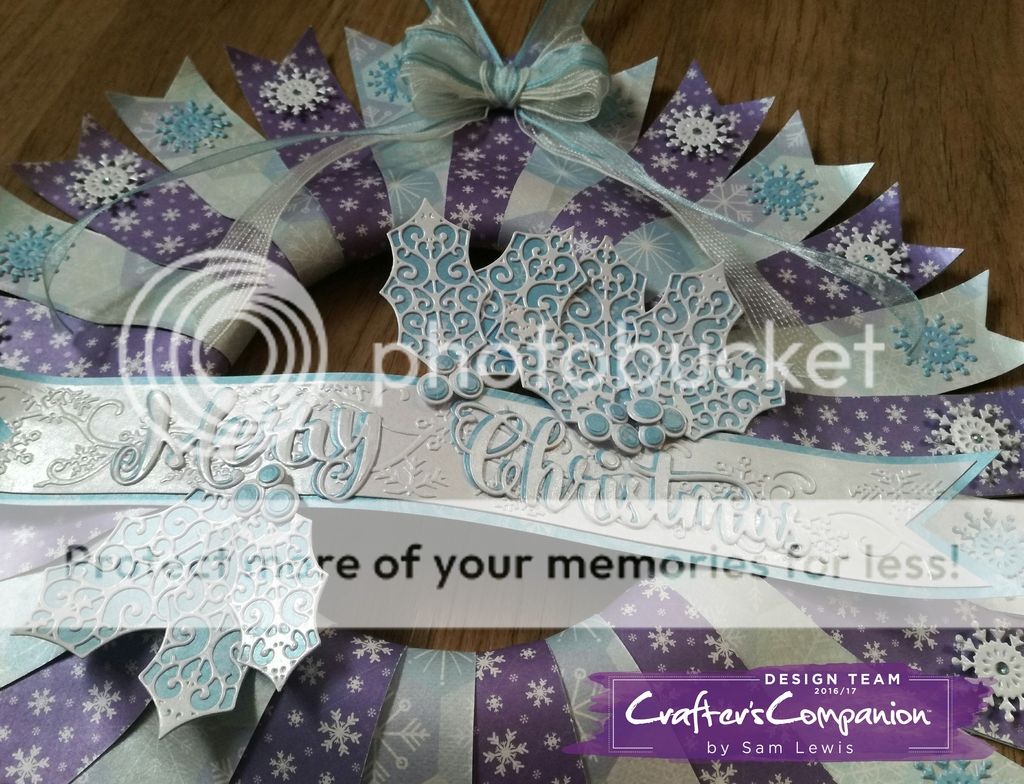
Join me as I share with you how I made the Christmas Wreath that was featured in the Blog Hop.
                             
Christmas Banner Wreath TUTORIAL from Sam Lewis AKA The Crippled Crafter.  Featuring Crafter's Companion!
                       
I used the following materials:
                
Gemini Die Cutting Machine
A3 Centura Pearl Cardstock - "Softly Falling"
A3 Centura Pearl Cardstock - "Snow White Hint of Silver"
Sara's Contemporary Christmas - Seasonal Sentiment Die
  Sara's Contemporary Christmas - Decorative Holly Die
Crafter's Inspiration Magazine - Issue 12 - Snowflake Die & Border Embossing Folder
  Collall Tacky Glue

       
All products above available from 
CRAFTER'S COMPANION
       
OTHER MATERIALS 
Paper Plate
Wired Ribbon
Gems
 
- - - - - - - - - - - - - - - - - -

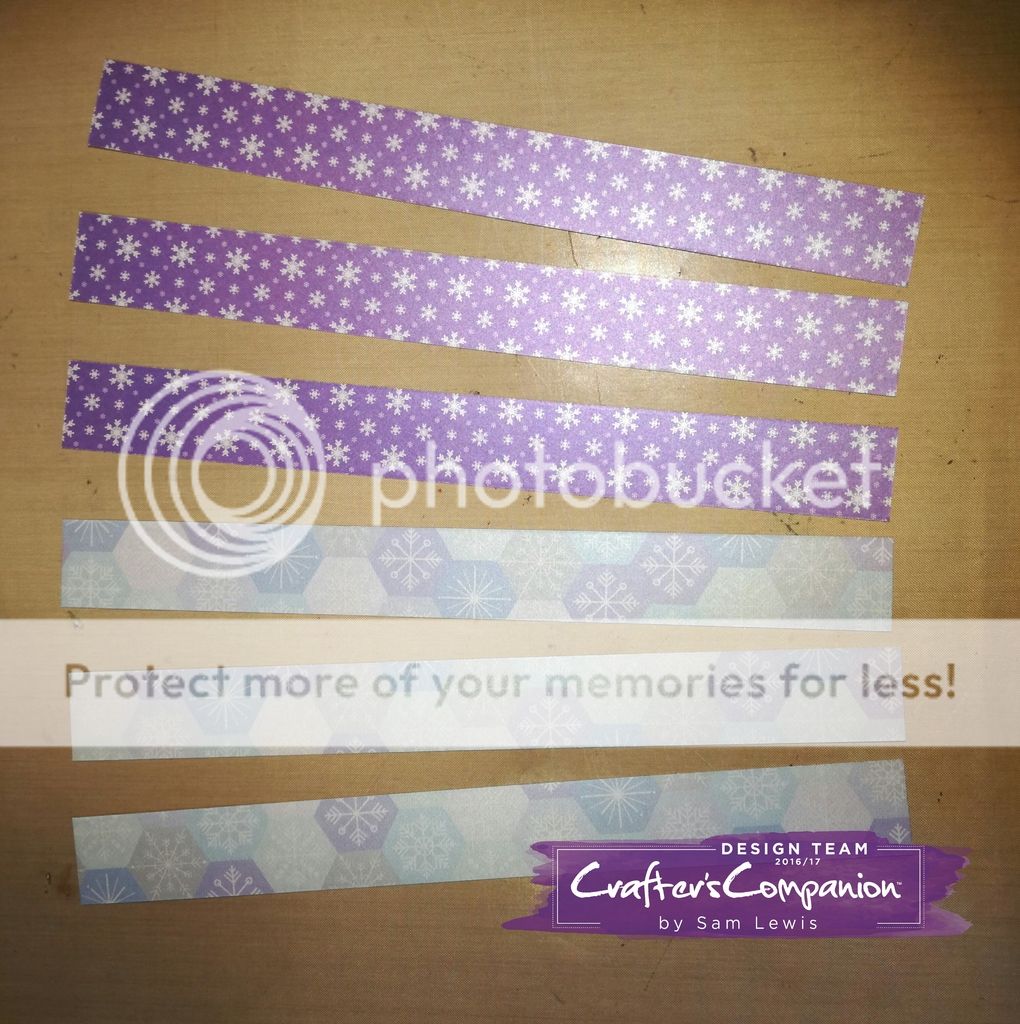
STEP #1:
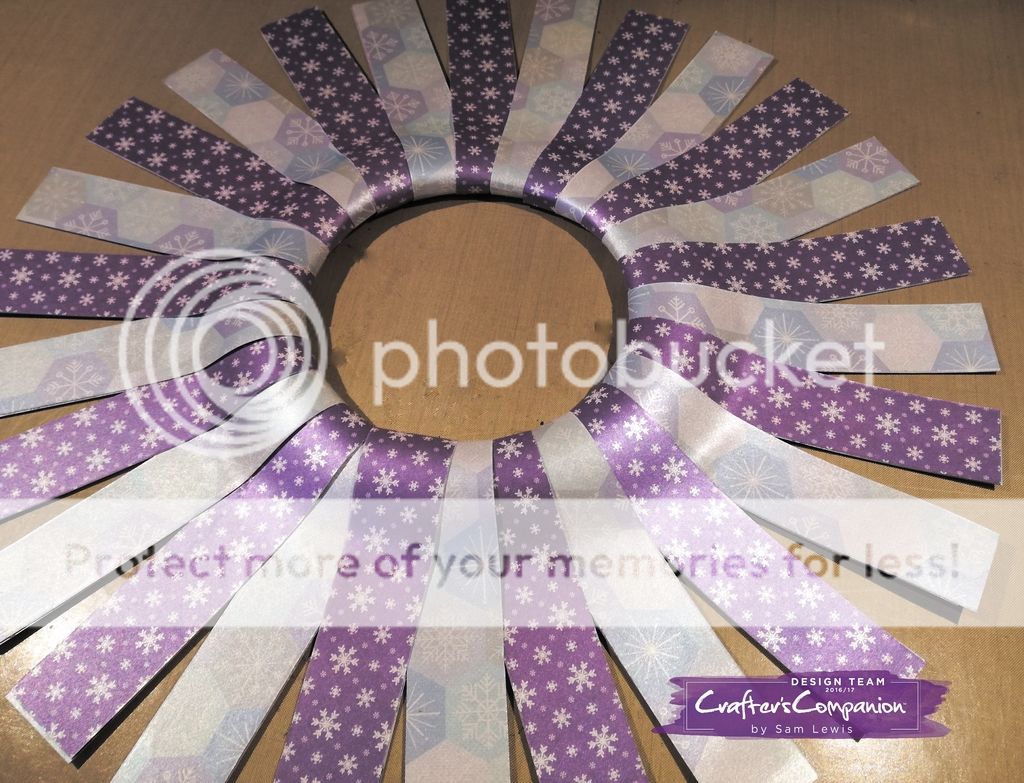
Using 2 sheets of Softly Falling Card, cut both sheets into 1¼" wide strips
(accross the short edge of the sheet so that each strip measures 1¼" X 11¾")
                      
Christmas Banner Wreath TUTORIAL from Sam Lewis AKA The Crippled Crafter.  Featuring Crafter's Companion!
           
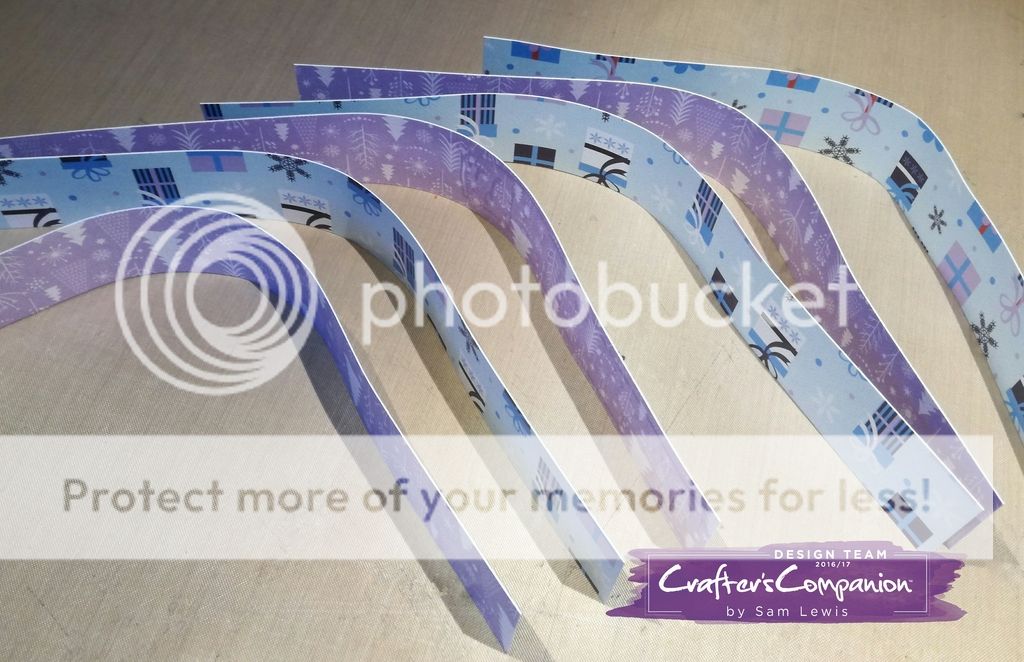
STEP #2:
Using a bone folder, gently soften the centre of each strip
(to make bending them in half a curve rather that harsh fold)
       
Christmas Banner Wreath TUTORIAL from Sam Lewis AKA The Crippled Crafter.  Featuring Crafter's Companion!
                   
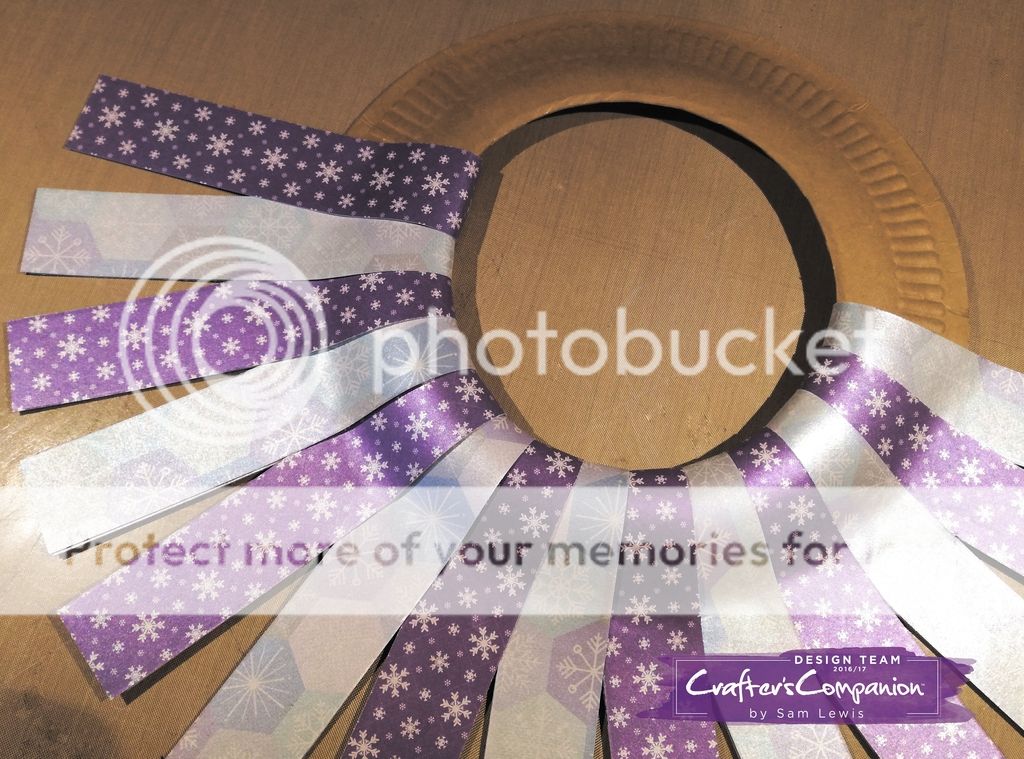
STEP #3:
Cut the centre out of the paper plate
                      
STEP #4:
Bend each strip through the hole in the plate and glue with Collall Tacky Glue
(Overlap each strip over the previous one)

Christmas Banner Wreath TUTORIAL from Sam Lewis AKA The Crippled Crafter.  Featuring Crafter's Companion!
           
STEP #5:
Continue until all the plate is covered
(don't worry about tucking the last strip under the first one as we'll cover this join later)
             
Christmas Banner Wreath TUTORIAL from Sam Lewis AKA The Crippled Crafter.  Featuring Crafter's Companion!
                 
STEP #6:
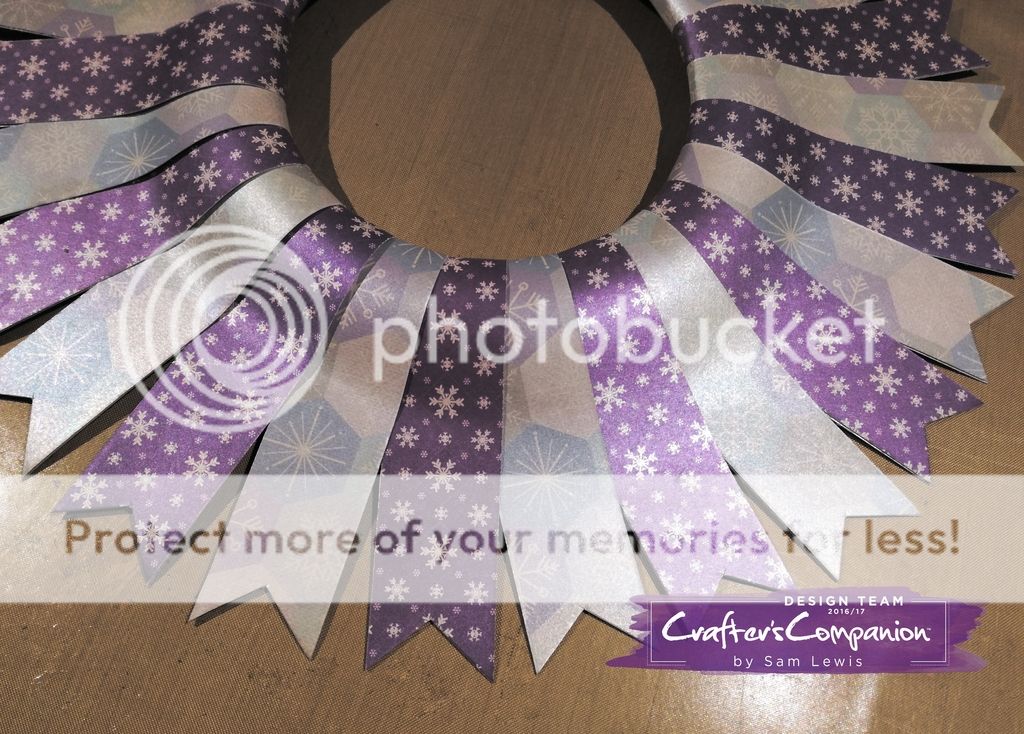
Cut a triangle wedge out of each strip to make a banner shape
(the length at which you keep each strip is up to you, mine measures approximately 4½" from centre to tip making for an overall wreath size of 13½")
           
Christmas Banner Wreath TUTORIAL from Sam Lewis AKA The Crippled Crafter.  Featuring Crafter's Companion!
                 
STEP #7:
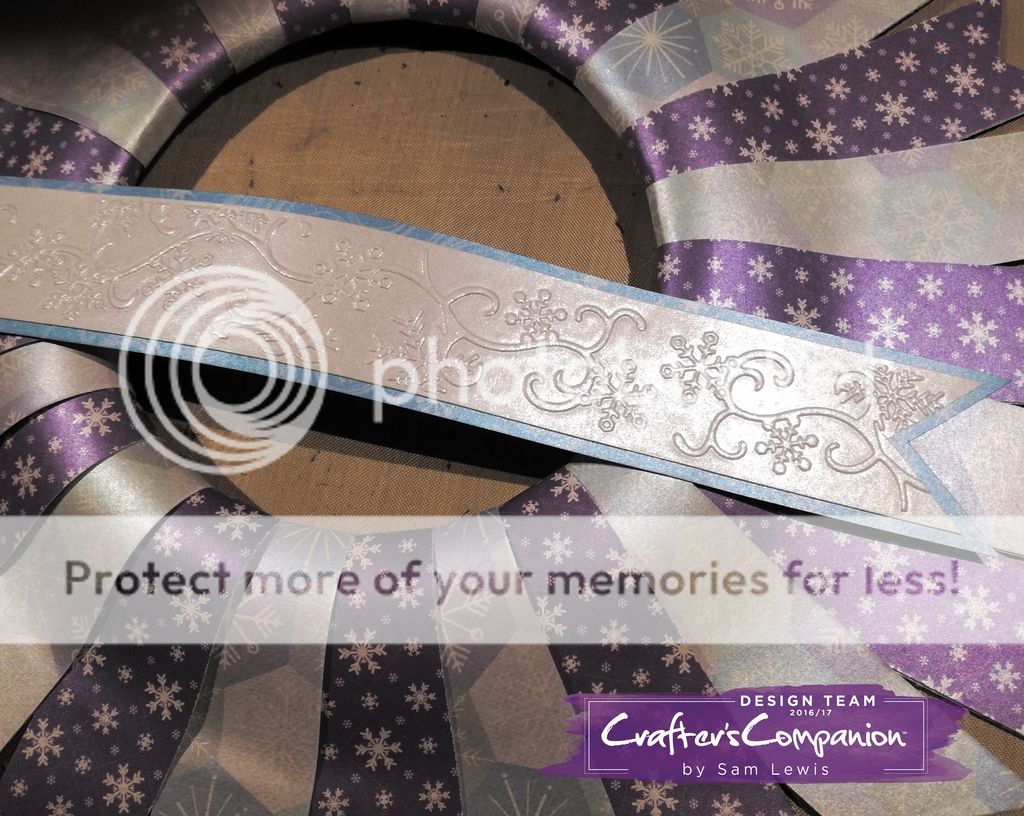
Using the border embossing folder from Crafter's Inspiration 12, emboss a 2" strip of Centura Pearl Cardstock (Snow White Hint of Silver)
(once you've embossed the cardstock once, flip the card in the embossing folder to emboss the other end of the strip)
                  
STEP #8:
Trim to 1¼" wide and trim a triangle from each end leaving a banner shape
(overall banner length of 10½")
        
STEP #9:
Mount the embossing banner onto blue Softly Falling cardstock and trim to leave a ⅛" border
           
STEP #10:
Gently shape the banner and attach to the wreath with hot glue
(position one end of the banner to cover the last banner that we positioned in Step #5)
           
Christmas Banner Wreath TUTORIAL from Sam Lewis AKA The Crippled Crafter.  Featuring Crafter's Companion!
               
STEP #11:
     
DIE CUT THE FOLLOWING ELEMENTS:
                  
Blue Softly Falling Cardstock:
13 X small snowflakes from Crafter's Inspiration 12
1 X Merry Christmas from "Seasonal Sentiment"
8 medium & 4 small holly berries from "Decorative Holly"
           
Centura Pearl Cardstock (Snow White Hint of Silver):
13 X small snowflakes from Crafter's Inspiration 12
1 X Merry Christmas from "Seasonal Sentiment"
3 X sets of holly leaves from "Decorative Holly" (9 leaves in total)
8 large & 4 medium holly berries from "Decorative Holly"
                   
STEP #12:

USE THOSE DIE CUTS! :
                        
Snowflakes:
Attach a foam dot to the back of each white snowflake.
 Using tacky glue or the foam dots, attach all the snowflakes around the edge of the wreath, alternating white and blue.
(decide to which banner you are going to attach the bow/hanging loop and don't put a snowflake there)
               
Merry Christmas sentiment:
Apply tacky glue to the back of the white sentiment and apply to the blue piece, offsetting slightly.
Apply more tacky glue to the back of the blue piece and attach to the large banner on the wreath.
              
Holly Leaves:
Apply tacky glue to the back of the holly leaves and apply to a piece of blue cardstock.
Once dry, fussy cut out the leaves.
Put to one side for now.
            
Holly Berries:
Apply tacky glue to the back of the blue berries and attach to the larger white berries.
Use hot glue to construct the holly bundles, three bundles with 2 leaves and 3 berries per bundle, plus one bundle with 3 leaves and 3 berries.
Using more hot glue, attach the holly bundles to the wreath in a random way.

                           
STEP #13:
Grab the wired ribbon and make a triple bow.  Leave the tails long.
Use the bow maker on the Ultimte Pro if you have one; it makes bow making much easier!
(wired ribbon will help the hanging loop and bow tails to hang better, but normal ribbon could certainly be used in it's place)
         
STEP #14:
Cut more wired ribbon for the hanging loop.
Use hot glue to attach the bow to the wreath, catching the hanging loop between the wreath and the bow.
              
Christmas Banner Wreath TUTORIAL from Sam Lewis AKA The Crippled Crafter.  Featuring Crafter's Companion!
         
- - - - - - - - - - - - - - -
      
If you make a wreath using my tutorial, why not tag me on social media to show me what you've made?! Find my social media links in the side bar and use the hashtag #thecrippledcrafter
                                 
Thank you as always for popping by.
             
xxSAMxx

Monday, 5 December 2016

Mind Crafternoon BLOG HOP


Join Crafter's Companion as we host a Crafternoon Blog Hop for the mental health charity MIND .
        
12pm on Mon 5 Dec 2016 - 5pm on Fri 9 Dec 2016
         
       
Looking after your mental health is incredibly important.  I have struggled with severe depression and anxiety for many years.  Now, for the most part, I am managing well and living a productive life. 
          
The stigma assigned to poor mental health can be as much of an issue as the problems themselves and whilst this is improving, there is still a long way to go.  Social inclusion, understanding and mindfulness are all ways in which we can improve not only our own mental health but that of others in our communities as well (both local and online!).
                       
So, whilst you enjoy this week of crafty fun, please take time to contemplate what you could do to make life a little easier for yourself or others around you.   
           
- - - - - - - - - - - - - - -
       
How the BLOG HOP works:
          
1. Visit each blog in the Hop List
(Enjoy the inspirational projects and tutorials by each blog host!)
              
2. Comment on each blog along the way 
 (Leave your email address so that you can be contacted if you win!)
            
3. Win prizes!  
(The host of each blog will choose 1 commenter each 
to win a product used in their inspiration piece!)
                 
You should have arrived here from Angela's Blog
NEXT STOP: Gemma's Blog
                                       
If you get lost along the way, or come to my blog from anywhere other than Angela's Blog, then jump to the top of the hop list below and make sure you hop to each blog on the list!
               
Christmas Wreath, Blog Hop and Prizes... what more can you want! Featuring Crafter's Companion and Sam Lewis
If you would like to know HOW this festive Christmas wreath was made, come back on Thursday for a full photo tutorial!

- - - - - - - - - - - - - - -
          
I used the following materials:
Christmas Wreath, Blog Hop and Prizes... what more can you want! Featuring Crafter's Companion and Sam Lewis
         
HOP LIST!
                  
Crafter's Companion UK Blog
                           
- - - - - - - - - - - - - - -
                               
Don't forget that Crafter's Companion are hosting the MIND Crafternoon event to fundraise for the charity!


Throughout the week there are also fun events and raffles with amazing prizes happening over on Facebook.
Be sure to Join the Facebook Crafternoon Event!
       
Get your Raffle Tickets HERE!
www.justgiving.com/fundraising/CraftersCompanionUK 
        
- - - - - - - - - - - - - - -
                                 
  Thank you as always for popping by.
             
xxSAMxx

Saturday, 3 December 2016

Anger - Wreck This Journal #1

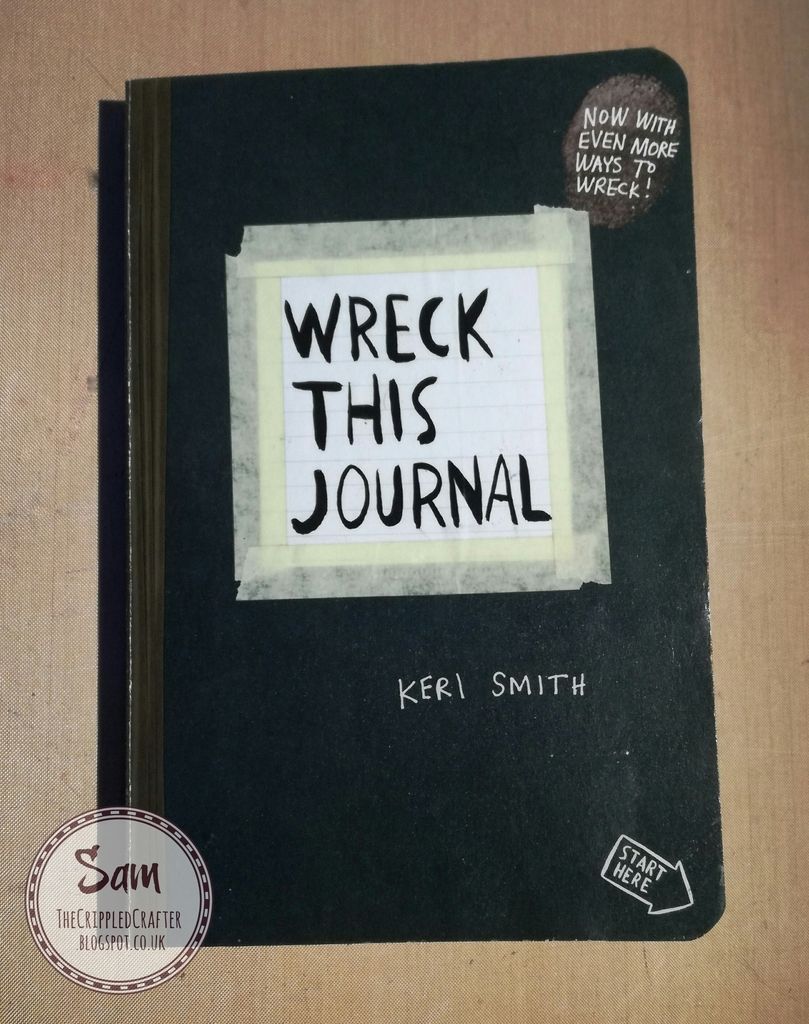
I picked up the Wreck This Journal by Keri Smith from Amazon a few months ago and have only just got round to making a start in it.
      
The paper in this journal is the normal paper that you find in any regular novel.  A couple of light coats of gesso and it's good to go!
                   
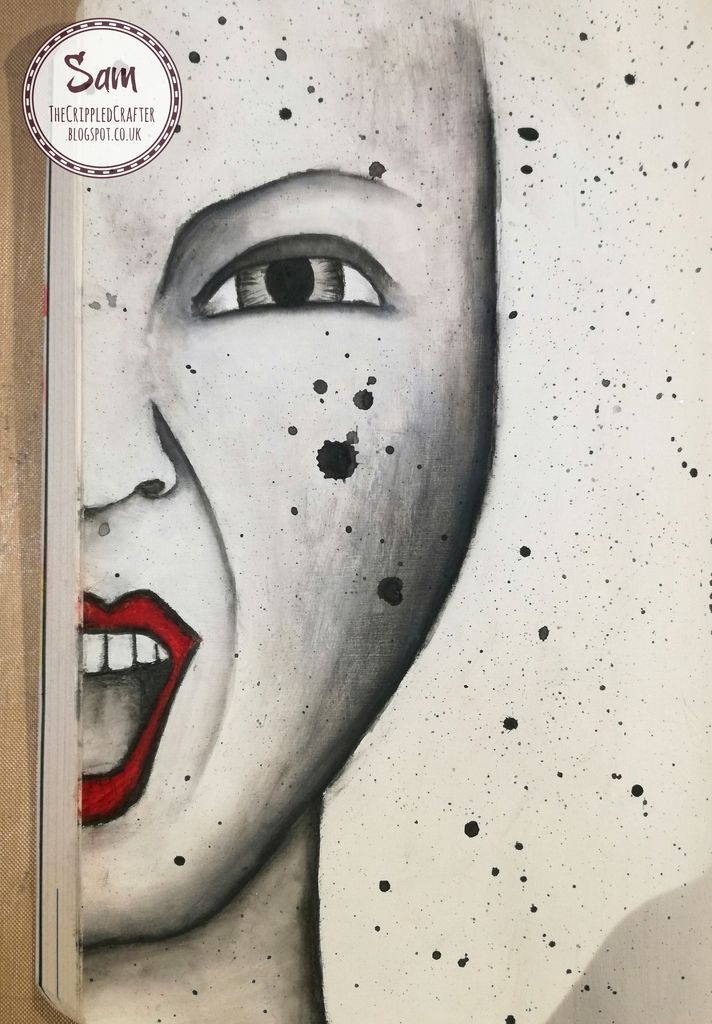
Wreck This Journal page by Sam Lewis using just gesso and 2 simple ingredients!
             
I flipped through and chose a page that appealed to me in that moment.

The instructions for the page I chose read:
"fill in this page when you are really ANGRY"
     
I wasn't actually feeling angry at all when I started this page but felt in a good position to be able to express how I've felt at these times! 
                 
Wreck This Journal page by Sam Lewis using just gesso and 2 simple ingredients!
                          
Wreck This Journal page by Sam Lewis using just gesso and 2 simple ingredients!
                 
MATERIALS LIST:
       
Gesso - White 
Inktense Pencil - Black 
Pental Water Brush
Sharpie - Red
                            
- - - - - - - - - - - - - - -
           
Below are a few more pages I've completed in the journal, not worthy of their own blog posts so....
       
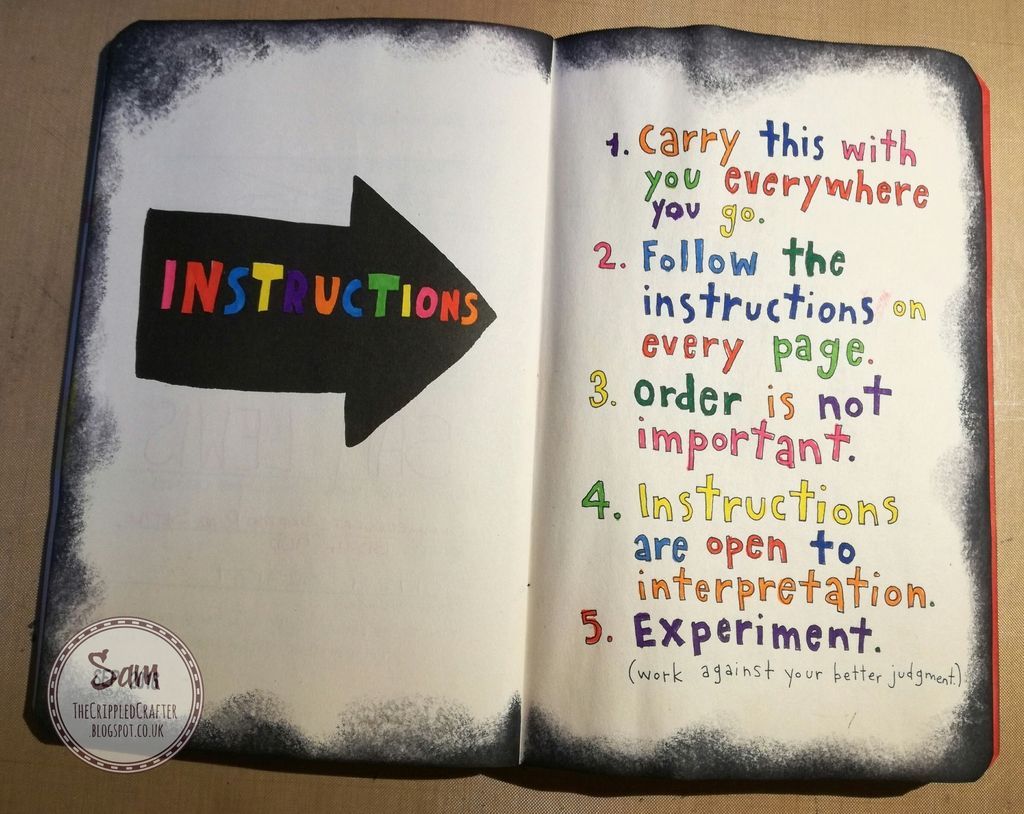
Wreck This Journal - Instructions Page by Sam Lewis
               
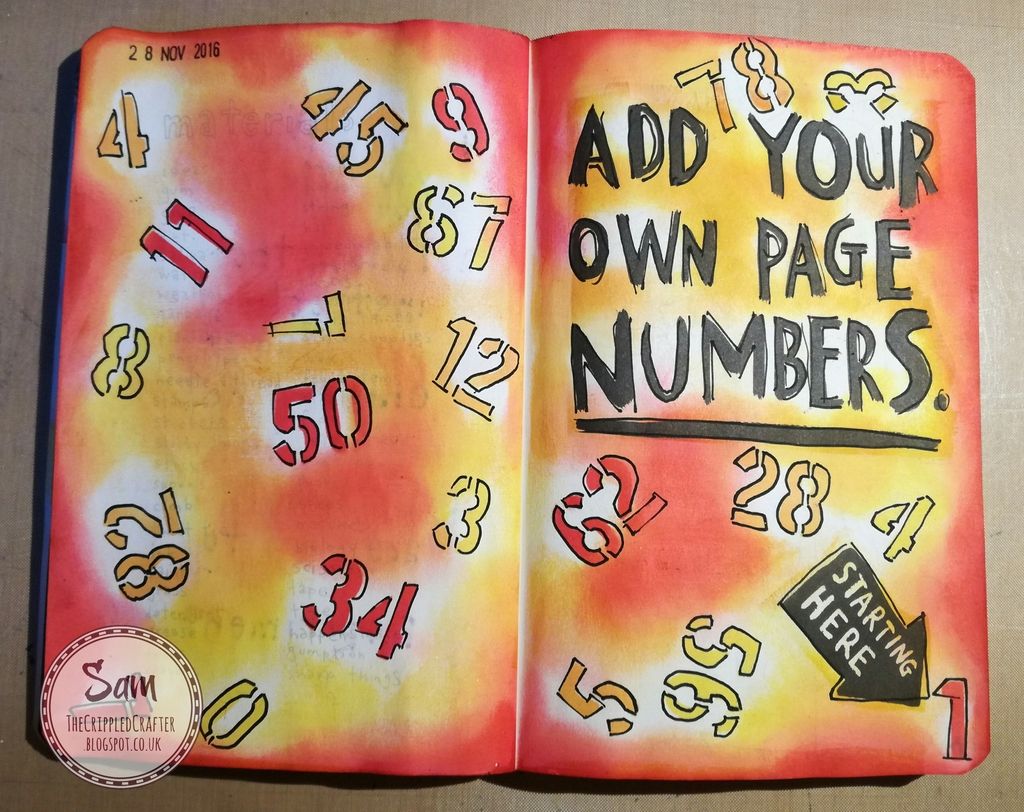
Wreck This Journal - Page Numbers Page by Sam Lewis
                          
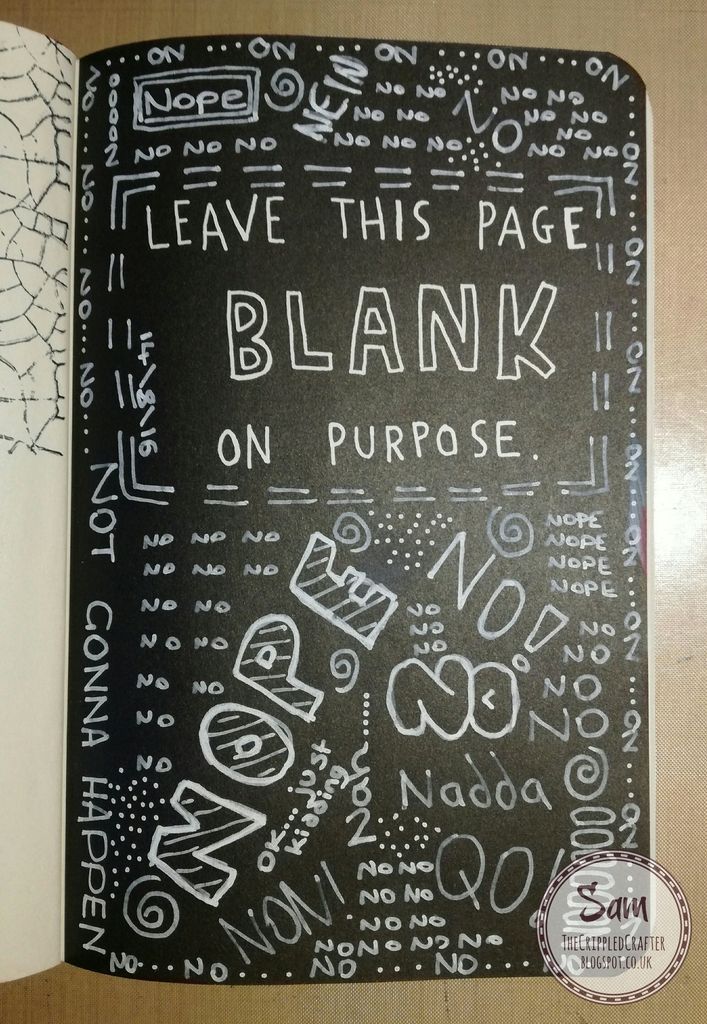
Wreck This Journal - Rebelling Against a Blank Page by Sam Lewis
                       
Thank you as always for popping by.
    
xxSAMxx
   

Monday, 28 November 2016

Framing your colouring projects - With Bloobel Stamps!

Today I show you how to make the most of your colouring projects by displaying them with pride!

Christmas is coming whether you like it or not and the digital stamp featured in this project is "Jolly Santa" by Bloobel Stamps.  I adore Lisa's quirky, fun style. She sure is one talented digital artist!


Sam Lewis shows how to frame those special colouring projects. Featuring Bloobel Stamps and Spectrum Noir Markers.

So, grab your coloured project, a frame (I picked mine up for a bargain at my local charity shop!) and some paint!

After giving the frame a coat of white gesso, paint it with red acrylic paint.  Then dry brush white gesso over the raised areas.

It really is THAT simple!

- - - - - - - - - - - - - - -
    
I used the following materials:
                 
"Jolly Santa" by Bloobel Stamps
           
Printed onto Crafter's Companion Neenah Cardstock
         
Coloured with Spectrum Noir Markers
                   
White Gesso
         
Red Acrylic Paint
             
- - - - - - - - - - - - - - -
   
Sam Lewis shows how to frame those special colouring projects. Featuring Bloobel Stamps and Spectrum Noir Markers.
              
SPECTRUM NOIR - COLOUR LIST:
                 
RED
DR7, DR6,DR5, DR4, CR9

BLACK
True Black, IG10, IG9, IG7, IG5, IG3

BEARD
IG4,  IG2, IG1, Blender

CUFFS
BGR3, BGR2, Blender
         
BUCKLE
GB9, GB7, GB3

IN MOUTH
IG4, CR5

TONGUE
DR7, DR6, CR7

SKY
IB1, BT4, IB2, BT5, BT9, TB9

SNOW
IG2, IG1, Blender
                 
Links you need to know 
- - - - - - - - - - - - - - -
  
Thank you as always for popping by

xxSAMxx